1.Cutting Conveyor Belts the Right Way from the Start
Learning how to cut conveyor belt straight and safely is the first step in installing and repairing conveyor belts. If the cut is not neat, it will not only affect the installation effect, but also directly lead to a loose joint and shortened conveyor belt life. For readers who are new to conveyor belt maintenance, it is important to understand the logic of this point. Below, we explain the importance of precise cutting, the difficulty of cutting, the goals of this guide, and the long-term value step by step.
1.1 Why precise cutting improves durability
When you cut a conveyor belt, if the cut is not flat, you will have jagged edges. When splicing or using hot vulcanization, the edges will not fit tightly and the joint strength will be greatly reduced. Imagine splicing two wooden boards. If the cut surface is not flat, no matter how many nails are used, it will not be a secure connection; the same is true for conveyor belts.
A neat cut allows the two ends of the belt to fit perfectly, and the joint is more evenly stressed, without single-point stretching or premature tearing. This uniform force allows the joint to withstand higher tension and load, thereby improving the overall durability of the conveyor belt. Straight cuts can also reduce edge wear, prevent belt deviation or edge gnawing, and further extend service life.

1.2 Common problems in the cutting process
Although the principle sounds simple, it is not easy in practice. Ordinary rubber conveyor belts are thicker and it is difficult to keep them straight when cutting with a manual knife alone, and the cuts are often bent or burred. If you are facing a steel reinforced conveyor belt, the internal steel wire will hinder the blade cutting, and it is necessary to use a special conveyor belt cutting tool or use an angle grinder to complete it.
In addition, many cutting operations are completed on site. Small space, uneven ground and inconvenient operating postures will affect the accuracy of cutting. Under these conditions, the cuts are prone to skew, resulting in the inability of subsequent joints to fit tightly, and conveyor belt repair problems frequently occur.
1.3 What this guide can help you solve
In response to these problems, this guide will detail how to cut conveyor belts safely and accurately in different scenarios. We will explain how to cut conveyor belt by hand, including how to measure and how to cut in sections to keep it straight. We will also explain the techniques of using power tools, such as cutting conveyor belt with circular saw for thick belts.
More importantly, we will teach you how to choose the right conveyor belt cutting tool so that you don’t waste time and effort because of the wrong tool. Through step-by-step steps, you can complete professional-level cutting in new installations or emergency repairs on site.
1.4 Long-term benefits: Why it is worth investing time to learn
Some people may think that a slightly crooked cut is not a big problem, but in the long run, this will cause repeated cracking of the joint and increasing maintenance costs. When you master the precise cutting skills, the joint strength is improved and the service life is significantly extended. For example, a conveyor belt with a bad joint may need to be replaced in a few months, while a belt with a correct cut and a firm joint can be used stably for several years.
Professional cutting not only reduces the frequency of conveyor belt maintenance, but also reduces the safety risks caused by belt deviation and breakage. For companies, this means less downtime of production lines, lower maintenance budgets, and improved overall efficiency.
Therefore, learning how to cut conveyor belt straight and safely is not just about making the cut look good, but is directly related to the stability and safety of the conveying system. Through this guide, you will understand the logic behind each step, master practical cutting methods, and make your conveyor belt run more reliably and longer.

2.Before Cutting: A Comprehensive Preparation Guide
Before you truly understand how to cut conveyor belt straight and safely, preparation is the foundation for determining whether the final cut is accurate and safe. Many cases of failed conveyor belt cutting are not due to operational errors during the cutting process, but due to insufficient preparation in the early stages. For users who want to reduce the frequency of subsequent conveyor belt repairs and reduce conveyor belt maintenance costs, a complete preparation process is essential.
2.1 Accurate Measurement and Marking: The First Step to Straight Cutting
To achieve a straight cut, you must first ensure that the dimensions are measured accurately. If errors occur during measurement and marking, even with the best conveyor belt cutting tool, you will not get the desired results.
Common measuring tools:
- Tape measure

- Ruler

- Long level

- Laser distance meter

Common marking tools:
- Chalk line

- Permanent marker

Measuring and marking tips:
- Measure at multiple points along the belt width to ensure consistent data
- Use a long guide rail or ruler to connect each marking point to form an accurate cutting reference line
- It is recommended to draw the center line first, and then mark the cutting edge at equal distances on both sides to ensure symmetry
Accurate measurement and marking allow subsequent cutting tools to operate along the established route, reducing deviations, thereby ensuring that the joint can fit completely, laying the foundation for subsequent belt splicing (mechanical buckle or hot vulcanization hot vulcanization joint).
2.2 Tool selection: Choose the right tool according to the material and thickness
One of the main reasons for non-straight cutting is using the wrong tool. Conveyor belts of different materials and thicknesses require different tools.
Commonly used cutting tools:
- Utility Knife: Suitable for thin PVC or light rubber belts
- Heavy-duty Scissors / Shears:For thin belt cutting or local trimming
- Circular Saw:Suitable for thicker rubber conveyor belts, which can ensure the straightness of the cutting
- Angle Grinder:Suitable for how to cut conveyor belt with angle grinder scenarios, especially steel reinforced conveyor belts
- Oscillating Tool:Suitable for fine cutting in a small space
- Industrial Belt Cutter:Suitable for batch cutting of conveyor belts with larger widths in factories

Selection principles:
- Select corresponding tools according to the material of the conveyor belt (rubber, PVC, steel wire rope core)
- Decide whether it is a manual tool or an electric tool according to the thickness
- Industrial cutting machines are recommended for factory environments, and lightweight portable tools should be selected on site
The right tool can not only improve cutting accuracy, but also avoid problems such as blade jamming and rough cuts, so that the conveyor belt can obtain stronger load-bearing capacity and longer life when it is connected.

2.3 Work environment preparation: Stable environment is the guarantee of precise cutting
Cutting a conveyor belt in an unstable operating environment is like drawing a straight line on a shaking table. The result is predictable.
Key points for work environment preparation:
- Use a flat, non-slip workbench or platform to ensure that the conveyor belt does not move during cutting
- Provide sufficient working space to avoid interference from surrounding equipment or personnel
- Thoroughly clean the surface of the conveyor belt to remove dust, oil and debris to prevent the blade from slipping during cutting
- Check aging and damaged areas to avoid direct cutting in these areas to cause breakage
Good environmental preparation not only improves cutting accuracy, but also significantly reduces the incidence of safety accidents and reduces subsequent conveyor belt maintenance and rework.
2.4 Safety protection equipment: prevent operational risks
Cutting conveyor belts involves sharp knives and high-speed electric equipment, and there are many risks such as cuts, sparks, and dust. Even experienced workers must wear protective equipment.
Essential safety equipment:
- Anti-cutting gloves

- Goggles or safety glasses

- Anti-noise earmuffs

- Dust masks

- Anti-slip safety shoes

- First aid kit (for emergencies)

These equipment can effectively prevent hand injuries caused by tool slippage, eye damage caused by flying debris during cutting, and hearing damage caused by long-term operation of power tools.
2.5 Lockout and tag-out (LOTO): Ensure the absolute safety of the cutting process
In a factory environment, conveyor belts are usually connected to motors or hydraulic systems. If the power is not completely cut off, the consequences will be very serious if the equipment is accidentally started during the cutting process.
LOTO operation steps:
- Turn off the conveyor belt drive power
- Lock the power switch with a safety lock
- Hang a safety warning label “Maintenance in progress, do not operate” in a conspicuous place
- Confirm that the conveyor belt cannot be started before cutting
Standardized LOTO operation is the safety bottom line to ensure how to cut conveyor belt straight and safely, and any cutting work must be strictly implemented.

2.6 Summary of the importance of preparation work
From measurement to tool selection, from environmental preparation to safety protection, each step directly affects the straightness of the cutting and the strength of the joint. If the preparation is not sufficient, it may lead to:
- The joint cannot be aligned, resulting in insufficient belt splicing strength
- The conveyor belt deviates and wears more, requiring frequent conveyor belt repair
- Increased production line downtime and higher maintenance costs
Only after completing all the above preparations can the subsequent manual or electric cutting be truly accurate and safe, and the overall service life of the conveyor belt can be greatly improved.
3. Manual cutting method
After mastering the preparation before cutting, we enter the specific steps of how to cut conveyor belt by hand. Although modern industrial sites prefer to use power tools, manual cutting is still an indispensable skill in many on-site emergency repairs or limited space. Mastering the correct manual cutting method can not only save time, but also efficiently complete the conveyor belt repair in an environment without power tools.
3.1 Commonly used hand tools
If you want to cut accurately by hand, you need to prepare the appropriate basic tools.
Recommended hand tools:
- Utility Knife: The most commonly used hand cutting tool, suitable for PVC and thin rubber belts (recommended within 5 mm, one layer of rubber conveyor belt)
- Heavy-duty Scissors / Shears: For medium thickness belts, 2-3 layers or trimming rough edges
- Cutting Guide Rail: Helps keep the cutting straight
- Cutting Mat: Protects the operating table and prevents the knife from slipping
These tools are basic configurations that can help you complete belt cutting and maintain a certain degree of accuracy without electric equipment.

3.2 Manual cutting skills
Tools alone are not enough, correct operating skills are the core of determining the quality of the cut.
Measuring and aligning:
- Confirm the measuring line again before cutting, and use the guide rail to fix the reference
- Keep the tool perpendicular to the conveyor belt to avoid tilting the cut
Step-by-step cutting:
- For thick rubber belts, use multiple shallow cuts, and the depth of each cut should not exceed 1/3 of the total thickness
- Repeat cutting along the reference line and gradually go deeper until it is completely cut
- Since the density of rubber material is very high, the deeper the blade is inserted, the greater the friction on both sides of the blade. This method can reduce the risk of blade jamming and make the cut neater
Trimming and finishing:
- After completing the conveyor belt cutting according to the above steps, use scissors to trim the rough edges of the conveyor belt
- Gently polish the edges with sandpaper or abrasives to reduce burrs and avoid wear during the operation of the conveyor belt
With these techniques, even if it is done manually, how to cut conveyor belt straight can be achieved, providing an ideal joint surface for subsequent belt splicing.
3.3 Advantages and disadvantages of manual cutting
Although manual cutting is not as efficient as power tools, it has unique advantages.
Advantages:
- Simple equipment, suitable for outdoor or non-electric environment
- Low cost, no need for expensive electric equipment
- Flexible operation, suitable for local repair and small-scale conveyor belt repair
Disadvantages:
- Slow cutting speed, not suitable for large quantities or thick conveyor belts
- High operator experience requirements, novices are prone to uneven cuts
- Long-term use can easily cause hand fatigue and increase safety risks
In the case of thick belts or steel reinforced conveyor belts, manual cutting efficiency and accuracy are low, or even impossible to complete. At this time, it is recommended to combine power tools or industrial cutting machines to complete the operation.

3.4 Measures to improve the safety of manual cutting
Manual cutting seems simple, but safety hazards cannot be ignored.
Safety advice:
- Must wear anti-cutting gloves and goggles to prevent the blade from slipping and causing cuts
- Choose a non-slip cutting mat to avoid an unstable operating surface
- Keep the blade sharp. A blunt blade requires more force. Excessive force on a thin blade can easily bend out of control, resulting in an incorrect cutting angle
- Do not cut with one hand during operation. Keep both hands stable to control the force
These measures can effectively reduce accidental cuts, while helping you stabilize the operation and improve the cutting quality.
3.5 Summary of applicable scenarios
Manual cutting is most suitable for the following situations:
- Quick on-site cutting of light conveyor belts or PVC belts
- Large equipment cannot be used in narrow spaces
- Temporary maintenance, conveyor belt repair without replacing the entire belt
When conditions permit, it is recommended to combine the electric cutting method in the subsequent chapters to improve efficiency and straightness. But even so, mastering how to cut conveyor belt by hand is always a skill that maintenance personnel must have, especially in emergency scenarios.

Through the above steps, you can complete relatively accurate cutting under manual conditions and ensure that the joints are firm and stable. The next section covers cutting with power tools, including specific tips on cut conveyor belt with circular saw and how to cut conveyor belt with angle grinder, to help with your thicker, stronger belting needs.
4. Power tool cutting method
When the conveyor belt material is thick or contains steel wire core, manual cutting will be very laborious and difficult to keep straight. At this time, choosing the right power tool can significantly improve cutting efficiency and accuracy. This chapter will introduce the commonly used power tools, their respective characteristics, cutting steps and safety rules in detail to help you master how to cut conveyor belt using power equipment.
4.1 Angle Grinder Cutting
Angle grinder is a commonly used conveyor belt cutting tool in industrial sites, especially for how to cut conveyor belt with angle grinder scenes. For steel wire core or thick rubber conveyor belt, angle grinder can quickly cut the steel wire and rubber layer.
Tool Selection:
- Diamond Cutting Blade:Suitable for thick rubber and steel cord
- Metal Cutting Blade:Primarily for the inner steel wire layer
Cutting Procedure:
1.Secure the conveyor belt on a stable platform.
2.Use a chalk line to mark the cutting baseline.
3.Start with a shallow cut to guide the cut direction.
4.Gradually increase the cutting depth to avoid kickback caused by cutting through all at once.
5.For the steel wire layer, switch to a metal cutting blade to complete the cut.
Safety Measures:
- Use a spark guard to prevent sparks.
- Intermittent cutting to avoid overheating and extend the life of the cutting blade.
- Wear cut-resistant gloves, goggles, and a dust mask at all times.

4.2 Circular Saw Cutting
A circular saw is another efficient conveyor belt cutting tool, ideal for cutting large areas of thick rubber belt. Compared to an angle grinder, a circular saw maintains a longer, straighter cutting path.
Saw blade selection:
- Carbide-tipped saw blade: suitable for thick rubber or composite materials
- Special blades for rubber and metal: can cut both the rubber surface and part of the wire layer
Cutting method:
1.Adjust the depth of the saw blade to make it slightly larger than the thickness of the conveyor belt
2.Place guide rails at both ends of the reference line to ensure straight cutting
3.Advance the saw blade evenly and maintain a steady speed.
4.For steel core belts, you can first use an angle grinder to make shallow cuts, and then use a circular saw to cut through
Using a circular saw can help you achieve precise cuts on conveyor belts with circular saws, especially in factories or spacious environments.

4.3 Oscillating Tool
Oscillating cutters are ideal for situations where space is limited or fine cutting is required. Its blades achieve cutting through high-frequency vibrations, which is suitable for small-scale trimming or cutting tasks in tight corners.
Applicable Applications:
- Mines and pipeline interiors where large equipment is unavailable
- Trimming conveyor belt edges or damaged areas
Technical Tips:
- Select a specialized rubber cutting blade.
- Use a ruler to guide the cut and avoid bending the cut section.
- Apply even pressure and advance slowly.
Although not as fast as a circular saw, the oscillating saw’s flexibility and controllability make it very popular for fine belt cutting.

4.4 Jigsaws and Reciprocating Saws
Jigsaws and reciprocating saws are very useful when non-straight cuts or unusual shapes are required.
Features:
- A variety of interchangeable blades accommodate different thicknesses and materials.
- Capable of cutting curved or circular openings, suitable for equipment modifications or special installation requirements.
Operational Tips:
- Select a specialized rubber or metal saw blade.
- Mark the cut outline with a hand tool first.
- Cut slowly along the marked line to avoid blade deflection.
Although these tools are not as effective as circular saws and angle grinders for straight cuts, they are indispensable for complex belt cutting projects.

4.5 General safety rules for power tools
No matter which power tool is used, safety always comes first. Incorrect operation not only affects cutting accuracy, but may also cause serious injuries.
General safety rules:
- Always hold the tool with both hands to keep it stable
- Avoid blade jamming or rebound, and keep the tool stable when cutting
- Check the cable position to prevent it from being cut or entangled
- Clean up the residue in time after cutting to prevent slipping or secondary injuries
- Regularly check the blade and motor status of the power tool to avoid malfunctions
Following these safety rules can ensure that how to cut conveyor belt is both efficient and safe when using power tools.
4.6 Applicable Scenarios and Tool Selection Recommendations
- Thick rubber belts: Circular saws or industrial cutters are preferred.
- Steel cord conveyor belts:An angle grinder with a metal cutting disc is recommended.(water jet is best and safest)
- For confined spaces or fine finishing:Opt for a vibrating cutter.
- For cutting special shapes: Use a jigsaw or reciprocating saw.
Choosing the right tool for each application can significantly improve cut quality, provide optimal splicing conditions for subsequent belt splicing or hot vulcanization, and reduce long-term conveyor belt maintenance and repair costs.
Mastering the use of the power tools listed above will enable you to efficiently cut thick or steel cord conveyor belts, truly achieving the ultimate goal of cutting conveyor belts straight and safely. The next section will introduce industrial-grade cutting tools, providing more professional solutions for large-scale factory production and high-precision cutting.
5. Industrial-Grade Cutting Tools
When conveyor belts are wide or thick, or when continuous batch cutting is required, manual and standard power tools cannot meet the required efficiency and precision. Professional industrial-grade tools are the best choice. This section introduces common industrial cutting equipment, their characteristics, usage procedures, and how to select the appropriate tool based on your needs, enabling efficient and safe conveyor belt cutting in a factory environment.
5.1 Flexco Belt Cutter
The Flexco Belt Cutter is a commonly used professional conveyor belt cutting tool internationally, designed for fast and straight cutting of medium-thick conveyor belts.
Tool Features:
- Sturdy construction ensures straight cuts on wide conveyor belts.
- Adjustable blade accommodates belts of varying widths.
- Safety design minimizes blade exposure during cutting, reducing the risk of injury.
Using Steps:
- Place the conveyor belt flat on the cutting platform.
- Adjust the blade width, ensuring both clamps are locked symmetrically.
- Align the tool along the marked line.
- Slide the cutting mechanism for smooth cuts.
The benefit of using the Flexco Belt Cutter is that it significantly reduces the risk of warping and burrs that can occur with manual cutting, providing an ideal cut for subsequent belt splicing and hot vulcanization.

5.2 Electric Belt Cutter
When working with thick or multi-layered conveyor belts, electric belt cutters can complete large cuts in a short time.
Features:
- High-frequency cutting efficiency, suitable for industrial assembly line environments
- Interchangeable blades can accommodate conveyor belts of different materials
- Automated feed system ensures smooth cuts
Usage Recommendations:
- Regularly check blade sharpness. A dull blade will result in a rough cut. Before cutting, inspect the cut surface for any curling, nicks, or other defects to prevent them beforehand.
- Prevent overheating or melting of the conveyor belt by adjusting the cutting speed. Alternatively, spray water on the blade surface and the conveyor belt cut to reduce the temperature while cutting.
- Combined with a laser alignment system, precise cutting is achieved.
This equipment is particularly suitable for factories with large-scale production and continuous cutting requirements, reducing manual labor, improving production efficiency, and reducing the frequency of conveyor belt maintenance.
5.3 Slitting Machine
Slitting machines are industrial equipment designed for large-scale factory processing. They can simultaneously make multiple straight cuts on conveyor belts and are suitable for mass customization of large-sized belts.
Application Features:
- Completes multiple straight-line cuts simultaneously with exceptional efficiency.
- High-precision cutting tools ensure smooth cuts, eliminating the need for secondary trimming.
- Can be configured with an automated conveyor system for full process automation.
Usage Recommendations:
- Large steel mills, ports, mines, and other applications with high conveyor belt demand.
- Requires the ability to split wide conveyor belts into multiple strips of varying widths.
For companies pursuing large-scale production, using a slitting machine can significantly reduce cutting costs while maintaining accuracy, providing high-quality base material for subsequent conveyor belt repair and splicing.

5.4 Tool Selection Guide
With a wide variety of industrial cutting tools available, selecting the right equipment is key to ensuring efficiency and precision.
Selection Factors:
Belt Material:
- Ordinary rubber belts can be cut with a Flexco Belt Cutter or an electric cutter.
- Steel reinforced conveyor belts require a high-powered electric cutter or slitter.
Belt Thickness:
- Medium-thick belts can be cut with a manual or small electric tool.
- Extra-thick belts should be cut with an industrial cutter or high-frequency equipment.
Production Scale:
- Small-batch cutting can be done with a Flexco or portable electric cutter.
- For large-scale production, a slitter is recommended for continuous and rapid cutting.
Comparing the efficiency and maintenance costs of different industrial cutting tools can help companies make informed decisions about the appropriate conveyor belt cutting tool.
- Flexco Belt Cutter: Manually operated belts can cut an average of 8–12 belts of medium-thickness per hour, at a cost of approximately $5–$8 per belt. The Flexco Belt Cutter offers a 95% joint alignment rate and requires minimal ongoing conveyor belt maintenance.
- High-frequency electric cutting machines: They can cut 20–30 strips of rubber belting thicker than 20mm per hour, with a blade lifespan of approximately 100–120 strips at a cost of approximately $3–$5 per strip cut. They also improve joint strength by 20–30%, extending service life by 12–18 months.
- Slitting machines: In industrial production lines, they can cut 50–80 strips of wide conveyor belt per hour with an accuracy of less than ± The cost per strip cut can be reduced to $1–$2, significantly reducing manual labor and subsequent joint rework.
According to statistics from multiple mines and steel mills, selecting the right industrial-grade cutting tools:
- Conveyor belt alignment is improved by approximately 30%
- Emergency downtime due to cracked or misaligned joints is reduced by 40–50%
- Overall maintenance costs are reduced by an average of 25–35%
This shows that tool selection not only affects cutting speed but also directly determines the precision and durability of conveyor belt joints. For conveyor belt projects involving thicker belts, complex materials, or batch cutting, industrial-grade tools ensure the robustness of belt splicing and hot vulcanization through high-precision cutting, helping companies truly achieve how to cut conveyor belts straight and safely, and maintain long-term stable operation.
6.Cutting Solutions for Different Types of Rubber Conveyor Belts
Cutting solutions for different types and structures of rubber conveyor belts vary significantly. Using a single tool is faster and eliminates the hassle of tool changes, but it can easily damage the belt structure and compromise joint quality. To cut conveyor belts straight and safely, we need to select the appropriate conveyor belt cutting tool for each belt type and thickness.
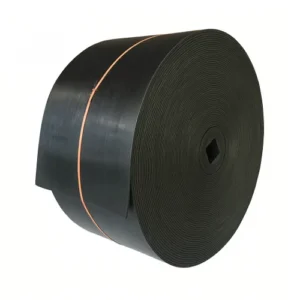
6.1 Steel-Reinforced Rubber Conveyor Belts
Steel-reinforced rubber conveyor belts are widely used in heavy-load environments such as mines, steel mills, and ports. To prevent large ore from damaging the belt surface, the belts require not only high tensile strength from the multiple steel strands within the belt but also a highly wear-resistant rubber covering, making cutting extremely challenging. The inherent metallic nature of the steel cord also prevents a utility knife or ordinary hand tools from cutting through the steel strands.
Cutting Solution for Medium-Thin Belts (Thickness ≤ 20mm)
Tool Selection:
- Electric Belt Cutter
- Angle Grinder + Metal Cutting Disc
- Hydraulic Shears for Wire Processing
Steps:
- Use an electric shear to shallowly cut the rubber layer to avoid misalignment caused by the cutter cutting through all at once.
- After exposing the wire rope, use hydraulic shears or an angle grinder to cut the wire ropes sequentially.
- Use a grinding wheel or other tool to smooth the cut and remove burrs from the wire.
Joint Preparation: Immediately perform belt splicing or hot vulcanization after cutting to ensure a secure joint.
Thick (> 20mm) Cutting Solution
Tool Options: High-Frequency Industrial Cutting Machine, Slitting Machine, or Water Jet Cutting
Advantages:
- Water jet cutting avoids burning the rubber caused by thermal cutting.
- Slitting machines are suitable for batch cutting, ensuring consistent dimensions.
Recommendations: For large-scale cutting needs, a slitting machine can be used in the factory to cut multiple conveyor belts at once, improving efficiency.

6.2 Fabric Conveyor Belts
Fabric conveyor belts are constructed from layers of fabrics such as canvas, nylon, or polyester. Cutting tools and methods vary significantly depending on the thickness and number of layers. Many users cut conveyor belts for vulcanization and pyrolysis. Overly aggressive cutting tools can damage the fabric layers, while insufficiently powerful tools may not achieve the desired results.
Thin (Thickness ≤ 5mm)
Tool Selection: Manual Utility Knife
Operation Tips:
- Make multiple shallow cuts to prevent tool jamming.
- Use a cutting guide to maintain straight lines.
- Sand the edges after cutting to reduce burrs.
Suitable for: Minor repairs or quick cutting of light-load conveyor belts.
Medium Thickness (5mm – 12mm)
Tool Selection: Portable Electric Cutting Machine
Operation Tips:
- Advanced along the reference line to prevent blade overheating.
- Intermittent cutting, optionally with water spray for cooling.
Advantages: More efficient than manual cutting, maintains a smooth cut, and reduces subsequent conveyor belt repairs.
Thick (Thickness > 12mm)
Tool Selection:
- Circular Saw
- Industrial Belt Cutter
Operation Tips:
- Cut at a low speed, completing the cut in sections if necessary.
- Sand the edges after cutting to ensure a snug fit.
Suitable for: Replacement of medium- to heavy-load industrial belts or large-scale cutting tasks.

6.3 PVC Conveyor Belt
PVC conveyor belts are lightweight and commonly used in light-load environments such as food processing and logistics warehousing. While highly flexible, they are prone to fraying and delamination after cutting, requiring specialized edge sealing.
Thin (Thickness ≤ 8mm)
Tool of Choice: Hot Knife or Utility Knife
Operation Tips:
- Use hot knife to simultaneously seal edges to prevent frayed edges.
- Use anti-fragmentation agent to protect the cut after manual cutting.
Joint Treatment: Cold bonding is best to prevent high temperatures from damaging the PVC material.
Thick (Thickness > 8mm)
Tool of Choice: Small electric cutter or industrial cutter
Operation Tips:
- Cut in sections to prevent blade jamming.
- Use hot knife to perform secondary edge sealing after cutting to maintain a smooth edge.
Joint Treatment: Use cold bonding or specialized heat sealing methods to enhance joint strength.

6.4 The Significance of a Classified Cutting Plan
Blindly cutting without distinguishing between conveyor belt types and thicknesses often results in:
- Exposed and rusted steel wire layers, resulting in insufficient joint strength
- Misaligned fabric layers, leading to tearing during operation
- Loose threads along the edges of PVC conveyor belts, impacting food safety and conveying accuracy
- Frequent conveyor belt maintenance increases operating costs
By carefully selecting conveyor belt cutting tools and implementing targeted solutions, you can effectively improve cutting accuracy, reduce ongoing maintenance requirements, and ensure joint quality for subsequent belt splicing or hot vulcanization, truly achieving the goal of cutting conveyor belts straight and safely.
7. Techniques for Ensuring Straight Cuts
Whether cutting manually or using a powered or industrial-grade cutting tool, maintaining a straight cut is always crucial. A curved cut not only affects aesthetics but can also lead to problems such as misaligned joints, uneven tension, and belt deviation. Mastering the following techniques can significantly improve cutting accuracy, ensuring a truly straight and safe conveyor belt cut.
7.1 Using Guides and Clamps
Any movement or jitter in the conveyor belt during cutting can cause a curved cut.
- A long straightedge or metal guide:Place it parallel to the cut line on the conveyor belt surface to serve as a guide for the cutting tool.
- A clamp or fixture:Secure the conveyor belt securely to the workbench or floor to prevent movement during cutting.
- An industrial belt cutter:Features a built-in clamping device to ensure a straight cut and is suitable for wide belts.
This method is particularly suitable for fabric or steel cord conveyor belts thicker than 12mm and can significantly reduce rework required during conveyor belt repair due to uneven cuts.

7.2 Marking Multiple Points and Aligning with the Center-line
Single-point marking can easily lead to deviation. It is recommended to use multiple marking points and align with the center-line:
- Mark the cutting positions at both ends and in the middle of the conveyor belt.
- Use a chalk line or laser marking tool to connect the marking points to form a continuous cutting reference line.
- For wider belts, first find the center-line, then make evenly spaced markings on both sides of the center-line to ensure symmetrical cuts.
This multi-point alignment method reduces visual error and allows even manual utility knife cuts to achieve high straightness.
7.3 Uniform Cutting in Sections
Cutting through the belt in one go can easily lead to deviation, especially with thick rubber or steel cord conveyor belts.
- Use segmented cutting: Start with a shallow cut of 1/3 the thickness, then repeat the cut until the entire belt is completely cut through.
- For steel cord conveyor belts, use an electric cutter to first shallowly cut the rubber layer, then cut the steel layer in segments.
- For PVC conveyor belts or thin fabric belts, using multiple shallow cuts can prevent frayed edges.
Evenly cutting in segments not only improves accuracy but also protects blade life and reduces overheating and burrs.
7.4 Continuously Correct Direction During Cutting
Even with guides and reference lines, slight deviation may occur during cutting.
- Stop and check the distance from the reference line every 20–30 cm.
- If deviation is detected, adjust the angle immediately rather than reworking after the cut is complete.
- For power tools such as circular saws and angle grinders, use handle pressure to correct direction.
This real-time correction method ensures that the cutting path is aligned with the reference line as closely as possible, ensuring a straight cut.
7.5 Post-cut Inspection and Trimming
After completing the cut, inspection and necessary edge trimming are essential:
- Use a long straightedge or laser line to check that the cut is straight.
- If the cut has significant bevels, these can be corrected with a secondary trimming cut.
- After trimming, recheck the width consistency to ensure that the joint is not misaligned.
Through post-finishing, even if there are minor errors in the initial cut, the cut can be adjusted to the required accuracy for the joint.
7.6 The Impact of Tool Maintenance on Straightness
Dull or worn power saw blades make it difficult to maintain a straight cut.
- Regularly inspect the conveyor belt cutting tool blade for edge curl and nicks.
- The guide rails and pulley systems of power tools should be lubricated to reduce vibration.
- The automatic feed mechanism of industrial cutting machines requires regular calibration to ensure accurate feed direction.
Maintaining your tools can significantly improve cutting stability and accuracy, reducing conveyor belt maintenance rework due to equipment problems.
By combining guide rail fixation, multi-point marking, segmented cutting, real-time calibration, and post-cut trimming, combined with proper tool maintenance, you can achieve high-precision cutting in a variety of scenarios, ensuring accurate and stable splicing. Mastering these techniques is crucial to understanding how to cut a conveyor belt straight and safely.
8.Safety Risks and Protective Measures
Cutting conveyor belts might look straightforward, but it’s one of the most dangerous maintenance tasks you’ll face. These belts are built tough – thick rubber, steel reinforcement, and abrasive surfaces that can turn a simple cut into a trip to the emergency room.
I’ve seen too many mechanics come back from belt repairs with bandaged hands or worse. The reality is that whether you’re using a basic utility knife or firing up an angle grinder, you’re dealing with serious hazards that demand respect.
8.1 Manual Cutting Risks
Hand tools seem safe enough, but they’re responsible for most cutting injuries:
- Blade slips happen fast.Conveyor belts are slippery – rubber surfaces, dust, and oil create the perfect conditions for a knife to slide right into your hand. Once that blade starts moving, there’s no stopping it.
- Your arms get tired.Try cutting through 20mm of reinforced rubber by hand. After ten minutes, your grip weakens and your control goes out the window. That’s when accidents happen.
- Crooked cuts mean more work.When you can’t cut straight, you end up going over the same area multiple times. More cutting equals more chances to get hurt.
Industry data shows that about one in three belt repair injuries comes from manual cutting. Most of these could have been prevented with better gloves and sharper blades.

8.2 Power Tool Dangers
Electric tools cut faster but bring bigger risks:
- Sparks fly everywhere.Cut into a steel-reinforced belt with a grinder and you’re creating a fireworks show. Those sparks can ignite anything flammable nearby – cardboard, oil spills, even your clothes.
- Tools kick back hard.Hit a steel cable wrong and that grinder will try to rip itself out of your hands. I’ve seen 200-pound guys get thrown off balance by kickback.
- Heat builds up quick.High-speed cutting melts rubber and creates toxic smoke. The belt gets so hot it can burn you through gloves.
- Electrical problems are real.Frayed cords, wet conditions, and metal dust create perfect conditions for shocks.
Mining and steel plants report that 4 out of 10 cutting accidents involve power tools. Usually because someone removed a safety guard or rushed the job.

8.3 Small Knife Problems
Even basic knives cause serious injuries:
- Puncture wounds go deep.Push too hard on a Stanley knife and it punches right through the belt – and into whatever’s behind it, including you.
- Your wrists take a beating.Hours of cutting leaves you with sore joints and strained tendons.
- Cheap blades break.When a blade snaps, the pieces go flying. Usually right at your face.

8.4 Real Accidents That Happen
Here’s what actually goes wrong on job sites:
- Deep cuts to hands and arms – blade slips are the #1 cause, happening in 1 out of 4 accidents
- Flying metal fragments – broken cutting discs or steel wire pieces cause 15% of injuries
- Shattered blades hitting faces – happens in 1 out of 10 power tool accidents
- Fires from sparks – not common, but when it happens, it’s bad
These aren’t made-up scenarios. They’re pulled from actual safety reports.
8.5 How to Stay Safe
8.5.1 Use Mechanical or Electric Tools Wisely
- Avoid fully manual cutting for belts thicker than 12mm.
- Prefer specialized conveyor belt cutting toolswith built-in guides and guards.
- Industrial cutters significantly reduce blade slips compared to handheld knives.
8.5.2 Wear Complete Personal Protective Equipment (PPE)
- Cut-resistant gloves:Reduce cut injury risk by up to 70%.
- Safety goggles:Protect eyes from sparks and flying debris.
- Hearing protection:Essential when using loud power tools like grinders or saws.
- Respiratory masks:Prevent inhalation of rubber dust and smoke.
- Non-slip safety shoes:Provide stable footing to avoid falls.
8.5.3 Maintain Cutting Tools
- Replace dull blades promptly—worn edges require more force and slip easily.
- Change cutting discs when wear exceeds 20%.
- Regularly inspect guards, switches, and electrical insulation.
8.5.4 Training and Skills Development
- Train all workers in proper cutting techniques and emergency stop procedures.
- Include modules on how to cut conveyor belt safely using manual and electric tools.
- Conduct safety drills annually to reinforce risk awareness and first-aid skills.

8.6 Following the Rules
Safety standards exist for good reasons:
- ISO 5285 covers conveyor belt safety
- DIN 22102 addresses fire-resistant belts
- OSHA sets workplace safety requirements
Following these standards keeps you legal and your workers safe. Ignore them and face fines, lawsuits, and worse – injured employees.
8.7 Making Safety Work
Safety isn’t about slowing down your work – it’s about doing the job right the first time. When your crew uses proper equipment and follows procedures, they cut straighter and faster. Fewer accidents means less downtime and lower insurance costs.
The reality is simple: respect the tools and they’ll serve you well. Get careless and you’ll pay for it. A healthy dose of caution keeps everyone working and going home in one piece.
The next section covers the complete cutting process – from measuring to finishing – combining these safety principles with practical techniques for straight, clean cuts ready for splicing
9.How to Cut Conveyor Belt: A Field Technician’s Complete Guide
After fifteen years maintaining conveyor systems across mining and manufacturing facilities, I’ve learned that how to cut conveyor belt correctly separates experienced technicians from rookies. Too many good belts get ruined by rushed cuts or wrong tool choices. Here’s the process I use—tested on everything from lightweight PVC to heavy-duty steel reinforced conveyor belts.
9.1 Why Most Belt Cuts Go Wrong
I’ve seen it countless times: operators skip measurement steps, use dull blades, or try forcing cuts through thick material. These mistakes create wavy edges that make belt splicing nearly impossible. The belt either fails at the joint or requires expensive rework. Following a systematic approach prevents these headaches.
Step 1: Get Your Measurements Right
Start with a quality steel tape measure—those flimsy cloth ones give inconsistent readings. Mark your cut line at multiple points across the belt width, especially on anything over 24 inches wide. I use a chalk line to connect the marks, creating a perfectly straight guide.
Here’s a trick I learned the hard way: measure twice at each end. If there’s more than 1/16 inch difference, remeasure everything. An angled cut will haunt you during splicing, causing premature belt failure.
Step 2: Lock It Down Properly
Never skip lockout/tagout—I’ve witnessed too many close calls from live conveyors. Once the system’s isolated, position your belt on the flattest surface available. A proper cutting table works best, but clean concrete will do.
Clamp every 18-24 inches along your cut line. Belt movement during cutting creates those jagged edges that require extensive cleanup. Trust me, extra clamps now save hours of grinding later.
Step 3: Match Your Tool to the Job
Wrong tool selection kills more projects than anything else. Here’s what actually works:
- Thin belts (under 5mm): Sharp utility knife with replaceable blades
- Medium thickness (5-12mm): Portable electric cutter—invest in a quality unit
- Heavy belts (12mm+): Industrial circular saw with fine-tooth blade
- Steel reinforced: Angle grinder for steel cords, standard blade for rubber
Don’t let anyone convince you that one conveyor belt cutting tool handles everything. I’ve tried—it doesn’t work.
Step 4: Score Before You Cut Deep
This technique took me years to perfect. Start with shallow passes to establish your cutting path. Trying to cut full depth immediately causes blade wandering and uneven cuts.
For steel reinforced conveyor belts, cut the rubber first, then switch to metal-cutting discs for the steel cords. Mixing these materials on one blade ruins both the cut and the disc.
Step 5: Control Your Speed
Rookies always cut too fast. Heat buildup from excessive speed scorches the belt material and dulls blades quickly. I maintain steady, moderate pressure—let the tool do the work.
On thick sections, pause every few feet to let things cool down. A spray bottle with water helps, but don’t soak the belt. Just light misting to control temperature.
Step 6: Finish Like a Pro
Once the cut’s complete, check it with a straightedge. Remove any rough spots with a sharp knife or fine grinder wheel. The goal is smooth edges ready for hot vulcanization or mechanical fasteners.
I always test-fit my cuts before final installation. Finding problems on the workbench beats discovering them during a production shutdown.

9.2 Field-Tested Efficiency Tips
Work in pairs on wide belts—one person guides while the other cuts. Use cutting rails for long straight runs. Keep spare blades handy because dull tools cause more problems than any other factor.
Most importantly, don’t rush. A precise belt cutting job prevents future conveyor belt maintenance headaches and keeps production running smoothly.
This approach for how to cut conveyor belt straight and safely has served me well across hundreds of installations. Master these fundamentals, and you’ll handle any belt cutting challenge confidently.
10.Post-Cutting Treatment and Protection
Look, cutting the belt is just the beginning. I’ve seen too many maintenance crews celebrate after making a clean cut, only to watch their work fall apart weeks later because they skipped the follow-up steps. The truth is, a freshly cut conveyor belt is like an open wound – it needs proper care to heal right.
10.1 Taking Care of Those Raw Edges
When you slice through a conveyor belt, you’re exposing all the internal materials that were never meant to see daylight. Those fabric layers and steel cords? They’re sitting ducks for moisture, fraying, and rust. Here’s what actually works in the field:
- Hot Vulcanization – The Gold Standard This is what the pros use when they want a belt to last. You’re basically welding the edge materials together with heat and pressure. It’s not quick, and you need the right equipment, but man, does it create a bulletproof seal. If you’re planning to splice this belt back together with hot vulcanization anyway, this is a no-brainer.
- Cold Vulcanization – The Practical Choice Sometimes you don’t have a vulcanizing press sitting around, or you’re working in the middle of nowhere. Cold vulcanization uses chemical adhesives to stick sealing strips right onto the belt edge. It’s not as bombproof as the hot method, but it gets the job done and you can do it anywhere.
- PVC Belts – Keep It Simple These are actually easier to deal with. A heated knife will cut and seal at the same time – the heat melts the edge as it cuts, sealing up those fibers automatically. If you’re doing it cold, just brush on some PVC-compatible edge paint afterward.
10.2 Cleaning Up the Mess
Even the best cut leaves some rough spots. I always tell new guys: if you wouldn’t want to grab that edge with your bare hand, clean it up. Those little fibers sticking out? They’ll catch on everything. Rubber burrs? They’ll tear during splicing.
Heavy-duty shears work great for trimming loose threads. For thicker rubber belts, I keep a handheld grinder handy to smooth things out. Steel-reinforced belts are trickier – you need to grind down any sharp wire ends and hit them with rust inhibitor right away. Trust me, a little grinding now saves you from dealing with wire stab wounds later.
10.3 Going the Extra Mile with Protection
Here’s where experience really shows. Even with perfect edge sealing, that belt is going to face moisture, chemicals, maybe abrasive materials. Smart maintenance teams add extra protection:
- Anti-corrosion coatings on any exposed steel
- Moisture barriers to keep water out of fabric layers
- Wear-resistant compounds for really tough applications
These extras cost money upfront, but they pay for themselves by keeping you from having to cut out damaged sections every few months.
10.4 The Final Check
Before I call any cutting job finished, I run through this checklist every time:
- Hold a straightedge against the cut – is it actually straight?
- Measure the belt width in three places – consistent all the way across?
- Run your hand along the edge – no sharp spots or loose fibers?
- If you used adhesives, are they fully cured?
Skipping this inspection is like skipping a final exam. You might think you’re done, but you’ll pay for it during splicing when nothing lines up right.
10.5 Getting Ready for What’s Next
Most of the time, you’re cutting a belt because you need to splice it or resize it. How you prep those edges makes all the difference:
- For Hot Vulcanization Clean those ends until they’re spotless, then roughen them up for better adhesive grip. Apply your uncured rubber and curing agents before you even think about firing up the press.
- For Mechanical Fasteners This is where precision matters most. Drill or punch your fastener holes exactly along that straight cut. I’ve seen joints fail in days because someone got sloppy with hole alignment.
- For Cold Bonding Bone dry and squeaky clean – that’s what you want. Any dust, oil, or moisture will wreck your bond.
Get this prep work right, and your splice will outlast the belt itself. Mess it up, and you might cut that joint’s life in half.
10.6 Real-World Maintenance Wisdom
After twenty years of dealing with cut belts, here’s what actually matters:
Store your finished belts somewhere dry and out of the sun. UV light and moisture are belt killers.
Handle those sealed edges like they’re made of glass until they’re fully cured. I’ve watched guys peel off sealing strips just by being careless.
Check your spliced areas regularly, especially after heavy loads or when equipment’s been sitting idle. That’s when problems show up.
Keep edge repair supplies in your maintenance kit. When you need them, you need them right now.
10.7 Why This Stuff Actually Matters
I get it – edge treatment feels like busy work when you’ve got production breathing down your neck. But I’ve been called out at 2 AM because someone skipped these steps and a belt failed mid-shift.
Those frayed edges will catch on conveyor components. Water will get into unsealed layers and cause delamination. Poorly treated splices will fail and force you to start this whole process over again.
Do it right the first time, and that belt will run reliably for months or years. Cut corners on the post-treatment, and you’ll be cutting belts again sooner than you think.
The bottom line? Anyone can make a cut through a belt. The difference between a hack job and professional work shows up in everything that happens afterward.

11. Tool Care That Actually Works
Here’s what nobody tells you when you start doing conveyor belt work: the difference between looking like you know what you’re doing and actually getting results comes down to your tools. I’ve seen veteran mechanics fumble simple cuts because their equipment was shot, while rookies with properly maintained gear made clean work of complex jobs.
The truth is, cutting a conveyor belt is only as good as the blade doing the cutting. Let your tools go to hell, and every job becomes a wrestling match. Keep them sharp and clean, and the work flows like it should.
After fifteen years of dealing with emergency repairs and planned maintenance, I can tell you that good tool care isn’t just about making things last longer – though it does that too. It’s about being ready when the plant manager is breathing down your neck and that conveyor belt repair absolutely has to happen right now.
11.1 End-of-Shift Habits That Pay Off
Most guys finish a job and walk away. That’s fine if you like starting the next day with tools that barely work. Me? I spend ten minutes after each cutting session making sure everything’s ready for tomorrow.
- Manual Cutting Tools – Those utility knives and heavy shears pick up rubber residue worse than anything. I’ve got a can of brake cleaner and shop rags dedicated just to this. Wipe down every surface that touched the belt material. Skip this step, and next time you’ll be fighting sticky buildup that throws off your control.
- Electric Cutters – Dust is murder on electric motors. I hit every air intake and cooling vent with compressed air after use. Sounds like overkill until you price out motor replacements. Five minutes of blowing out dust beats a $400 repair bill every time.
- Industrial Equipment – The big cutting machines earn their keep, but they need attention. I clean the guide tracks and oil the moving parts weekly. These aren’t cheap tools – they’re production equipment that needs to work when called on.
This routine keeps everything running smooth and prevents the kind of buildup that turns precision equipment into junk.
11.2 Blade Replacement Reality
There’s no mystery to knowing when blades need changing – they tell you by making you work harder. When cutting starts feeling like a fight, the blade’s done.
I check cutting edges before every job. Nicks, chips, dull spots – anything that’ll mess up the cut gets fixed or replaced right then. No point starting work with compromised tools.
My rule for utility knife blades: change them after every major project or when resistance goes up. Cutting discs for grinders get swapped when they’re down to about three-quarters original size. Yeah, you can squeeze more life out of them, but the cut quality suffers.
Stock management matters too. I keep spare blades, discs, and consumables in my kit at all times. When you’re doing urgent conveyor belt repair work, having the right parts available is the difference between fixing it now and waiting for a supply run.
11.3 Electric Tool Reality Check
Power tools are like any machine – ignore them and they’ll quit when you need them most. Regular attention prevents most problems before they start.
- Electrical Safety – I check every cord and connection before plugging in. Damaged insulation or loose connections can kill you. If I spot problems, that tool gets red-tagged until it’s properly fixed.
- Motor Health – Your ears are the best diagnostic tool you have. Changes in sound, new vibrations, or rough running usually mean something’s wearing out. Catching bearing problems early beats rebuilding motors later.
- Heat Management – Belt cutting makes heat, and your tools need to shed it. I make sure cooling vents stay clear and fans spin freely. Overheated equipment doesn’t just work poorly – it can catch fire or have cutting discs explode.
- Calibration Checks – Industrial cutters need their guide systems and feed mechanisms checked regularly. Precision drift happens gradually, but it adds up to crooked cuts and wasted material.
11.4 Storage That Protects Your Investment
How you store tools between jobs determines how well they’ll work next time. I’ve watched good equipment get ruined by careless storage.
Everything goes in a controlled environment – dry, clean, and organized. Rust and contamination destroy precision faster than heavy use ever will.
Cutting edges get protection. Blades go in sleeves, discs in proper holders. It’s cheaper to buy protective storage than to replace damaged cutting tools.
Heavy equipment needs proper support. Those precision guide rails can’t handle being leaned against walls or having stuff piled on top. A little thought here prevents expensive realignment work later.
Organization saves time when you’re under pressure. Emergency repairs don’t wait for you to dig through a pile of tools looking for what you need.
11.5 Planned Maintenance Schedule
For shops that do regular conveyor belt cutting work, waiting for things to break is expensive and stupid. I learned to stay ahead of problems.
- Weekly – Quick condition check on everything. Look for obvious wear, lubricate what needs it, clean what’s dirty. Takes maybe thirty minutes but catches most developing issues.
- Monthly – Electrical safety testing on all powered equipment. Simple stuff – continuity checks, insulation testing. Prevents electrical problems from becoming safety hazards.
- Every Quarter – Full calibration check on precision equipment. Verify that your straight cuts are actually straight and your measurements are accurate.
- Annual Service – Bring in qualified technicians for deep maintenance on expensive machines. They’ve got specialized tools and training to catch things I’d miss.
This systematic approach has virtually eliminated unexpected tool failures in our shop.
11.6 What Good Tool Care Actually Gets You
I’ve worked in shops that treat cutting tools like disposable items – always buying replacements, always fighting poor performance. I’ve also worked where tools get treated like precision instruments with proper care and feeding.
The difference is night and day. Well-maintained equipment makes clean, accurate cuts that set you up for easy splicing. Your tools last longer, work safer, and never leave you hanging when critical work needs to happen right now.
Mastering how to cut conveyor belt material isn’t just about technique – it’s about having equipment that performs when it matters. Professional work requires professional tools maintained to professional standards.
Your reputation in this business comes down to delivering results when the pressure’s on. That only happens when your equipment is ready to perform every single time you need it. Take care of your tools, and they’ll take care of you when it counts.