1.Finding the Balance Behind Every Moving Belt
you wanna know how to make a conveyor belt? Fair question. Belts look simple — a loop, a motor, a couple of rollers — but once you start building one, you realize there’s a lot going on behind that smooth movement. I’ve spent years working in a conveyor belt plant, and trust me, the “easy part” is never as easy as it looks.
If you’re doing a DIY conveyor belt, start small. A few PVC pipes for rollers, a wood or metal frame, and maybe an old treadmill belt — it’ll work just fine. You’ll learn quick how tension and alignment matter. Too loose, it slips. Too tight, the motor cries for help. The fun part is finding that sweet spot where it just runs steady. That’s when you’ll catch yourself smiling like, yeah, I built that.
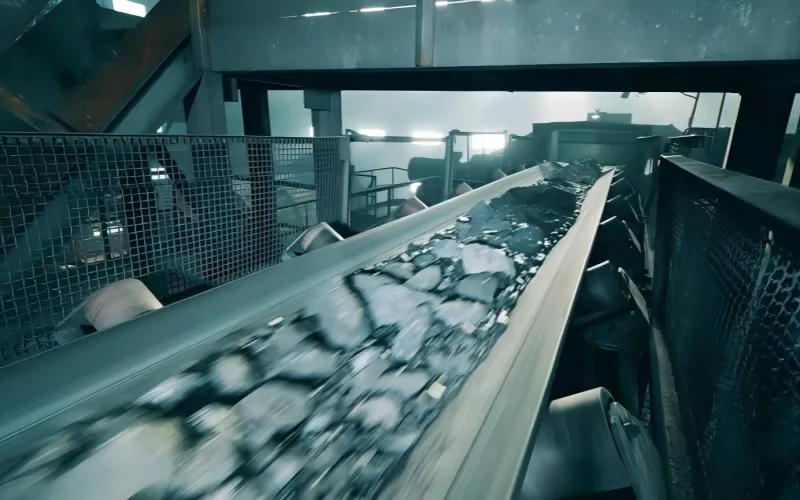
Now, factory belts — whole different animal. At Tiantie Industrial Co., Ltd, we make rubber conveyor belts tough enough to move coal, rock, even hot clinker. These aren’t glued together in someone’s garage. We layer fabric, rubber, and steel cords, then vulcanize everything at around 150°C so it stays together under serious stress. One bad splice or off-center pulley, and you’ve got a mess nobody wants to clean up.
So when someone asks me how to make a conveyor belt, I tell them this: it’s not about the belt, it’s about the balance — speed, tension, load. Once you get that right, it doesn’t matter if it’s a PVC conveyor belt in a bakery or a 200-meter steel-cord monster in a mine. It’ll move, and it’ll keep moving. That’s the whole point.
2. Conveyor Belt Basics — How It Works
2.1 Core Working Mechanism
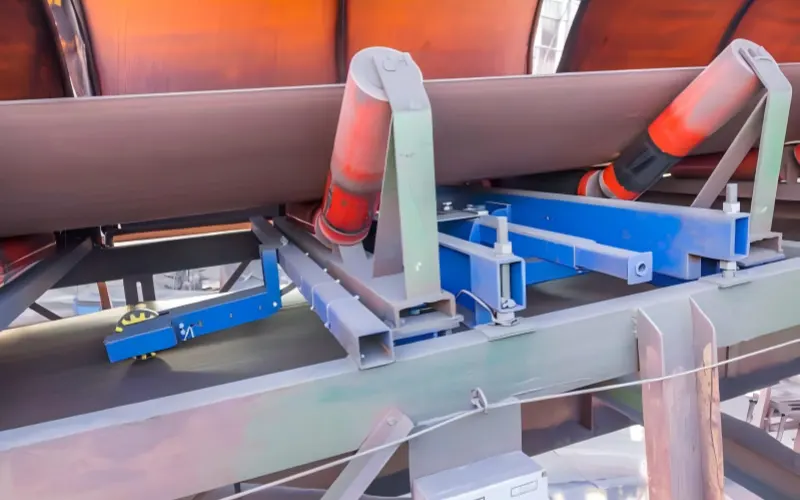
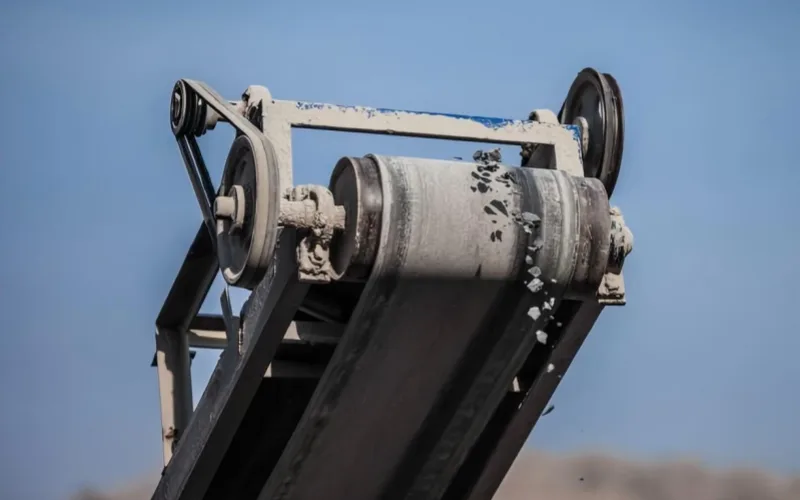
Every conveyor belt system runs on one simple rule — friction keeps the world moving. You’ve got your drive pulley doing the heavy lifting, an idler pulley guiding the return, and a belt that loops endlessly between them. Sounds simple, right? But when you actually build or maintain one, you learn that “simple” doesn’t mean “easy.”
The secret is all in the tension. Too loose, and the belt slips. Too tight, and you’ll hear your bearings cry for mercy. Getting that tension just right is half science, half instinct — kind of like tuning a guitar, except this guitar weighs a few tons. When everything lines up — tension, friction, pulley alignment — the belt runs like it’s alive. That quiet, steady hum? That’s the sound of balance.
2.2 Key Components
A conveyor belt system might look basic, but every part has a job, and each one can stop the whole operation if it fails.
- Frame – The backbone. DIY setups might use wood or aluminum; industrial systems go for heavy-duty steel.
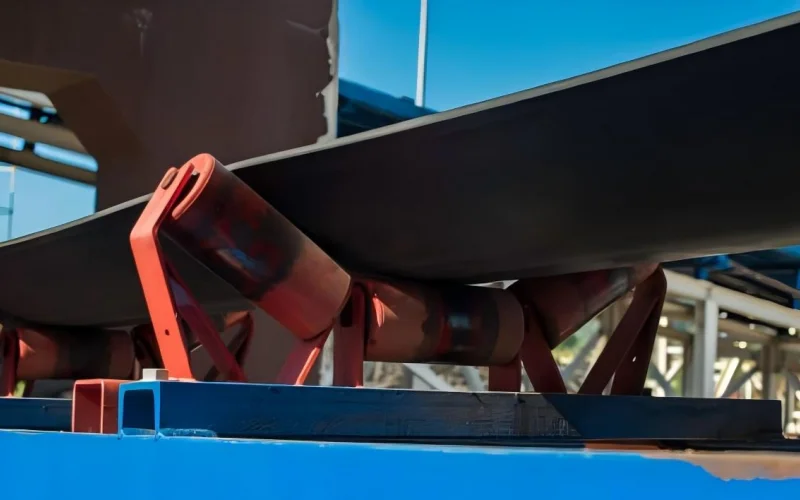
- Pulleys / Drums – The drivers and followers that make the loop work. Alignment here is everything.
- Belt – The star of the show. Whether it’s a rubber conveyor belt or a PVC conveyor belt, the material defines the performance — heat resistance, flexibility, or wear life.
- Motor + Gearbox – The heart and muscle. Power must match the load, belt speed, and friction, or you’ll either waste energy or cook your motor.
- Tensioning Device – The unsung hero. It keeps the belt tight enough to grip, loose enough to move, and aligned enough to not destroy itself.
I’ve seen belts stop entire production lines because of a single bolt coming loose. One small thing out of tune, and everything else follows. That’s why we say: a good conveyor belt doesn’t just move — it behaves.
2.3 Common Conveyor Belt Types
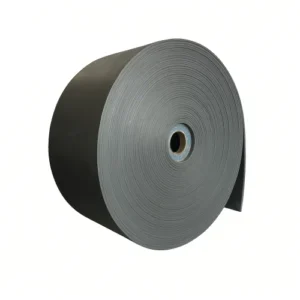
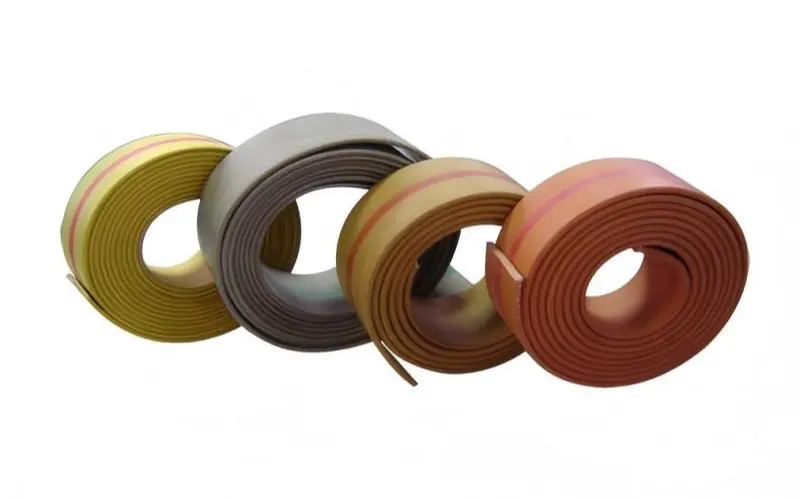
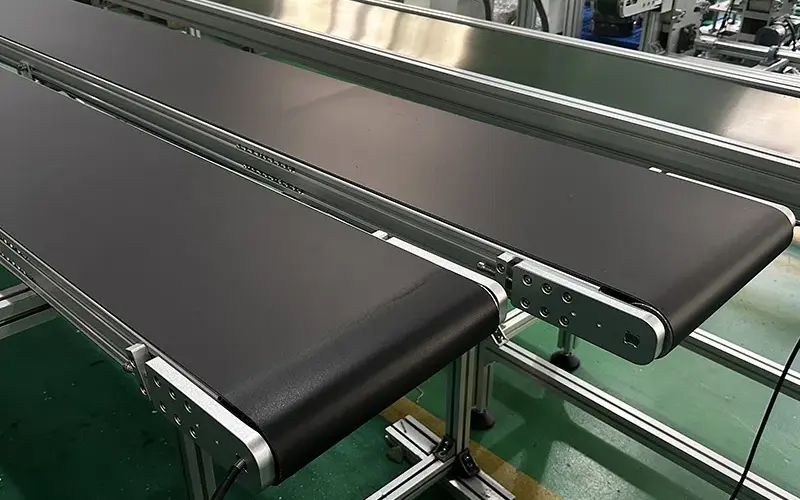
- Flat Transmission Belt
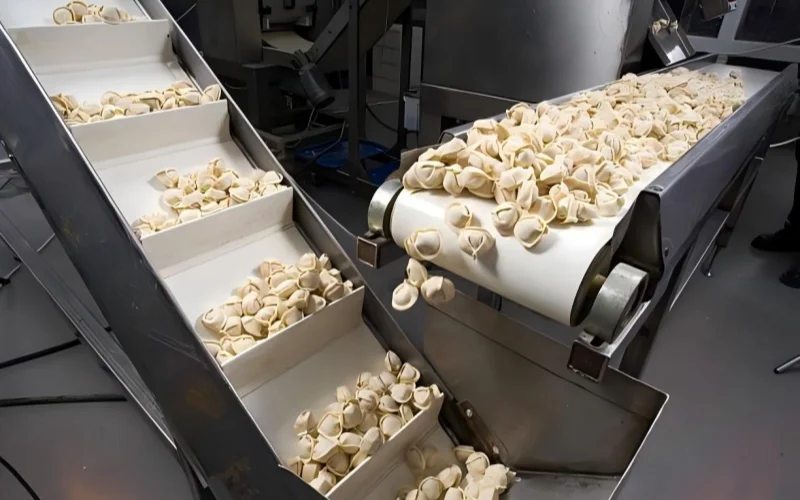
Not the star of modern plants, but it earns its keep because of low costand simple handling. You’ll see it on light-duty, short, and clean runs where traction demands are modest. Inside our own lines at Tiantie, we use flat transmission belts to carry sheet from the extruder to the calender—steady, low-tension, and easy to maintain. It’s not ideal for inclined transport or abrasive bulk, but for internal process flow and budget-sensitive setups, it does the job without drama.
- Flat Transmission Belt
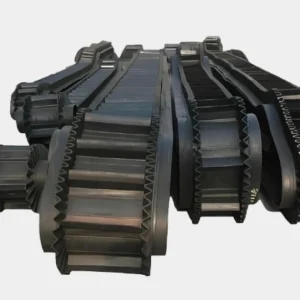
- Chevron Rubber Belt
This is a rubber conveyor beltwith molded V-patterns for grip on inclines. Think of it as the anti-slip specialist: coal, sand, grain—anything that tries to slide back, the chevron keeps it moving up. Performance comes down to details: pick the pattern height and pitch for your incline and material, and match the cover compound (abrasion, heat, or oil resistance) to the site conditions. Get those three right and the line runs calm, even on steep sections.
- Chevron Rubber Belt
![]()
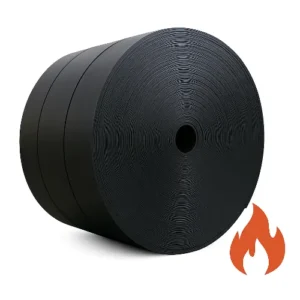
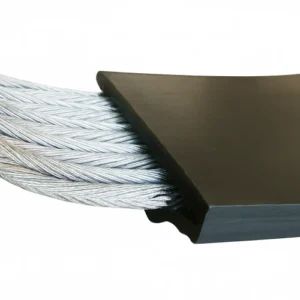
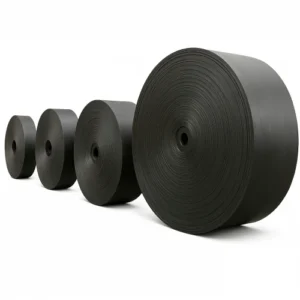
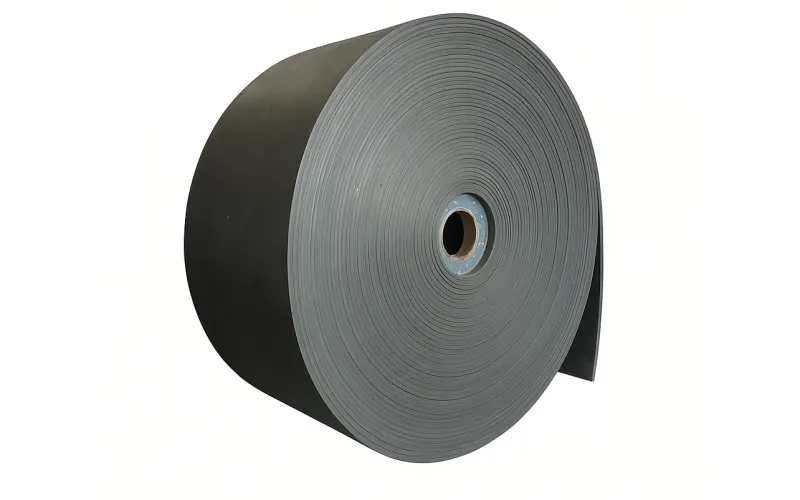
- Plain-Cover Rubber Belts (EP/NN or Steel Cord)
When people say “industrial conveyor belt,” they usually mean this family: flat-cover rubber beltsreinforced with EP/NN fabric or steel cords. These handle real work—mines, cement, ports—where impact, heat, and abrasion Selection is about tensile rating (e.g., EP/NN grades or ST ratings for steel cord), cover thickness, and the right compound (heat-resistant, flame-retardant, cold-resistant, oil/chemical-resistant). In short: plain cover for heavy throughput, chevron when you need grip, flat transmission when you need a low-cost process belt.
- Plain-Cover Rubber Belts (EP/NN or Steel Cord)
3. Choosing the Right Materials — DIY vs Industrial
When people talk about how to make a conveyor belt, most of them think about motors, rollers, or speed. But in real life, the material of the belt decides how long your system will survive. You can get everything else right — alignment, bearings, drive — but if you pick the wrong belt compound, you’re setting yourself up for breakdowns.
3.1 DIY-Friendly Materials
For small projects or school experiments, a DIY conveyor belt doesn’t need industrial-grade engineering. You just want something flexible, grippy, and safe to work with.
Material | Best For | Notes |
Cardboard or Wood | Classroom demos | Cheap and easy, but wears fast and warps with humidity. |
Rubber Sheet or Cloth Belt | Light-load motion | Good traction but stretches over time. |
Old Treadmill Belt | Home builds | Smooth, strong, and easy to reuse. |
PVC Sheet | Light, clean indoor lines | Simple to clean, but never exceed 55 °C — PVC releases toxic fumes when overheated. |
DIY materials are all about understanding how tension and friction work. Once you’ve built one that tracks straight and moves evenly, you already understand the principle behind an industrial system.
3.2 Industrial-Grade Materials
In factories, how to make a conveyor belt becomes a question of reliability. The environment is rough — heat, dust, impact, and long hours. That’s where rubber conveyor belts come in, and it’s what we build every day at Tiantie Industrial Co., Ltd.
We don’t make “standard belts for standard use.” Every belt is custom-built according to the customer’s needs — because a quarry, a power plant, and an underground mine all face different problems.
- Underground Mining
Safety first. These belts must handle static electricity and flame hazards. We use flame-retardant and anti-static rubber compounds, ensuring the belt won’t ignite or propagate fire. The carcass is usually EP fabric (EP100–EP630)or steel cord (ST630–ST3150), depending on load and distance. These belts meet MSHA and DIN 22103 flame-resistance standards. - Surface Mining and Quarrying
Here the fight is against abrasion and impact. We recommend wear-resistant rubber coversthat stand up to rock, gravel, and ore. Belts for these environments typically use EP fabric construction — flexible, durable, and easy to splice. - Cold-Region Operations
For ports or construction sites in sub-zero climates, we supply cold-resistant rubber compoundsthat stay elastic at low temperatures and prevent cracking during startup in winter mornings.
- Underground Mining
Each belt includes precise calendering, controlled vulcanization, and strict adhesion testing. Our manufacturing follows ISO 14890 and DIN 22102 to guarantee strength and uniformity.
Typical specs:
- Operating Temperature:–40 °C ~ +200 °C
- Tensile Strength:EP100 – EP630 (fabric) / ST630 – ST3150 (steel cord)
- Expected Service Life:about 2–3 years under continuous industrial use
That lifespan might sound short, but in heavy industry, three years of stable operation means the belt has done its job perfectly.
3.3 PVC Conveyor Belt
Now let’s talk about the PVC conveyor belt — lighter, cleaner, and much easier to handle. It’s ideal for logistics, packaging, and general manufacturing, where loads are smaller and the environment is dry and controlled.
PVC belts run quietly and resist moisture and mild chemicals. However, they’re not suitable for high-temperature or food-processing lines. PVC contains chlorine and plasticizers; once heated beyond 55 °C, it can release toxic gases and degrade quickly.
For applications needing higher heat or direct food contact, we recommend PU (polyurethane) or silicone belts instead — safer and compliant with FDA 21 CFR 177.2600 and EU 10/2011 food-grade standards.
So, if you’re running a warehouse, parcel sorter, or assembly line at room temperature, PVC is a cost-effective and clean solution. But if you plan to deal with heat, friction, or heavy load — stick with rubber.
3.4 Rubber vs PVC — Practical Comparison
Property | Rubber Conveyor Belt | PVC Conveyor Belt |
Operating Temp | –40 °C ~ +200 °C | –10 °C ~ +55 °C |
Carcass Type | EP 100–630 / ST 630–3150 | Polyester fabric base |
Durability | 2–3 years typical | 1–2 years |
Resistance | Heat, abrasion, flame, cold, oil | Moisture, mild chemicals |
Noise | Louder | Quieter |
Best For | Mining, quarry, cement, ports | Packaging, logistics, indoor transport |
Rubber belts are built for punishment — they work where the air is hot, the loads are heavy, and downtime is expensive. PVC belts are for convenience — lighter, cleaner, easier to install and replace.
When someone asks me how to make a conveyor belt that truly lasts, I tell them: start by knowing what it’s up against. The right material isn’t just about price or color — it’s about survival. And in our world, that’s what engineering really means.
4. Planning Your Conveyor Belt Project
When you’ve figured out how to make a conveyor belt, the next question is: how do you build one that actually fits your job?
A belt that’s too small won’t carry your load; too big, and you’ll waste money and energy. Planning is where good projects start — and bad ones die fast.
4.1 Define Your Specifications
Start by asking three questions:
- What are you moving?— boxes, coal, sand, or packages?
- How far and how fast?— the length, incline, and required throughput.
- Where will it run?— hot, humid, dusty, or clean environment?
These three answers decide everything — belt type, drive size, and frame material.
For example, a rubber conveyor belt in a cement plant needs heat resistance and high tension; a PVC conveyor belt in a warehouse just needs smooth, clean transport.
4.2 Size and Power Calculations
Here’s the simple math that keeps you from guessing:
- Belt Length (L)= 2 × Center Distance (C) + 1.57 × (D₁ + D₂) + (D₁ – D₂)² / (4C)
(D₁ and D₂ are the diameters of drive and tail pulleys.) - Power (P)= (Load × Speed × Friction Coefficient) / 1000
- Belt Length (L)= 2 × Center Distance (C) + 1.57 × (D₁ + D₂) + (D₁ – D₂)² / (4C)
These formulas give you the motor power in kilowatts (kW). Add a 10–20% margin for safety — better to have extra torque than watch your motor stall under load.
And remember: the pulley diameter must match the belt’s stiffness. A thick rubber belt needs a larger pulley to prevent bending stress, while a thin PVC belt can run on smaller rollers.
4.3 Frame and Drive System Choices
Frame materials:
- Wood or aluminum:fine for DIY conveyor belt projects or lightweight goods.
- Steel:essential for industrial setups, especially when vibration and load are high.
Drive options:
- Manual crank or small DC motor— for DIY or educational use.
- AC geared motor with VFD (Variable Frequency Drive)— for professional systems, allowing speed control and smooth startup.
Always install a tensioning device — even the best-designed belt will slip if tension isn’t adjustable. A properly aligned tensioner is the difference between a silent line and a squealing one.
4.4 Budget Tiers and Expectations
Category | Typical Cost | Typical Use |
DIY | <$200 | School projects, hobby builds |
Semi-Professional | $200–$1000 | Light production, labs, startups |
Industrial | >$1000 | Mining, cement, ports, or heavy manufacturing |
Here’s the thing: don’t obsess over cutting corners. Cheap components cause expensive downtime.
As we say in the factory — you can save on paint, not on tension.
4.5 The Tiantie Approach
At Tiantie Industrial Co., Ltd, planning isn’t guesswork. We start with the customer’s data — material type, load weight, ambient conditions — and use that to design everything: carcass strength (EP100–EP630 or ST630–ST3150), cover compound, pulley size, and splice method.
That’s how we make sure the system performs exactly as promised — not just at startup, but years later. Because understanding how to make a conveyor belt is one thing; building one that keeps running is another.
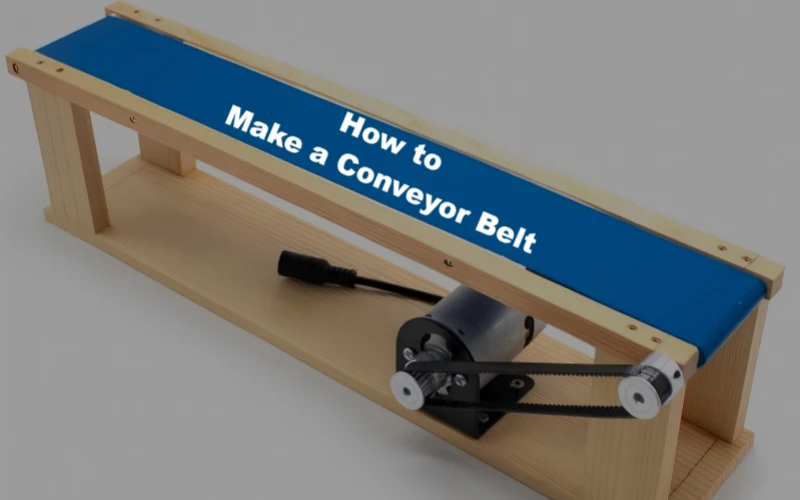
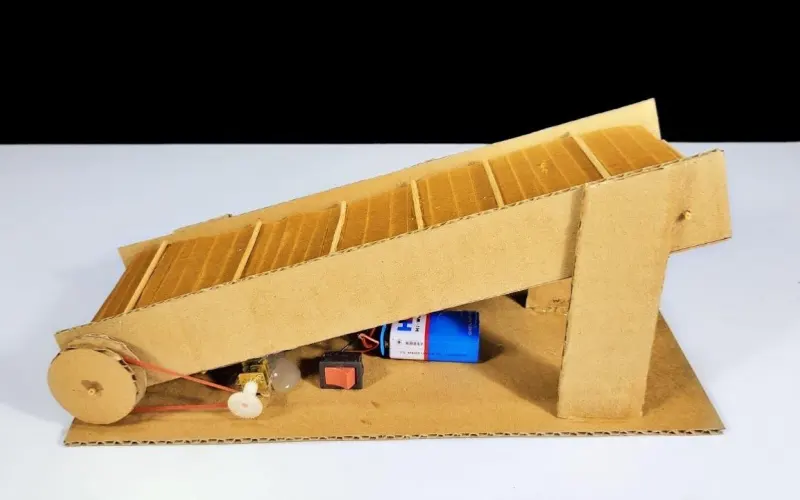
5. Building a DIY Conveyor Belt — Step by Step
If you really want to understand how to make a conveyor belt, the best way is to build one yourself. Reading about it is fine, but when you actually cut, align, and run the belt, you begin to see how tension, friction, and balance all play together. Even a simple DIY conveyor belt can teach you a lot about what goes into an industrial system.
5.1 Materials and Tools
You don’t need high-end machinery for a small build. The goal is to create something stable, safe, and functional enough to see how the components work together. Most of the materials can be found in any workshop.
You’ll need:
- Frame:wood, aluminum profile, or mild steel
- Rollers:PVC pipes or metal rods
- Belt:PVC sheet, rubber strip, or an old treadmill belt
- Bearings:to reduce friction on the rollers
- Motor:12–24V DC motor or small AC geared motor
- Fasteners:bolts, nuts, washers, brackets
- Power source and switch
And the tools: a drill, wrench, tape measure, and a level.
If you’re using a rubber conveyor belt or thick PVC, wear gloves while cutting — the edges can be sharp, and adhesives heat up quickly.
5.2 Building the Frame
The frame is the backbone of your system. It doesn’t need to be heavy, but it must be straight and rigid. If the frame is off by even a few millimeters, the belt will never track correctly.
Cut two side rails to the desired length, then add crossbars to connect them. Check the corners with a diagonal measurement — both diagonals should be equal. Drill roller holes on each side at equal heights and double-check that both ends are perfectly level.
This simple step — alignment — is the difference between a conveyor that runs smoothly and one that constantly drifts to one side.
5.3 Installing the Rollers
Every conveyor needs at least one drive roller and one idler roller. The drive roller connects to the motor; the idler supports the belt’s return path.
Install the idler first and make sure it spins freely. Then, mount the drive roller on the other end. Use bearings or bushings to reduce friction. When both are in place, spin them by hand. They should rotate evenly with no wobble. If one side turns slower, your frame is not square — fix it before moving on.
Even in industrial lines, roller misalignment is one of the top causes of tracking problems. A small angle error at installation becomes a big issue once the belt runs at speed.
5.4 Fitting the Belt
Now comes the key part — the belt itself.
Wrap the PVC or rubber belt around both rollers and check that it’s centered. For small projects, you can join the ends using hot-melt glue, belt clips, or metal fasteners.
If you’re using PVC, it’s flexible and easy to handle. If you’re using a rubber conveyor belt, it’s heavier but stronger. Either way, make sure the joint is straight and smooth; otherwise, the belt will “walk” to one side during operation.
Once the belt loop is complete, apply just enough tension so it grips the drive roller without slipping. Too tight, and you’ll stress the bearings and motor; too loose, and it won’t move at all.
5.5 Motor and Drive Setup
A small 12–24V DC motor is ideal for a DIY conveyor belt.
Mount the motor close to the drive roller and connect it with a coupling, chain, or timing belt. Keep both shafts aligned; even a small offset causes vibration and noise.
Before powering it up, secure all bolts and make sure the motor bracket doesn’t flex.
Start at a low speed to test the motion. If the belt slips, increase tension slightly. If it drifts, adjust the angle of the tail roller by a few turns. In our factory, this process is called “fine-tuning,” and it’s something every technician learns early.

5.6 Testing and Adjusting
Let the belt run without load first. Watch it carefully — does it stay centered? Does it wobble?
A properly aligned belt should run straight for several minutes without touching the sides.
If it drifts, adjust the idler roller on the opposite side.
If it makes a squeak or hum, check for friction in bearings or uneven tension.
When it runs smoothly, test it with light loads — small boxes or tools. Notice how the belt reacts: does the speed change under weight? Does the motor struggle? Adjust gradually until everything feels balanced.
These little tests might seem trivial, but they mirror how we commission industrial systems at Tiantie Industrial Co., Ltd. In both cases, the secret is to let the belt “tell” you what’s wrong before you assume.
5.7 Common Problems and Fixes
Problem | Cause | Solution |
Belt slips | Low tension or smooth roller | Increase tension slightly or add grip tape to roller |
Belt drifts | Misaligned rollers | Adjust roller angle or level the frame |
Noise or vibration | Loose parts or dry bearings | Tighten bolts and lubricate |
Motor overheats | Excess tension or overload | Loosen belt or reduce load |
Most issues come down to two things: alignment and tension. Fix those, and 90% of your problems disappear — whether it’s a garage build or a 200-meter industrial rubber conveyor belt.
5.8 Keep It Safe and Simple
Don’t chase perfection on your first build. The goal isn’t to make it look like a factory line; it’s to understand how motion, load, and friction interact. Once you grasp that, scaling up becomes easy.
Always keep safety in mind — never touch the moving belt, avoid loose clothing near rollers, and disconnect power before adjustments. These rules sound obvious, but even experienced operators forget sometimes.
What you’ll realize after a few hours of trial and error is that building a DIY conveyor belt isn’t really about the belt — it’s about understanding systems. The same balance of power, alignment, and material quality applies whether you’re making a small prototype or a full-size line.
At Tiantie, our large-scale belts follow the same physics. The difference is in the materials: EP fabrics, steel cords, and vulcanized rubber instead of PVC and glue. But the idea — steady tension, clean alignment, consistent motion — never changes.
So once your DIY system runs smoothly, even for a few minutes, you’ve already learned the heart of conveyor engineering. You don’t just know how to make a conveyor belt anymore — you know how to make it work.
6. Industrial Manufacturing of Conveyor Belts
When people wonder how to make a conveyor belt, they usually imagine a simple process—mix, press, and roll. In truth, the path from raw rubber to a finished industrial belt involves exact chemistry, precision machinery, and an engineer’s constant attention to every detail.
Each rubber conveyor belt and PVC conveyor belt we deliver follows strict production principles: stability, precision, and repeatability. Both go through four major manufacturing stages, yet within those steps lie hundreds of variables that define quality.
6.1 Rubber Conveyor Belt Manufacturing Process
A rubber conveyor belt is a multilayer composite structure made to withstand tension, abrasion, and extreme temperatures. The process may be summarized in four stages—mixing, calendering, forming, and vulcanization—but each stage contains dozens of quality checkpoints that make the difference between an ordinary product and an industrial-grade belt.
1. Mixing — The Foundation of Strength
Every belt starts with the rubber compound. Natural and synthetic rubbers are blended with carbon black, plasticizers, anti-aging agents, and curing accelerators in a closed internal mixer.
Each formula is tailored to its operating environment:
The goal is consistency. The viscosity, density, and dispersion of each batch are tested before approval. A small error at this stage will multiply during curing, so precision starts right here.
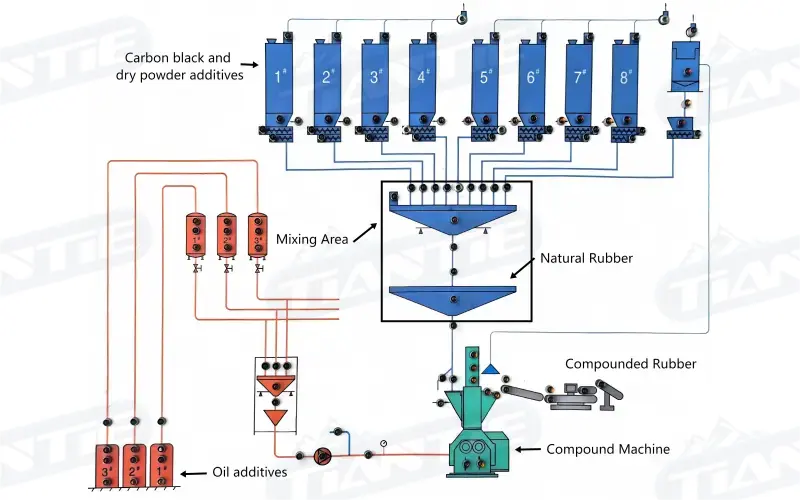
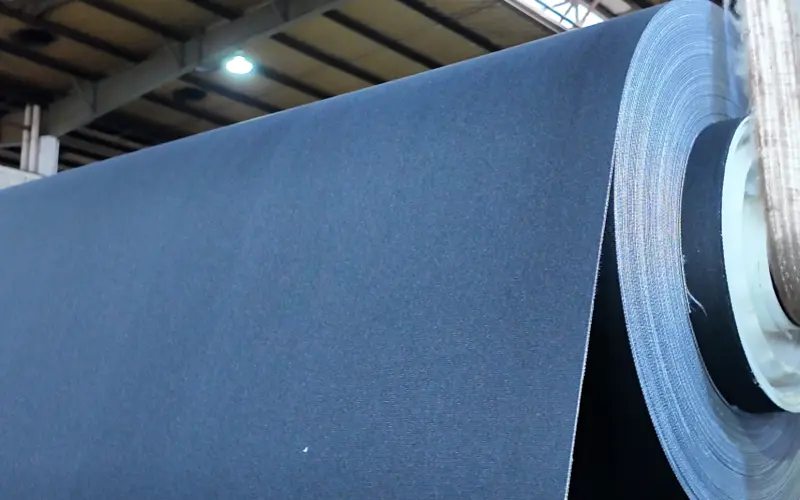
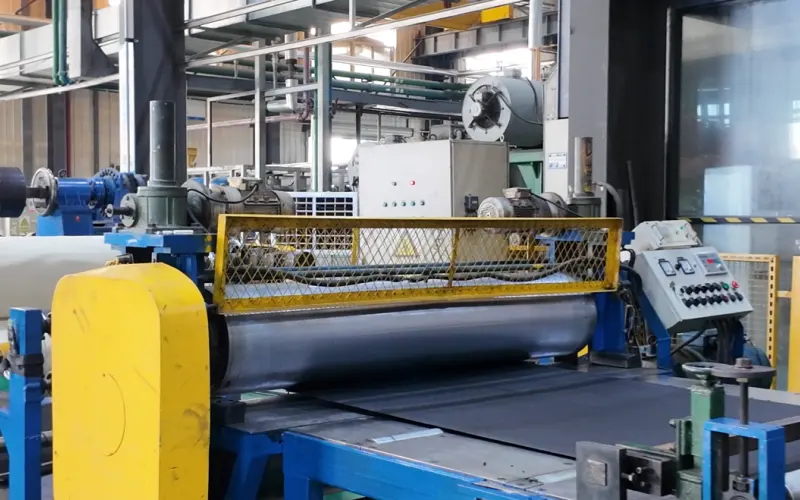
2. Calendering — Creating Reinforced Layers
The prepared rubber is rolled into thin sheets and laminated with reinforcement fabrics such as EP (polyester-nylon), NN (nylon-nylon), or steel cords.
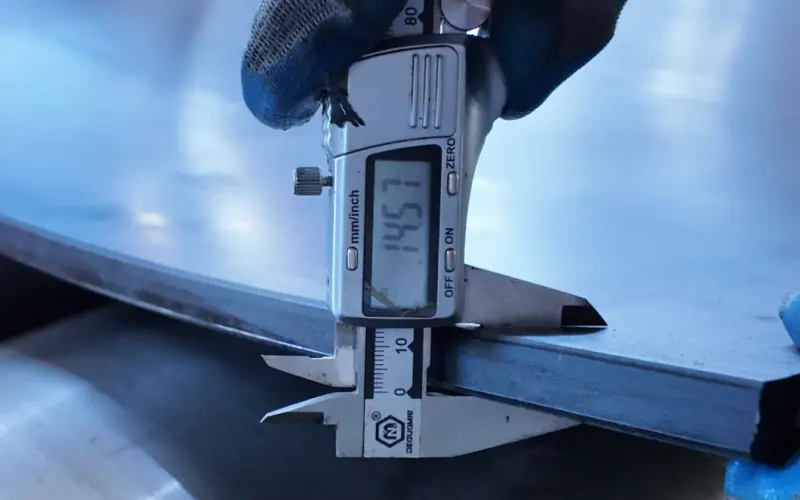
This is one of the most sensitive steps in the entire process. Sheet thickness is controlled within ±0.3 mm.
It may seem small, but a 1 mm variation can alter belt tension, weight, and service life. For steel cord belts (ST630–ST3150), cords are pre-cleaned, tensioned, and positioned using laser alignment, ensuring consistent spacing and perfect adhesion.
This combination of fabric and rubber creates the carcass—the core strength of every rubber conveyor belt.
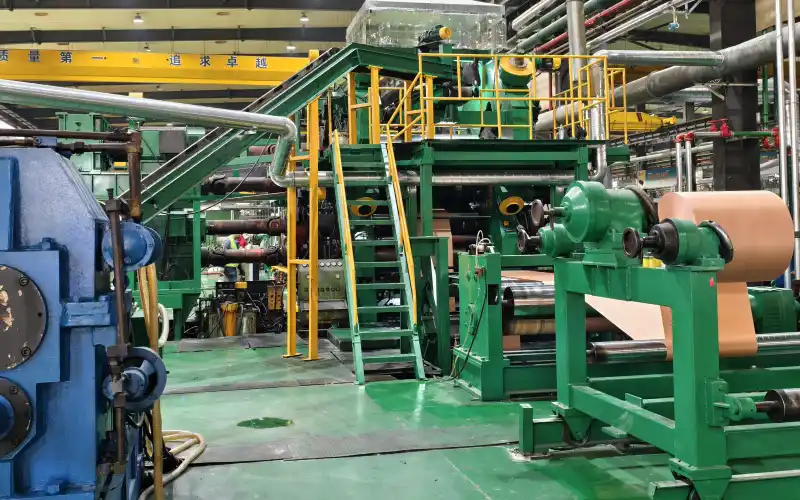
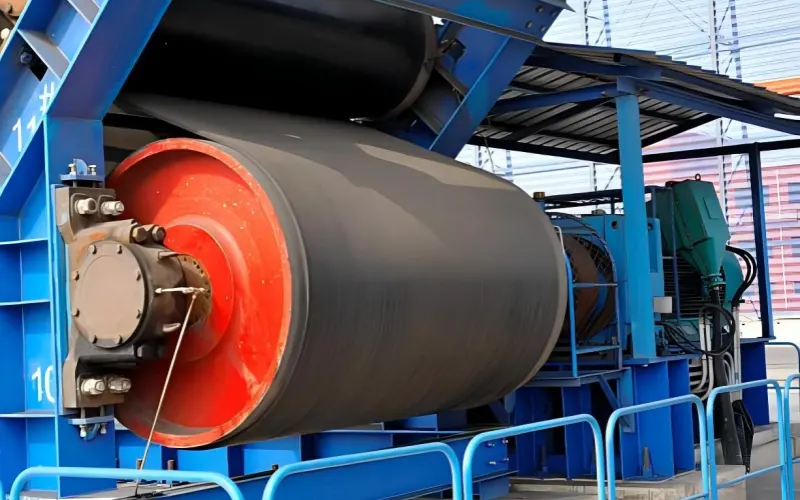
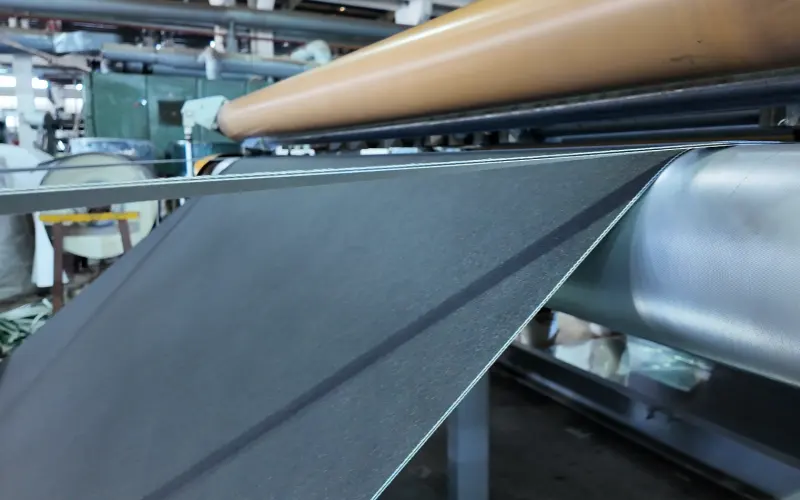
3. Forming — Precision in Structure
In the forming stage, layers of rubber and reinforcement are assembled into a single structure. Engineers place each layer—bottom cover, carcass, and top cover—with guided alignment to prevent offset.
A rolling shaft presses the composite to remove trapped air, guaranteeing complete bonding between layers. Even a small air pocket can become a weak spot once the belt operates under load.
This process demands calm precision. The belt looks simple, but the forming line is where dimensional accuracy and straightness are built in.
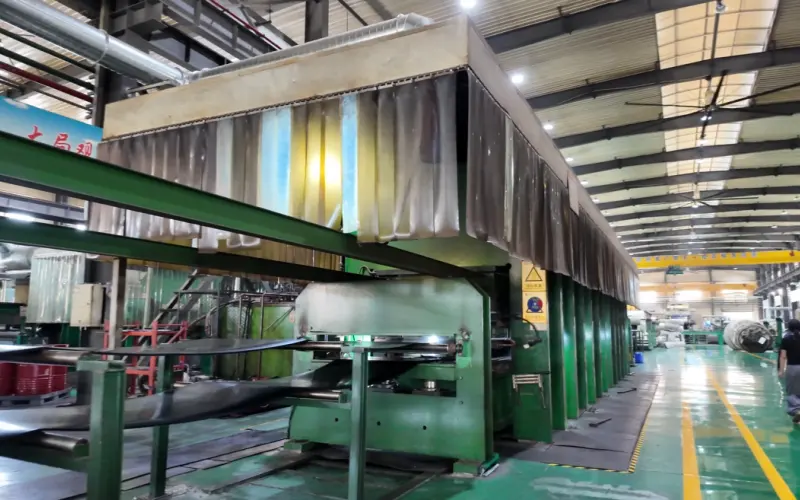
4. Vulcanization — Where Elasticity and Durability Begin
During vulcanization, the assembled “green belt” is placed in a press and subjected to controlled heat and pressure.
Standard curing conditions are 140–160°C for 15–45 minutes, depending on belt thickness and rubber formula.
Inside the press, chemical crosslinks form between rubber molecules, transforming the soft compound into a tough, elastic material. This process defines the belt’s mechanical strength, flexibility, and resistance to heat and wear.
Temperature, pressure, and time are all critical. A few degrees too high or a few minutes too long can harden the surface and reduce internal bonding. Continuous monitoring through PLC systems ensures uniform curing across the full width.
After curing, the belt is cooled slowly to relieve internal stress, then trimmed and inspected.
5. Final Testing and Quality Control
Each finished rubber conveyor belt undergoes comprehensive testing for tensile strength, elongation, adhesion, wear resistance, and—when specified—flame resistance and static conductivity.
We follow ISO 14890, DIN 22102, and related industry standards.
Even a one-millimeter thickness variation is unacceptable; it changes both the belt’s total weight and operational life. For us, precision isn’t a feature—it’s the foundation of reliability.
6.2 PVC Conveyor Belt Manufacturing Process
While rubber conveyor belts are designed for heavy-duty and outdoor applications, PVC conveyor belts serve industries where light weight, flexibility, and cleanliness are essential—such as logistics, packaging, or indoor assembly lines.
Their production process also follows four major stages: fabric preparation, coating, heating, and finishing. Though different in chemistry, the same precision philosophy applies.
1. Fabric Preparation
PVC belts begin with a polyester or nylon fabric core that provides flexibility and tensile strength. The fabric is pre-treated, cleaned, and tensioned to eliminate wrinkles and ensure a perfectly flat surface before coating. Any unevenness here will translate directly into visible waves or weak spots in the final belt.

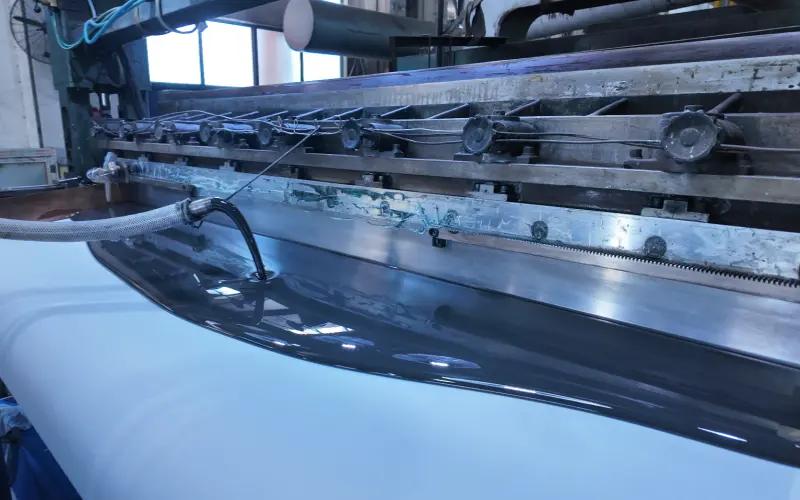
2. Coating — The PVC Layer
The prepared fabric passes through a knife-coating line, where liquid PVC compound is evenly applied to both sides. Coating thickness is maintained within ±0.3 mm, the same tolerance standard used in rubber belt calendering.
The compound contains stabilizers and plasticizers that define the belt’s hardness, color, and resistance properties. The coating step is where surface quality and cleanliness are built—critical for smooth conveying and easy maintenance.
3. Heating and Solidifying
After coating, the belt moves into a controlled heating tunnel. The curing temperature is carefully maintained between 165–175°C, just high enough to melt and bond the PVC compound without deforming the fabric core.
The belt is then cooled gradually to avoid internal stress. Cooling too fast would make the surface brittle; too slow would affect surface gloss. This delicate balance gives the PVC conveyor belt its signature smoothness and flexibility.
4. Finishing and Inspection
Once solidified, the belt is trimmed, surface-polished, and edge-sealed to prevent delamination or moisture intrusion.
Each belt is tested for tensile strength, flexibility, adhesion, and coating uniformity before packaging. The result is a clean, stable belt suitable for light to medium-duty applications, where smooth motion and hygiene matter more than heavy load capacity.
6.3 The Importance of Precision
Both rubber and PVC conveyor belts share the same truth: precision decides performance.
A one-millimeter difference in thickness or uneven coating may look harmless, but it can change belt weight, tension distribution, and lifespan by a surprising margin.
That’s why modern belt manufacturing isn’t just about pressing materials—it’s about controlling every variable within fractions of a millimeter.
When you understand how to make a conveyor belt this way, you don’t just make a moving surface; you make a product that carries consistency, reliability, and trust.
7. Rubber vs PVC — Practical Comparison
After years of working with conveyors, I’ve come to realize that how to make a conveyor belt is a question of materials just as much as design. The real choice is always between strength and efficiency — between a rubber conveyor belt and a PVC conveyor belt. Both have their place, but their roles have shifted with time, cost, and technology.
I’ve spent most of my career in rubber manufacturing, so I naturally trust its durability. But if there’s one thing I’ve learned, it’s that performance alone doesn’t decide what ends up in the field — economics does. The world has become more cost-sensitive, and the balance between “strong” and “smart enough” has changed.
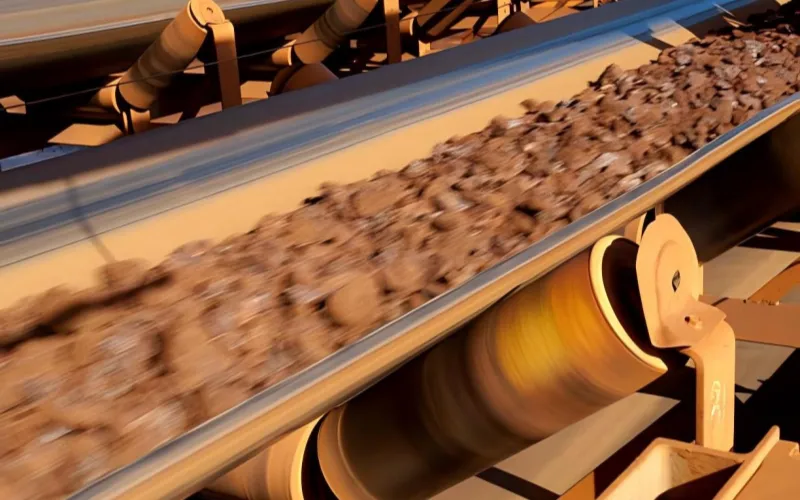
7.1 The Enduring Strength of Rubber
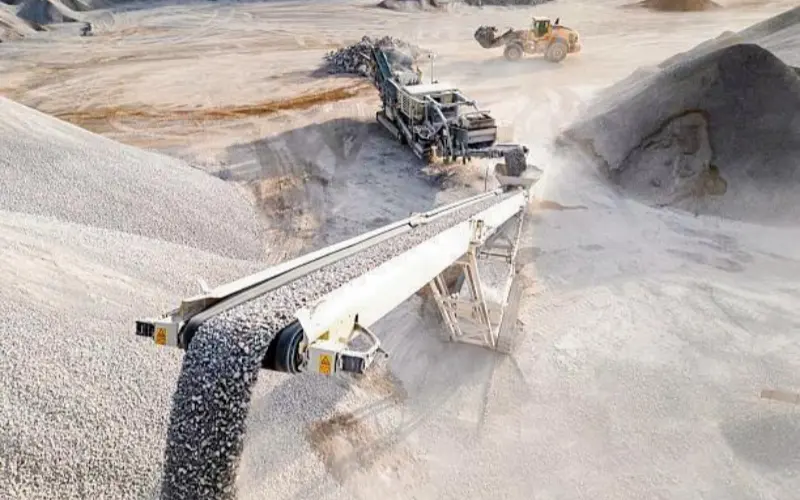
A rubber conveyor belt has always been the backbone of heavy industry. It handles heat, impact, and abrasion with ease, whether it’s hauling coal from underground or clinker from a cement kiln. Its elasticity lets it absorb shocks without tearing, and its thick covers resist wear for years.
Rubber belts are built for survival — and they do survive. With proper maintenance, a heavy-duty rubber belt can run for more than three years in harsh environments. But they’re expensive, heavy, and power-hungry. That combination used to be acceptable when energy was cheap and equipment lifecycles were long. Today, with every kilowatt-hour counted, that’s no longer the case.
7.2 The Economic Logic of PVC
The PVC conveyor belt wasn’t born to replace rubber; it simply found a gap where strength was no longer the most important metric.
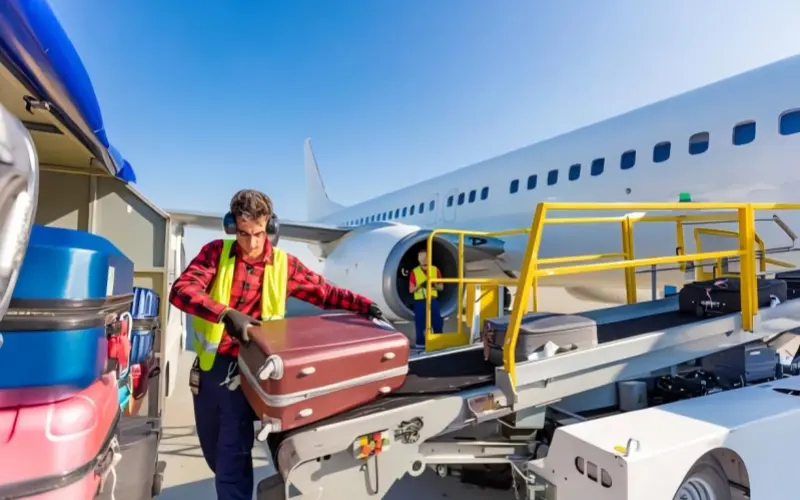
One of the clearest examples comes from the aviation industry. Years ago, almost every airport used rubber conveyor belts in baggage systems — they were tough, dependable, and proven. But as passenger volume grew, airports started analyzing total system costs. Rubber belts were durable, yes, but their power demand, weight, and replacement costs added up over time.
PVC belts, especially in thicker specifications, offered nearly the same performance for a fraction of the operating cost. They’re lighter, easier to install, and require smaller drive systems. For airports, where the load is moderate and the working hours are long, cost efficiency outweighed brute strength. By selecting reinforced or thicker PVC conveyor belts, operators found they could match the stability and surface durability of rubber without overspending.
This shift wasn’t about surface wear or noise reduction — it was simply economic logic. If the belt doesn’t need to survive rocks or heat, why pay for that capability?
7.3 A Market Dividing by Purpose
That reasoning has quietly reshaped the industry. Rubber conveyor belts still dominate where reliability under stress matters — mines, ports, cement plants, power stations.
PVC conveyor belts are spreading through light manufacturing, logistics, and warehousing, where energy efficiency and maintenance cost carry more weight than tensile strength.
As an engineer, I can’t deny that I still prefer rubber. It’s predictable, almost stubborn in the best way — the kind of material that never quits on you. But as systems evolve toward automation and cost-optimized design, I’ve also learned to respect PVC for what it is: not a cheaper substitute, but a smarter fit for the right conditions.
In the end, the difference isn’t about which one’s stronger — it’s about which one makes sense. Rubber carries the industries that move the world; PVC keeps the world moving smoothly, quietly, and affordably.
8. Safety, Standards & Maintenance
Safety looks different depending on the kind of conveyor belt you’re running. In a mine, it’s about flame retardancy and electrical safety. In a small workshop or DIY setup, it’s about keeping fingers away from moving parts and not overloading your motor. Whether it’s a full-scale rubber conveyor belt system or a simple PVC conveyor belt prototype, the principle is the same — control the risks that actually exist.
8.1 Safety Requirements — Understanding What’s Necessary
Safety doesn’t mean adding every feature; it means applying the right ones.
In industrial environments, safety requirements come in two categories:
- General machine protection:applies to all systems — guards over rollers, emergency-stop switches, proper clearances, and lockout/tagout points.
- Application-specific properties:required only in special risk zones.
- Flame retardancy and antistatic conductivity are part of the safety group, but only needed when the working condition involves explosion or fire hazards — such as underground mining or grain processing. Standards like ISO 340, ISO 284, and MSHA define test limits for these properties.
- For food or pharmaceutical lines, belts must meet FDA 21 CFR 177.2600or EU 10/2011 compliance to prevent chemical migration.
- Rubber conveyor beltscan be made flame-retardant or oil-resistant; PVC conveyor belts can be antistatic and easy-clean, depending on environment.
The goal isn’t to make every belt “super safe” on paper — it’s to make it safe enough for its actual risk.
8.2 Routine Maintenance for Industrial Systems
For industrial conveyors, safety and performance live or die in maintenance.
- Daily checks:look for belt tracking, tension, and surface condition.
- Weekly checks:lubricate bearings, inspect splices, clean pulleys, and confirm scraper pressure.
- Monthly checks:measure cover wear and inspect idler alignment.
Small steps like these prevent the big failures — the kind that tear a splice or stop production.
Rubber conveyor belts need attention to heat and tension. Too tight, and the splice weakens; too loose, and it slips.
PVC conveyor belts require careful temperature control (stay below 55 °C) and frequent cleaning, since oil or dust can reduce friction and cause slipping.
8.3 Maintenance for DIY and Light-Duty Systems
When people learn how to make a conveyor belt at home or for school projects, they often forget that small machines can hurt just as easily as large ones. Even if it’s made from wood, PVC, or an old treadmill belt, the same rules apply — just simplified.
- Keep all moving parts covered.A thin acrylic shield or simple frame cover prevents clothing or hair from getting caught.
- Use low voltage.If the belt is powered by DC motors (12–24 V), it should run from a regulated supply or battery pack — never a direct AC plug.
- Don’t overload the belt.Most small belts fail not from poor construction but from carrying too much weight. Test with light materials first.
- Inspect connections regularly.Check splices, glue joints, or mechanical clips after every few hours of operation.
- Avoid overheating.For PVC belts, long continuous runs can raise surface temperature — turn the system off periodically to cool.
Even a small DIY conveyor belt should have an emergency cut-off — a simple toggle or inline switch within reach. Safety isn’t about the scale of the system; it’s about awareness.
8.4 Troubleshooting for All Types
Regardless of scale, most conveyor issues follow the same pattern:
Symptom | Common Cause | Quick Fix |
Belt slipping | Low tension or dirty pulley | Clean, increase tension slightly |
Mistracking | Uneven loading or misaligned rollers | Realign frame and pulleys |
Frayed edges | Belt rubbing against frame | Adjust idlers, re-center belt |
Excessive noise | Dry bearings or loose mounts | Lubricate and tighten fasteners |
Whether it’s a homemade mini belt or an industrial system hauling tons per hour, these small checks keep everything running safely and predictably.
Safety isn’t one single standard. It’s a mindset — whether you’re tightening bolts on a 100-meter rubber conveyor belt or wiring a tiny PVC conveyor belt in your garage, it’s the same principle: design carefully, operate consciously, and never assume small means safe.

9. Cost & Application Insights
Whenever someone asks me how to make a conveyor belt, the next question almost always comes down to cost.
But the number alone never tells the full story. The real expense behind a rubber conveyor belt or a PVC conveyor belt includes not only the belt itself, but also how it performs, how often it needs attention, and what it costs each time it stops.
9.1 Layers of Cost
Every conveyor project involves three types of cost:
- Fabrication cost:materials, components, and assembly.
- Operating cost:energy consumption, wear parts, and routine maintenance.
- Downtime cost:what happens when the belt stops.
A DIY conveyor belt for an experiment or hobby setup might only cost $50–$150, using recycled components or treadmill belts.
A small factory or warehouse installation can reach $500–$1,000 when proper rollers, bearings, and tensioning are included.
For an industrial conveyor running a rubber conveyor belt over hundreds of meters, total investment easily exceeds $10,000 — but that number buys consistency under constant stress.
9.2 Comparing Material Economics
A PVC conveyor belt is cheaper to produce and transport. Its lower weight reduces motor power, saving energy over time. For moderate loads and continuous operations, this difference translates directly into operating savings.
A rubber conveyor belt, on the other hand, costs more up front but delivers longer service under high tension and temperature.
When measured in total tonnage moved before replacement, rubber often balances out or surpasses PVC in long-term economy.
The comparison depends on workload: light systems benefit from PVC’s efficiency; heavy-duty conveyors rely on rubber’s durability.
9.3 Labor and Replacement Costs
Installation time is an invisible expense that often determines profitability.
Replacing a rubber conveyor belt in a mining plant can require cranes, full shutdown, and a maintenance crew — meaning every hour costs more than the belt itself.
A PVC conveyor belt in a packaging line can usually be changed by one technician in less than an hour.
Even when belt prices seem close, the downtime gap can be massive.
That’s why maintenance planning is part of the financial calculation. The goal isn’t to find the cheapest belt, but the one that minimizes interruptions.
9.4 Typical Application Mapping
Application | Preferred Material | Core Reason |
Underground mining | Rubber conveyor belt | Flame-retardant & heavy load capacity |
Cement & quarry systems | Rubber conveyor belt | High temperature & abrasion resistance |
Packaging & logistics | PVC conveyor belt | Energy efficiency & clean operation |
Airport baggage systems | PVC conveyor belt | Long duty cycle & controlled load |
DIY & educational models | PVC or small rubber strips | Easy setup & low cost |
Material selection follows function, not tradition. The right belt for the job is the one that fits the environment, load type, and replacement tolerance.
9.5 Shifting Market Dynamics
In the past decade, the gap between synthetic rubber and PVC pricing has widened.
As polymer costs dropped and automation spread, PVC conveyor belts gained presence in logistics and warehouse automation. Their performance is sufficient for most indoor use, and their replacement cycle fits fast-moving industries.
Meanwhile, rubber conveyor belts remain concentrated in sectors where environmental conditions push every material to its limit — heat, oil, impact, or fire risk. These applications value endurance over price, which keeps rubber essential to heavy industry.
This gradual separation of market roles isn’t competition; it’s specialization. PVC handles the growing light-duty sector, while rubber continues to carry the industries that shape infrastructure.
10. When to DIY and When to Buy
Not everyone asking how to make a conveyor belt needs an industrial system.
Sometimes it’s a school project, a prototype, or a small workshop test rig.
Other times, it’s a line that runs twenty hours a day and can’t stop even for an hour.
The difference between those two situations is the difference between DIY and professional purchase.
10.1 When DIY Makes Sense
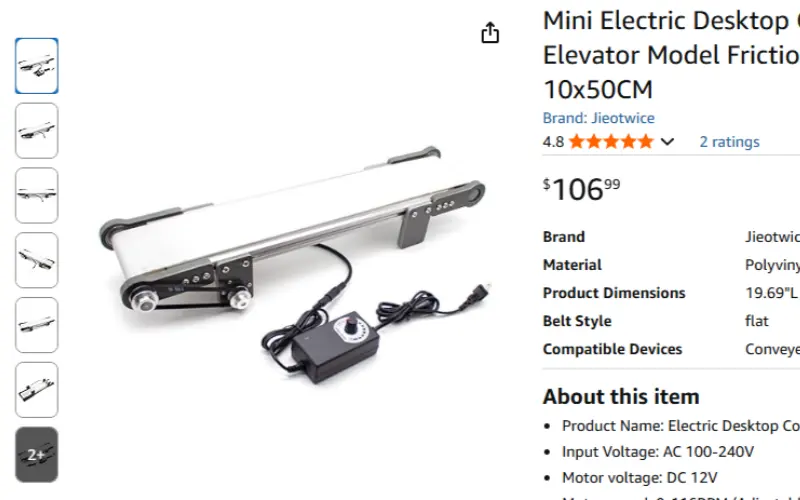
A DIY conveyor belt works perfectly well when the job is simple, the load is light, and precision isn’t critical.
If the goal is to move boxes for packaging, demonstrate automation, or build a prototype for testing sensors, making your own belt is not only cheaper but educational.
Common DIY materials include:
- PVC sheet or fabric belts:smooth, flexible, and easy to connect.
- Old treadmill belts:strong enough for small loads.
- Wooden or aluminum frames:simple to drill and modify.
A budget under $200 can produce a working unit with a small DC motor and belt tensioner.
The key is understanding limits: light loads, short duration, and intermittent operation.
When DIY belts fail, it’s almost always from overloading or poor tracking, not from weak materials.
10.2 When to Move Beyond DIY
Once a belt runs continuously for several hours a day, or carries more than 50 kilograms per meter, the economics change.
At that point, a custom or ready-made PVC conveyor belt or rubber conveyor belt becomes necessary.
Factory-made systems offer consistent thickness, proper vulcanized joints, and stable tension control — things that DIY setups struggle to achieve.
Heavy-duty systems, especially those with heat or chemical exposure, must use rubber conveyor belts designed under ISO or DIN standards.
PVC belts, though cheaper, begin to deform or slip under long-term stress.
For food processing, certified materials are also mandatory to meet hygiene regulations.
10.3 How to Choose a Supplier
Choosing the right manufacturer or distributor saves more than just time.
- Check customization options:size, belt type, and thickness tolerance.
- Ask for documentation:ISO 9001 certification, FDA or EU compliance if food-grade.
- Confirm warranty and service:most reputable suppliers offer at least 12–24 months of coverage.
- Evaluate communication:technical support should be available for installation and maintenance, not just sales.
The best suppliers treat a conveyor belt as part of a system, not just a component.
They’ll help you select the right material for your environment — whether it’s a heat-resistant rubber conveyor belt for a kiln line, or a clean, antistatic PVC conveyor belt for a logistics hub.
DIY projects are great for learning and testing ideas.
Industrial operations demand stability, compliance, and traceable quality.
Knowing which side of that line you’re on is the first real step toward building a conveyor that fits its purpose.