1.Introduction
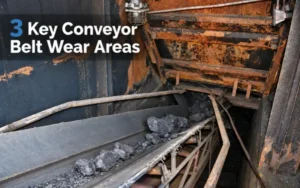
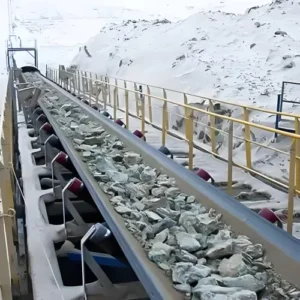
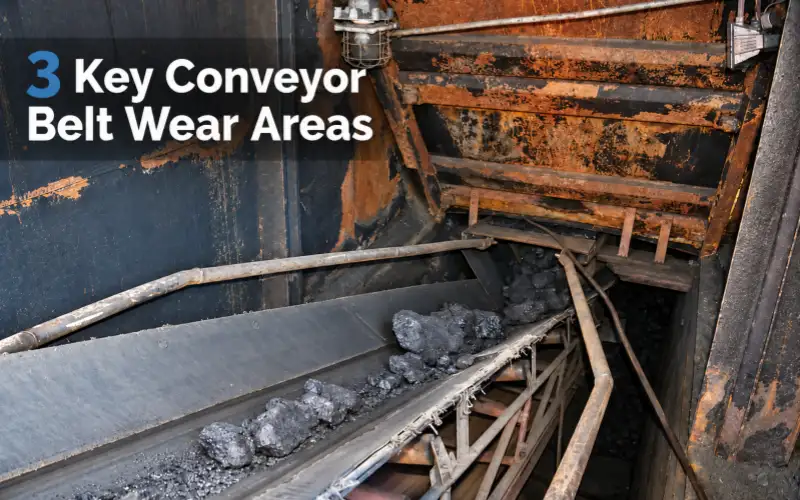
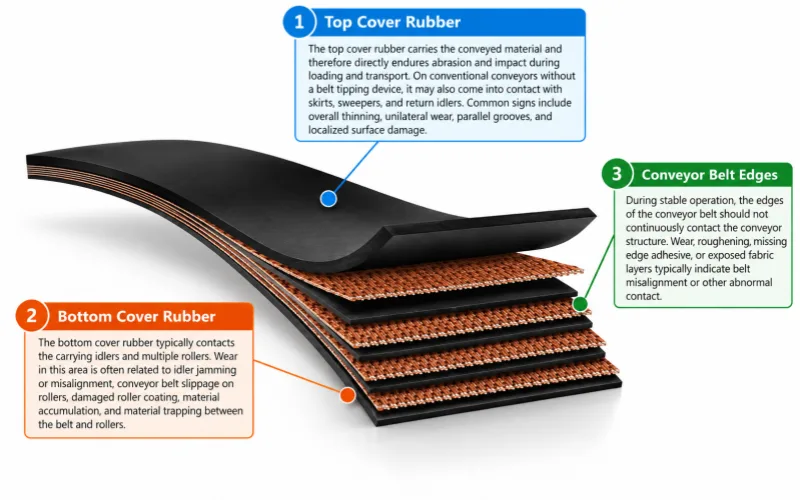
The main conveyor belt wear areas are the top cover, bottom cover, and edges. Conveyed material directly causes top-cover abrasion and impact damage. Loading zones, skirtboards, cleaners, idlers, and pulleys are locations or components associated with wear. Cuts, tears, delamination, and splice failures are damage, not wear areas.
2. What are the three main wear areas of a conveyor belt?
2.1 Top Cover Rubber
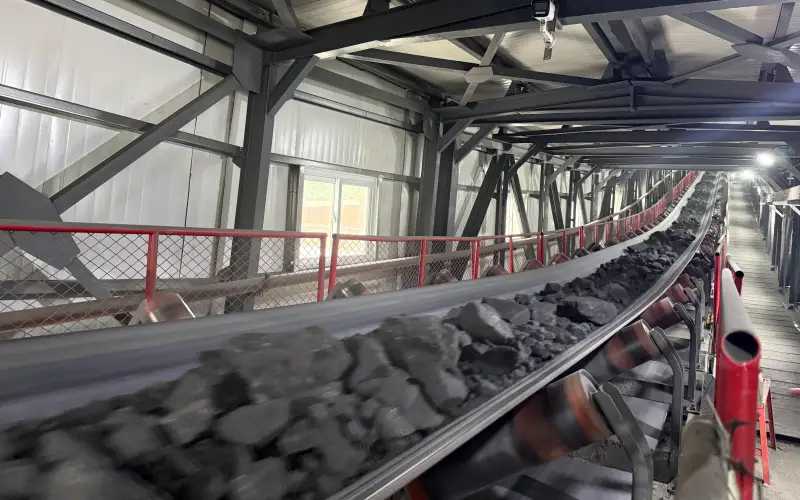
The top cover rubber carries the conveyed material and therefore directly endures abrasion and impact during loading and transport. On conventional conveyors without a belt tipping device, it may also come into contact with skirts, sweepers, and return idlers. Common signs include overall thinning, unilateral wear, parallel grooves, and localized surface damage. These patterns may be related to material abrasion, eccentric loading, particle trapping, or improper component contact.
2.2 Bottom Cover Rubber
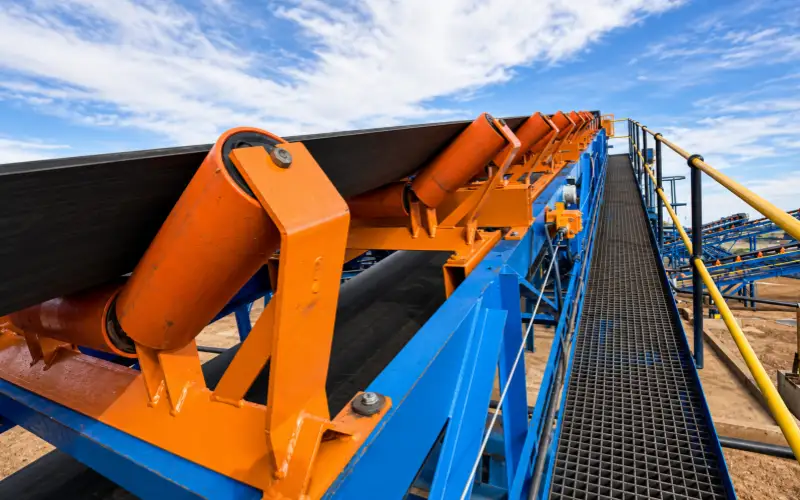
The bottom cover rubber typically contacts the carrying idlers and multiple rollers. Wear in this area is often related to idler jamming or misalignment, conveyor belt slippage on rollers, damaged roller coating, material accumulation, and material trapping between the conveyor belt and rollers. The specific contact surfaces need to be determined based on the conveyor layout, as deflector rollers, pressure rollers, tension, devices, and belt tipping structures may cause different components to contact any cover rubber surface.
2.3 Conveyor Belt Edges
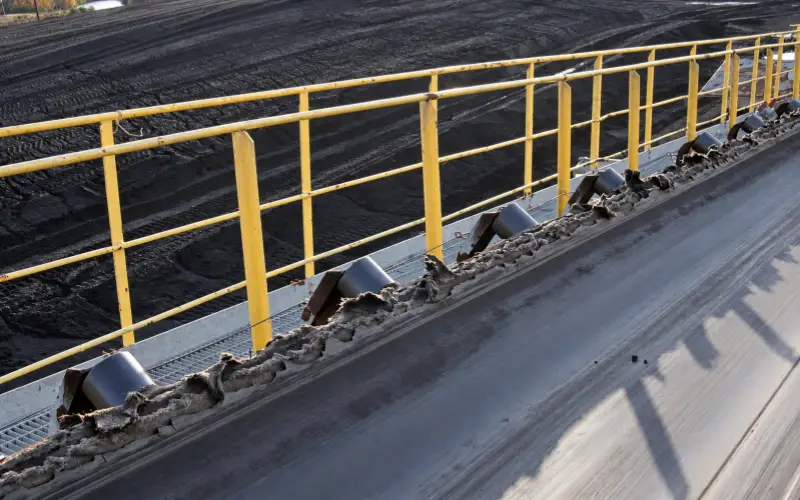
During stable operation, the edges of the conveyor belt should not continuously contact the conveyor structure. Wear, roughening, missing edge adhesive, or exposed fabric layers against the steel cables typically indicate belt misalignment or other abnormal contact. Eccentric loading, material accumulation, misalignment of rollers or idlers, uneven tension, and non-perpendicularity of the joint to the center-line can all cause the belt to shift to one side. Edge wear is merely a consequence; you still need to find the source of the misalignment.
3. Top Cover Wear
The top cover has the most direct contact with conveyed material. Its wear should be evaluated as progressive rubber loss caused by abrasion and sustained friction. Cuts, punctures, tears, and delamination may occur in the same area, but they fall outside this wear assessment.
3.1 Wear at Loading and Transfer Points
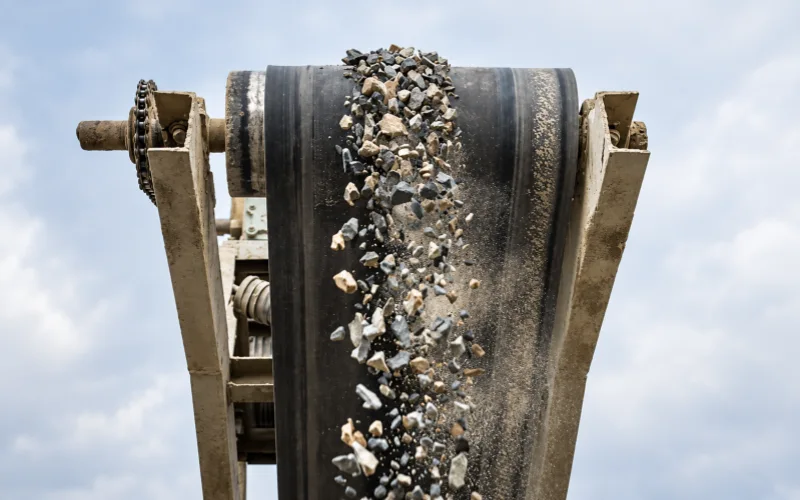
Loading and transfer points often show faster wear because the material has not yet matched the belt’s direction and speed. Particles slide while they land, accelerate, and settle. Greater relative speed, abrasive particles, off-center loading, and inadequate belt support can concentrate wear within a short section. Check whether thinning begins below the loading point and how far it continues downstream.
3.2 Abrasion Along the Material-Carrying Path
After the material stabilizes, the top cover wears mainly along its carrying path. A broad central band that thins slowly can represent expected service wear. Rapid thinning across the same band may indicate highly abrasive material or unsuitable cover performance.
Continuous wear on one side usually points to off-center loading or material shifting across the belt. A narrow longitudinal groove suggests that abrasive particles or another object remain in a fixed position against the moving surface.
3.3 Belt-Cleaner Contact Wear
Belt cleaners maintain continuous contact with the top cover. A shallow and even wear band across the cleaning width may be acceptable. Uneven thinning, local rubber loss, or a fixed groove can indicate incorrect pressure, a worn or angled blade, uneven belt support, or poor installation.
Insufficient pressure increases carryback, while excessive pressure accelerates direct wear. Cleaner adjustment should therefore be evaluated through both cleaning performance and the wear rate within its contact area.
3.4 Carryback and Return-Idler Wear
On a conventional conveyor without belt turnover, the top cover faces downward on the return run and contacts the return idlers. Carryback can accumulate on idler shells or rubber rings and create uneven contact.
If an idler stops rotating, the belt slides across its surface and develops a polished longitudinal band. Compare the band’s position and width with the corresponding idler surface. For a belt-turnover system, confirm which cover contacts the return components before identifying the wear source.
3.5 Reading Top-Cover Wear Patterns
- Broad, even central wear:Usually reflects continuous abrasion from the conveyed material.
- Rapid thinning within the normal material path:Check material abrasiveness, cover thickness, and cover performance.
- Continuous wear on one side:Check off-center loading, material movement, and belt tracking.
- A narrow longitudinal groove:Look for trapped abrasive particles or a fixed contact point.
- A shallow band across the cleaner width:Compare cleaner pressure and alignment with its cleaning performance.
- A polished longitudinal band:Check the corresponding return idler for buildup or seizure.
The wear pattern helps identify the likely source. Confirm it by comparing the location, width, and development rate with the material path and corresponding contact component.
4. Bottom Cover Wear
The bottom cover is the running side of the belt. It primarily contacts carrying idlers and many pulleys. Under normal rolling contact, its wear is usually lower than top-cover wear. Faster rubber loss generally indicates sliding, contaminated contact surfaces, uneven pressure, or misalignment. Confirm the actual contact surfaces from the conveyor layout, especially around bend, snub, take-up, pressure, or turnover arrangements.
4.1 Wear Caused by Carrying Idlers
Carrying idlers roll against the bottom cover and should create limited abrasion when they are clean, aligned, and rotating freely. Wear increases when an idler starts to seize, its surface becomes rough, or buildup changes its effective diameter.
A stopped idler makes the belt slide across a fixed surface. This often leaves a smooth or polished longitudinal band matching the idler contact area. During shutdown, check idler rotation, surface condition, buildup, alignment, and whether the wear width corresponds to a particular shell or rubber ring.
4.2 Pulley and Lagging-Related Wear
The belt should move with the pulley with minimal relative movement. Insufficient traction, unsuitable tension, worn lagging, or contaminated pulley surfaces may allow the belt to slip. Continued slippage can polish, heat, and progressively remove bottom-cover rubber within the pulley contact area.
Uneven lagging or material buildup can also change pressure across the belt width. This may produce greater wear on one side. Before changing the bottom-cover specification, inspect belt tension, pulley alignment, lagging condition, surface buildup, and any signs of slippage.
4.3 Abrasive Material Between the Belt and Pulley
Carryback or spillage may enter between the belt and a pulley. The pulley then presses the material against the bottom cover during each passage. Repeated contact can create localized thinning, rough wear patches, or a narrow worn area near the pulley.
Check where the material originates and whether it collects around the tail, bend, or take-up pulley. Sudden cuts, deep gouges, or cover separation should be recorded separately as mechanical damage.
4.4 Reading Bottom-Cover Wear Patterns
- A wide, smooth, or polished area:Check for belt slippage and reduced pulley traction.
- A narrow longitudinal wear band:Inspect the corresponding carrying idler for seizure, buildup, or a rough surface.
- Greater wear on one side:Check pulley and idler alignment, belt tracking, and uneven buildup.
- Localized wear near a pulley:Look for trapped material, pulley buildup, or uneven lagging.
- Marks repeated at regular spacing:Inspect rotating surfaces for a raised or contaminated area.
Bottom-cover wear usually reflects the condition of the components supporting and driving the belt. Match the pattern with the corresponding idler or pulley before considering a thicker or more wear-resistant bottom cover.
5. Conveyor Belt Edge Wear
Edge wear occurs when one or both belt edges repeatedly rub against fixed conveyor components. The edges have no normal continuous contact surface during stable operation. Polished edges, progressive rubber loss, notching, or fraying therefore indicate abnormal belt movement. The inspection should identify where the belt first leaves its intended centerline.
5.1 Edge-Wear Progression
Early wear usually appears as a shiny, smoothed, or slightly rounded edge. Continued rubbing gradually removes the edge rubber and creates an uneven edge profile. Severe progression may eventually expose fabric or steel cords.
Compare both edges and determine whether the wear affects the entire belt or only one section. Wear extending around the full belt length usually indicates contact at a fixed conveyor location. Wear limited to one belt section may be associated with the splice, belt camber, or local deformation.
5.2 Mistracking as the Direct Cause
Mis-tracking is the most common direct cause of edge wear. The belt moves away from its intended path until one edge contacts the frame, pulley support, guide, or another stationary component.
Mistracking remains an intermediate condition. Adjusting a tracking idler may temporarily change the belt position. The wear can return if off-center loading, buildup, component misalignment, uneven tension, or an inaccurate splice remains unresolved.
5.3 Root Causes Behind Edge Wear
The main conditions that move a belt toward the conveyor structure include:
- Material loaded away from the belt center.
- Chute blockage or trajectory changes that shift the load.
- Material buildup on pulleys or return idlers.
- Seized, tilted, or misaligned idlers.
- Pulley shafts that are not parallel.
- Conveyor structures that are out of alignment.
- Uneven belt tension or an off-center take-up.
- A splice that is not square to the belt centerline.
- Belt camber caused by storage, handling, or uneven tension.
Several causes may act together. Off-center loading can move the belt sideways, while buildup on a return idler prevents it from returning to the center.
5.4 Locating the Cause from the Starting Point of Edge Wear
The point where the belt first moves sideways usually provides the clearest indication of the source:
- Deviation begins after the loading zone:Check load centering and material trajectory.
- Deviation begins after a pulley:Check pulley alignment and surface buildup.
- The belt changes direction near one idler set:Check idler rotation, alignment, and frame position.
- The belt position changes when the splice passes:Check splice alignment against the belt’s average centerline.
- The belt remains centered when empty but wanders when loaded:Check load distribution and belt support.
- The belt alternates between both sides:Check for multiple adjustments or alignment errors at different conveyor positions.
Follow the belt from a stable, centered section toward its first deviation. The final rubbing point may be some distance from the component or operating condition that initiated the mistracking.
6. Distinguishing Normal and Abnormal Wear
Normal wear is gradual and reasonably predictable. Abnormal wear develops faster, appears outside the expected contact path, or concentrates within a specific area. The remaining cover thickness alone cannot distinguish them. A heavily worn belt may have reached that condition gradually, while a newer belt may already show an abnormal wear pattern.
6.1 Normal Wear Characteristics
Normal wear generally follows the belt’s regular contact conditions:
- Top-cover wear remains mainly within the normal material path.
- Rubber loss is relatively even across the contacted area.
- Bottom-cover wear develops slowly under normal idler and pulley contact.
- Both edges remain free from continuous structural contact.
- The wear rate remains close to previous inspection records.
- Remaining cover thickness can be predicted for the next maintenance period.
Normal wear still requires monitoring. It describes how the rubber is being consumed and does not confirm that sufficient cover thickness remains.
6.2 Abnormal Wear Indicators
Abnormal wear usually shows a change in distribution or development rate:
- One side wears noticeably faster than the other.
- A narrow wear band corresponds to a fixed component.
- One location becomes thinner much faster than surrounding areas.
- Wear spreads outside the normal material or component contact path.
- Edge wear develops through repeated contact with the structure.
- The wear rate increases after changes in material, loading, speed, or maintenance.
- A previously stable wear pattern begins progressing rapidly.
These conditions indicate that the belt is experiencing additional friction, sliding, uneven pressure, or an operating change.
6.3 Wear Rate as the Deciding Factor
A single thickness reading only shows the current condition. Wear rate shows whether the condition is stable or worsening:
Wear Rate = (Previous Cover Thickness − Current Cover Thickness) ÷ Operating Period
Measure the same marked positions during each inspection. If operating hours do not reflect actual production, compare thickness loss against the quantity of material conveyed. This prevents low-use and high-use periods from being judged by the same time interval.
6.4 Belt Specification and Conveyor Condition
Localized or one-sided wear usually directs your inspection toward the conveyor system. Broad and relatively uniform wear that progresses too quickly may indicate inadequate cover thickness or unsuitable abrasion resistance, especially after mechanical causes have been excluded.
This distinction helps you decide whether to correct the conveyor, adjust the belt specification, or perform both actions before the next replacement.
7. Tracing Conveyor Belt Wear to Its Source
Tracing wear requires separating three different points:
Wear location on the belt → Contact point on the conveyor → Root cause of the contact
For example, a conveyor frame may directly wear the belt edge, while off-center loading causes the belt to move toward that frame. Correcting only the final contact point may allow the same wear to return elsewhere.
7.1 Belt Location and Conveyor Location
The wear location moves continuously with the belt, while the component causing it usually remains fixed on the conveyor. Record the affected cover, left or right side, wear width, wear length, and its position relative to the splice.
You should then identify where that section first contacts an abnormal surface. This distinction prevents a worn area on the belt from being incorrectly treated as the physical source of wear.
7.2 Practical Tracing Sequence
After the conveyor has been properly stopped and isolated:
- Mark the beginning and end of the worn area on the belt.
- Record whether it affects the top cover, bottom cover, or either edge.
- Measure the width and position of the wear across the belt.
- Use the splice or another permanent belt feature as a reference point.
- Observe the marked section through a complete operating cycle from a safe position.
- Identify the first abnormal contact or movement.
- Compare the wear width with the cleaner, idler, pulley, or structural contact area.
- Recheck the marked location after corrective work to confirm that wear has stabilized.
The point where wear becomes visible may appear after the belt has already passed the component that created it. Begin tracing from the first change in belt movement or contact.
7.3 Pattern Frequency and Contact Width
The distribution of wear provides additional evidence:
- A longitudinal band extending around the entire belt:Usually indicates continuous contact with a fixed conveyor component.
- Wear limited to one section of the belt:Check the splice, belt camber, or localized belt deformation.
- Marks appearing at regular intervals:Compare their spacing with the circumference of nearby rotating components.
- Wear returning at the same belt position each cycle:Check a belt-based feature or repeated component interference.
- A wear width matching an idler shell, rubber ring, or cleaner blade:Inspect that component first.
- Top-cover, bottom-cover, and edge wear developing together:Look for a cause affecting belt movement across several conveyor sections.
7.4 Typical Wear Chains
Common wear chains show how one operating problem can affect more than one belt area:
- Off-center loading → uneven top-cover wear → mistracking → edge wear
- Carryback → return-idler buildup or seizure → top-cover wear → mistracking
- Reduced pulley traction → belt slippage → accelerated bottom-cover wear
- A seized carrying idler → sliding contact → a longitudinal bottom-cover wear band
Treat these chains as inspection routes. Follow each stage until you find the earliest condition that can be corrected.
8. Reducing Wear in the Three Areas
Wear-control measures should match the affected belt surface. Conveyor conditions determine where abnormal contact occurs, while the belt specification influences how quickly the rubber wears under normal operating conditions. Mechanical causes should therefore be corrected before changing the cover compound or thickness.
8.1 Top-Cover Wear Control
Because conveyed material is the main source of top-cover wear, control how the material reaches and travels on the belt. Load material near the centerline, align its direction with belt travel, reduce unnecessary drop height, and limit the speed difference between the material and the belt. These measures reduce impact and relative sliding at loading and transfer points.
Belt cleaners should contact the surface evenly and operate at the specified pressure. Excessive pressure, uneven installation, or worn components can increase friction. Insufficient cleaning leaves carryback on the return strand, where abrasive material and contaminated return idlers may accelerate top-cover wear.
After operating conditions are stable, review the cover compound and thickness against the material’s abrasiveness, particle size, temperature, oil or chemical exposure, and loading conditions. Greater abrasion resistance can reduce rubber loss, while additional cover thickness provides a larger wear allowance.
8.2 Bottom-Cover Wear Control
Carrying idlers should rotate freely and remain correctly aligned. Seized idlers, damaged shells, and hardened buildup can create sliding contact or concentrated pressure on the bottom cover. Regular removal of buildup also helps maintain consistent idler diameter and belt support.
Pulley surfaces and lagging should be clean, even, and securely bonded. Adequate traction and correctly controlled belt tension help prevent slippage and the resulting heat and friction. Material should also be prevented from entering between the belt and tail, bend, or take-up pulleys.
8.3 Edge-Wear Control
Reducing edge wear requires restoring a stable belt path. Correct off-center loading, remove buildup, align pulleys and idlers, and check the conveyor structure and take-up system. If the belt shifts as the splice passes a fixed point, inspect splice alignment and belt straightness.
The first location where the belt begins moving away from the centerline is usually more useful than the final point where the edge contacts the structure.
8.4 Corrective Action Priority
Use the following sequence when addressing excessive wear:
- Remove trapped material, foreign objects, and fixed structural contact.
- Correct the loading position and material trajectory.
- Restore the rotation, cleanliness, and alignment of idlers and pulleys.
- Eliminate pulley slippage and correct lagging or tension problems.
- Set belt cleaners correctly and control carryback.
- Measure the wear rate again after corrective work.
- Review the cover compound, thickness, and belt construction if wear remains excessive.
Cover abrasion resistance and thickness can influence service life, but belt tracking and equipment alignment require mechanical correction.
9. Conclusion
The top cover, bottom cover, and edges develop wear under different contact conditions. Identify the affected surface, compare the wear pattern and rate, and trace it to material flow or conveyor components. Correct operating causes before reviewing the cover compound, thickness, or belt construction.
10. FAQs
1. Are the Center and Shoulder Zones Separate Wear Areas?
At the primary classification level, the center, shoulders, and outer margins are subzones of the top or bottom cover. They are not additional main wear areas. During inspection, however, these zones should be recorded at fixed transverse positions so changes in wear distribution can be compared over time.
2. How Should the Left and Right Belt Edges Be Identified?
Left and right should follow a fixed reference, preferably when looking in the direction of carrying-run travel. The return strand moves in the opposite direction, so changing the observation position can reverse the labels. Inspection records should state the reference direction or use a permanent site designation such as the walkway side or drive side.
3. How Does a Belt Turnover Affect Wear-Area Classification?
Top and bottom cover names follow the intended belt surfaces rather than their temporary physical orientation. A turnover rotates the return strand, allowing the bottom cover to contact return idlers through part of the conveyor. The turnover points and belt orientation must therefore be mapped before linking a wear area to a particular component.
4. How Does Reversible Operation Affect Wear-Area Distribution?
Reversing the running direction does not exchange the top and bottom covers. The same top cover continues to carry the material. However, the active loading and discharge positions may change, causing wear to accumulate differently at the two ends. Inspection records should identify the operating direction and approximate running time in each direction.
5. How Are Wear Areas Classified on Chevron or Cleated Belts?
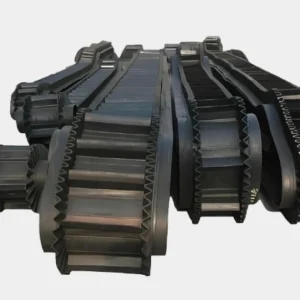
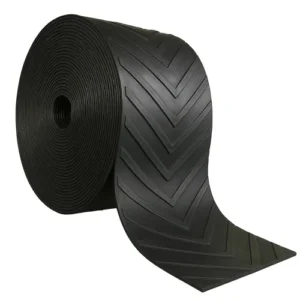
The top cover, bottom cover, and edges remain the three main areas. On the carrying side, profile crowns, load-facing surfaces, back surfaces, roots, and valleys can be recorded as top-cover subareas. Profile height may decrease before the flat cover becomes noticeably thinner, so profile wear and base-cover thickness should be recorded separately.
6. How Should Wear Extending from the Cover to the Edge Be Recorded?
Wear extending across the outer cover margin and around the belt edge should be recorded as two connected areas: cover wear and edge wear. The report should identify the affected cover, distance from the edge, edge side, and transition length. This allows the progression of both areas to be compared independently.