1.Why and How I Splice Conveyor Belts the Right Way
If there’s one thing I’ve learned after years of working with conveyor systems, it’s this: the splice decides the belt’s future. You can have the best material, the perfect alignment, even brand-new rollers—but if the splice fails, everything fails. That’s why I take splicing seriously—because I’ve seen firsthand how a poorly executed splice conveyor belt job can shut down a line for hours, even days.
When I walk up to a belt that needs joining, the first thing I check isn’t the tools or the glue—it’s the belt’s structure. Is it EP fabric? NN? Steel cord? The internal construction tells me everything I need to know about how to proceed. You’d be surprised how many breakdowns I’ve diagnosed over the years that trace back to someone choosing the wrong conveyor belt splicing procedure for the type of belt they were working with.
EP belts—those are reliable, common, and easy to work with if you know your steps. NN belts need a bit more finesse because of their higher stretch rate. Steel cord belts? Those are a different beast entirely. You need precision, pressure, and time on your side. I don’t touch those without the right vulcanizing press and full splice kits.
PVC belts, on the other hand, belong to a completely different category. They’re thermoplastic, not thermoset. I’ve never seen a serious technician confuse the two—not because it’s a rule in a manual, but because you feel the difference. The tools are different. The smell when you heat them is different. The whole process—finger cutting, heat pressing, cooling—is its own workflow.
So no, it’s not about guessing or experimenting. It’s about knowing. That’s what this guide is for: to give you real, structured advice based on the type of belt you’re working with. Whether you’re figuring out how to splice a conveyor belt in the field, or training a new tech in your plant, these methods work—because they come from the floor, not just the book.
Let’s begin where it matters most: the structure beneath the surface.

2. Splice Rubber Conveyor Belt
2.1 Rubber Conveyor Belt Types and Structural Differences
When I walk up to a belt that needs joining, my first step isn’t to grab the tools—it’s to figure out exactly what type of belt I’m dealing with. You can’t choose the right way to splice conveyor belts unless you know the belt’s internal structure. It’s like trying to fix an engine without knowing if it runs on diesel or gasoline.
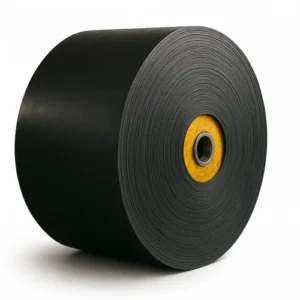
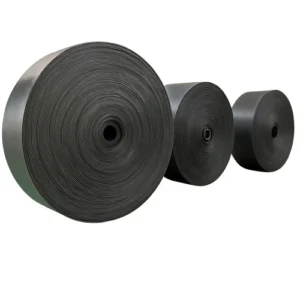
EP fabric belts are the most common in heavy industry. The polyester warp gives them strength, while the nylon weft offers flexibility. This balance makes them excellent for applications where both load capacity and resistance to stretching matter. In practice, they handle hot vulcanizing very well, and if you follow the correct conveyor belt splicing procedure, the joint can reach 90–100% of the belt’s original strength. They can also be cold spliced in the field when speed and convenience are more important than ultimate tensile strength.
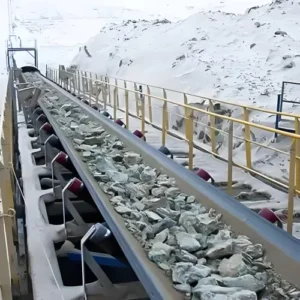
Then there are NN belts—nylon in both warp and weft. These belts absorb shock better than EP, which is why I see them in impact-heavy applications like mining or quarry work. The trade-off is that they stretch more under load, so splice alignment and tension calibration become critical. If you get lazy here, your splice will creep, and tracking will be a constant headache.
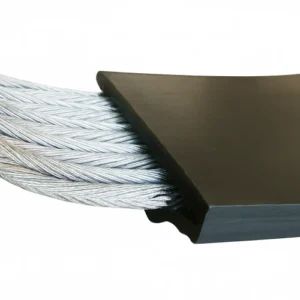
Steel cord belts, however, are in a league of their own. These belts have embedded steel cables running lengthwise, giving them extreme tensile strength. Splicing them isn’t just about bonding surfaces—it’s about aligning each cord individually, ensuring uniform load distribution, and using the exact temperature, pressure, and curing time during hot vulcanizing. I’ve seen more failures here than anywhere else, usually because someone tried to cut corners. Steel cord splicing is slow, meticulous work, but if you do it right, the splice is as strong as the belt itself.
Understanding these differences isn’t academic—it’s essential. Choosing the wrong method from the many conveyor belt splice types will shorten belt life, increase downtime, and cost far more in the long run. I’ve learned to respect each belt for what it is and to apply the method that matches its design and working conditions.
Next, I’ll walk you through each splicing method for these belts—hot vulcanizing, cold bonding, and mechanical fastening—so you can match the process to the belt type and keep your system running at its best.

2.2 Overview of Available Splicing Methods for Rubber Belts
Whenever someone asks me the “best” way to splice conveyor belts, I always give the same answer: It depends. I know, it’s not the magic bullet they were hoping for—but in this line of work, there is no single best. The right method depends on your belt’s structure, the load it carries, the speed it runs, and how much downtime you can afford before someone starts yelling about lost production.
For rubber belts, there are three main approaches: hot vulcanizing, cold bonding, and mechanical fastening. Each has its place, and each has its own set of pros, cons, and “if you do this wrong, you’ll regret it” moments.
Hot vulcanizing is my personal favorite when conditions allow. It’s the gold standard for achieving near-original belt strength—up to 100% if you follow the conveyor belt splicing procedure to the letter. The process uses heat, pressure, and uncured rubber to chemically bond the belt ends together. It’s not fast, it’s not portable, and it requires the right equipment, but when done properly, the splice is as smooth and durable as the rest of the belt. I’ve seen hot vulcanized joints outlast the belts themselves.
Cold bonding is the field-friendly cousin. Instead of heat, it uses a chemical adhesive to fuse the ends. It’s faster, doesn’t require heavy presses, and is perfect for emergency repairs in the middle of nowhere. The trade-off? You’ll get about 60–70% of the belt’s original strength, so it’s not ideal for high-tension, heavy-load applications. Think of it like a spare tire—it’ll get you moving, but you wouldn’t race on it.
Then there’s mechanical fastening, the speed demon of the group. With metal fasteners or clips, you can connect a belt in minutes. It’s perfect for temporary solutions, frequent belt changes, or systems where downtime costs a fortune. But, it’s also the noisiest and least smooth option—material can catch on the fasteners, and they can wear rollers faster. I use them when speed matters more than aesthetics or long-term durability.
Here’s the bottom line: each of these conveyor belt splice types has its place. The trick is knowing which tool to pull out of the box for which situation. That’s where experience comes in—because the difference between a good splice and a great splice often comes down to the judgment of the person holding the knife, adhesive, or vulcanizer controls.
Next, I’ll walk you through hot vulcanizing in detail, because while it’s the most demanding method, it’s also the one that can make your splice truly bulletproof.

2.3 Hot Vulcanization for EP / NN Belts
If there’s one method that makes me feel like a conveyor belt surgeon, it’s hot vulcanizing. When I want a splice conveyor belt job that’s rock-solid and nearly invisible in operation, this is my go-to. For EP (polyester/nylon) and NN (nylon/nylon) belts, it’s the closest thing to restoring the belt to its factory strength—up to 90–100% of the original tensile rating.
Here’s how I do it in the field, step by step:
- Cut and Square the Belt Ends
I start by marking and cutting both ends perfectly square. If the cut’s off, everything else will be off. A crooked splice is like driving with misaligned wheels—you’ll feel it right away. - Skive the Layers in Steps
I skive the fabric plies into a step pattern. This increases bonding surface and ensures even load transfer across the splice. Skip this, and you’re basically asking the joint to fail early. - Surface Preparation
This is the messy but critical part: grinding to remove oxidized rubber, cleaning to get rid of dust, and making sure the surfaces are completely dry. Any contamination here will show up later as a weak spot. - Apply Bonding Layers and Cover Rubber
I brush on bonding cement in thin, even coats and place uncured cover rubber between each ply layer. Think of it like making a layered cake—except this one has to handle tons of tension. - Assemble in the Vulcanizing Press
Once stacked, I clamp the splice in the press. Heat and pressure are set according to belt specifications. Too hot and you’ll scorch the rubber; too cold and you’ll never get full adhesion. - Curing Under Controlled Conditions
I keep the splice under pressure for the exact time needed—no more, no less. It’s tempting to rush, but good vulcanizing is all about patience. - Cool Down Under Pressure
I always let the splice cool while still in the press. Releasing early can cause warping or delamination. - Trim and Inspect
Once cooled, I trim excess rubber, check alignment, and run a tension test. A good splice should be seamless in appearance and performance.
- Cut and Square the Belt Ends
Hot vulcanizing isn’t the quickest method, but it’s the one I trust for long-term durability. When done right, you’ll forget where the splice even is—until someone asks why your belt is still running perfectly after years of service.
Next up, I’ll cover cold bonding—faster, more flexible, but with trade-offs you need to know.

2.4 Cold Vulcanization for EP / NN Belts
Cold vulcanizing is like the quick-response unit of the splice conveyor belt world. It’s the method I turn to when the clock is ticking, the line is down, and a hot press just isn’t practical. Instead of heat, we use chemical bonding agents—making it perfect for field repairs, remote sites, or emergency situations. For EP and NN belts, it’s fast and effective, though not quite as strong as hot vulcanizing (think 60–70% of original strength).
Here’s my field-proven process:
- Prepare and Square the Ends
Just because it’s “cold” doesn’t mean it’s sloppy. I start by cutting both ends square. A crooked cut will haunt you later when you’re trying to align the splice. - Grind the Surface
Using a grinder, I remove the top layer of rubber to expose clean fabric plies. This increases the adhesive’s grip. If you skip this step, you’re basically gluing over dust—and it will fail. - Clean Thoroughly
I wipe both ends with a solvent to remove dust, oil, or moisture. Adhesive hates dirt. In high-humidity environments, I’ll even use a heat gun to ensure everything is bone-dry before moving on. - Mix the Adhesive (if two-part)
Some adhesives require mixing before application. I measure precisely—too much hardener and you get a brittle joint; too little and it never cures properly. - Apply the Adhesive
I brush adhesive onto both ends in thin, even coats. The first coat soaks into the fabric; the second creates the bonding layer. I wait until the surface is tacky—not wet—before joining. - Join and Clamp
Once ready, I bring the ends together carefully, making sure the plies align perfectly. Then I clamp them under steady pressure to ensure a uniform bond. - Curing Time
Cold vulcanizing isn’t “instant.” I let the joint cure for 24–48 hours depending on the adhesive. Trying to run the belt too soon is the fastest way to undo all your hard work. - Inspect the Splice
After curing, I inspect the bond visually and by hand, checking for gaps or soft spots. If it passes, it’s ready for service.
- Prepare and Square the Ends
Cold vulcanizing is the rescue plan—not the long-term champion. But when you need the belt running again fast, this method can save the day (and your production schedule).

2.5 Mechanical Fasteners for Rubber Conveyor Belts — Materials, Styles, and Connection
When you need to splice conveyor belts quickly without a vulcanizing press, mechanical fasteners are the go-to solution. To get a strong, long-lasting connection, you need to choose the right material, the right fastener style, and install it correctly.
1. Fastener Materials
- Carbon Steel– Strong and economical for dry, non-corrosive conditions.If you use it in a humid environment or at a port, it is recommended that you do not use this type of steel as carbon steel is easily corroded.
- Stainless Steel– Corrosion-resistant, ideal for wet or food-grade environments.The overall cost-effectiveness is the highest, and it can be used in a variety of conventional environments, but it is not recommended to be used in high temperature environments and acidic corrosive environments for a long time. Therefore, it is not recommended to use in acid and alkali resistant belts and conveying high-temperature coal ash.
- Alloy Steel– High-strength option for extreme tension and heavy impact loading.It is not recommended to use it in strong acid and alkali environments, or in low temperature environments. When the temperature is below 40 degrees, its toughness will decrease, affecting its performance.
2. Common Fastener Styles for Rubber Belts
1.Clipper Fastener
With aggressive serrated teeth, this fastener grips deep into the belt cover and carcass, making it perfect for heavy-duty EP or NN belts in mining, cement, and bulk handling.
- Best for:Long-term, high-strength splices where downtime is critical.

2.Hinged Fastener
Recognized by its wing-like flanges, it’s quick to install and works well with smaller pulley diameters, making it a favorite for medium-duty belts in quarries, agriculture, and on-site maintenance.
- Best for:Temporary to semi-permanent splices that need flexibility and speed.

3.Flat Plate Fastener
A solid plate clamping design that spreads load evenly across the belt end, suitable for a variety of fabric-based rubber belts.
- Best for:General-purpose splicing where space and pulley size aren’t restrictive.

3. Step-by-Step Connection Procedure
1.Prepare and Square the Belt Ends – Use a belt cutter or straight edge to achieve perfectly square ends. Misalignment will cause uneven tension and shorten splice life.
2.Mark Hole Positions – Align the fastener template with the belt centerline. Mark each hole for precision grip.
3.Punch the Holes – Use the correct punch size. Avoid tearing fabric plies; clean cuts maximize holding power.
- Clipperand Hinged fasteners often need deeper penetration to seat teeth or wings.
- Flat plates require evenly spaced bolt/rivet holes for uniform clamping.
4.Install the Fastener –
- Clipper:Tap serrated section so teeth embed into the belt cover.
- Hinged:Align wings flush with the belt surface.
- Flat Plate:Position plates on both sides for full overlap.
5.Secure the Fastener – Tighten bolts or rivets gradually from the center outward. For hinged designs, leave slight movement for pulley passage.
6.Insert Connecting Pin (if required) – Ensure smooth movement. Nylon-coated pins reduce noise and wear.
7.Test Run at Low Speed – Observe for lifting edges, misalignment, or unusual noise. Stop to adjust if necessary.
8.Final Tightening & Inspection – Once aligned, fully tighten and verify all components are seated correctly.
9.Routine Maintenance – Inspect weekly for heavy loads or monthly for light duty. Replace worn parts before failure.
Pro Tip: Even the strongest Clipper fastener will fail early if installed poorly, while a Hinged or flat plate can last surprisingly long with proper technique. In mechanical splicing, precision matters more than the type of fastener.

2.6 Splicing Steel Cord Conveyor Belts — My Field-Tested Approach
If you’ve ever worked with steel cord conveyor belts, you know they don’t forgive mistakes. These belts carry massive loads over long distances, and every splice is under constant stress. I’ve seen perfectly good belts scrapped early because the splice wasn’t done right. So here’s how I approach it when I want the splice to last for years, not months.
1. Understanding the Challenge
Steel cords aren’t just reinforcement—they are the backbone of the belt. Each cord must line up exactly with its original position so the tension is evenly shared. One misaligned cord can throw off the load balance and start tearing the splice apart from the inside. That’s why I stick to hot vulcanizing for every steel cord job. It’s the only method that restores the belt’s original strength.
2. My Step-by-Step Process
1.Tag Every Cord
Before cutting, I mark and number every steel cord. This isn’t optional—mixing them up will create uneven pull across the belt.
2.Cut in a Stepped Pattern
I never cut cords straight across. A staggered, step-like cut spreads the stress and prevents a “hard break” at one point.
3.Rust Protection First
The moment those cords are exposed, I coat them with rust inhibitor. Even a little moisture can start corrosion that keeps eating away after the splice is done.
4.Fill Between the Cords
I use uncured rubber to restore the belt’s profile and cushion between cords. The filler has to bond completely—no voids allowed.
5.Cover Layers Matter
Top and bottom covers are laid so there’s a smooth, even thickness. Any trapped air is trouble waiting to happen, so I work methodically to press it out.
6.Precise Vulcanizer Setup
In the press, I double-check alignment and settings. I control temperature and pressure like a recipe—too hot, too cold, too quick, too slow, all can ruin the splice.
7.Full Cooling
I don’t rush cooling. Pulling the belt out warm is asking for internal separation. I let it cool naturally in the press.
8.Final Inspection and Record
Once done, I measure splice length, check cord alignment, and note every detail for the maintenance log. This record saves headaches later.
3. My Key Advice
- Keep the work area dry—moisture is the silent killer of steel cord splices.
- Use trained hands only; this isn’t a job for first-timers.
- Don’t cut corners on materials—cheap filler or covers are a false economy.
A well-made steel cord splice is invisible in operation—you’ll forget it’s there. A bad one will remind you every time it fails. Do it right the first time, and it’ll handle the pressure for years.

2.7 Choosing the Right Rubber Belt Splice — My Quick-Reference Guide
Over the years, I’ve lost count of how many times someone asked me, “Which splice should I use?” Truth is, there’s no one-size-fits-all answer. The right splice depends on your belt type, your operating environment, your budget, and how much downtime you can afford. Here’s my own go-to table, followed by my personal take on each option.
1. Quick Selection Table
Belt Type | Splice Type | Strength | Typical Use | My Verdict |
EP / NN | Hot Vulcanizing | ★★★★★ | Cement, mining, power plants | The gold standard for permanent joints |
EP / NN | Cold Vulcanizing | ★★★★ | Field repairs, temporary lines | Great for emergencies, not for life-long runs |
EP / NN | Mechanical Fastener | ★★ | Short-term use, easy removal | Quick but not for high tension |
Steel Cord | Hot Vulcanizing | ★★★★★ | Long-distance, high-load systems | Only method worth using for steel cord |
2. My Notes and Advice
- Hot Vulcanizing for EP/NN Belts
If you have the time, equipment, and trained technicians, this is hands down the best choice. It restores almost all the belt’s original strength and works well for high-load applications. Just remember, sloppy alignment here wastes all your effort. - Cold Vulcanizing for EP/NN Belts
Perfect when you’re in the middle of nowhere and can’t set up a vulcanizing press. I’ve done cold splices that lasted surprisingly long—but only when the prep was meticulous. Humidity is your enemy here. - Mechanical Fasteners for Fabric Belts
I use these when speed matters more than strength—like temporary bypass lines or belts you need to swap frequently. Keep in mind, they can catch material and wear pulleys faster. Choose stainless or alloy versions if corrosion is a concern. - Hot Vulcanizing for Steel Cord Belts
Don’t even think about other methods. Steel cord splicing needs precision, and hot vulcanizing is the only way to match original tensile strength. Anything else is a ticking time bomb.
- Hot Vulcanizing for EP/NN Belts
3. My Shortcut Rule
If the belt is critical to production, go hot vulcanizing. If it’s temporary or low load, cold vulcanizing or mechanical fasteners will do. And if you’re handling steel cord, you already know—you’ve got just one real choice.
When in doubt, I ask myself: “Do I want to fix this again in six months?” If the answer is no, I go for the method that will outlast the belt itself.

3.Splice PVC Conveyor Belt
3.1 PVC Conveyor Belt — Characteristics & Application Realities
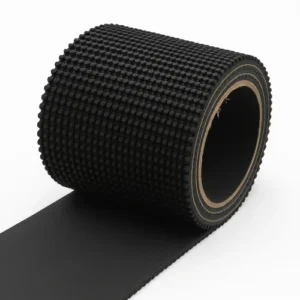
When I hear someone say, “PVC belts are easy—you just melt them together,” I know they haven’t spent much time in the field. Yes, PVC is a thermoplastic, which means the cover softens under heat and can fuse seamlessly. But here’s the truth: that’s only the outer skin. Inside every PVC conveyor belt is a fabric carcass—usually polyester or nylon—that doesn’t melt at all. If you focus only on the cover, you’re building a splice that looks good on day one and fails from the inside out.
1. The Layered Truth
Think of a PVC belt as a sandwich:
- Top PVC Cover – Smooth, heat-fusible, sometimes textured for grip or hygiene.
- Fabric Carcass – Woven polyester or nylon; this is the backbone that carries the belt’s tension.
- Bottom Layer – Here’s where many people get caught out. Some belts have a PVC-coated bottom for two-sided protection; others leave the fabric exposed for better friction on slider beds or to reduce cost.
That last point is critical. A belt with a coated bottom will fuse on both sides during a heat splice. A belt with an exposed fabric underside needs extra attention—mechanical reinforcement, adhesive bonding, or a combined method—because heat alone won’t join that layer.
2. Why This Matters in the Field
I’ve seen flawless-looking finger welds peel apart in weeks because the splicer never secured the carcass. The PVC top was perfectly bonded, but the internal fabric wasn’t engaged. On high-speed lines, that’s not just a failure—it’s an expensive, noisy mess. Proper splice conveyor belt work on PVC means you bond the cover and join the carcass as one unified structure. Miss either step, and you’ve got a weak link waiting to snap.
3. Where PVC Belts Excel
PVC belts are unbeatable in:
- Food Processing – Hygienic, easy to clean, resistant to fats and oils, FDA/EU compliant.
- Logistics & Parcel Sorting – Smooth tracking, ideal for diverters and sorters at high speeds.
- Light to Medium Packaging – Gentle product handling without scuffs or residue.
But in all these cases, precision splicing is non-negotiable—especially for belts with exposed fabric bottoms, where contamination, misalignment, or skipped reinforcement will shorten lifespan drastically.
4. My Go-To Prep Tips for PVC Splicing
- Identify the Bottom Type – Coated or bare fabric; this determines your carcass joining method.
- Clean Everything – Both PVC cover and fabric must be spotless; even fine dust can ruin a bond.
- Square the Ends – Misaligned carcass fibers will cause the belt to wander.
- Control Heat – PVC typically fuses at 150–180°C; too hot risks warping, too cold leaves a weak joint.
- Reinforce Fabric Layers – Adhesives or stitching for bare fabric bottoms; match the system to the application.
- Cool Under Pressure – Keeps the joint flat and prevents early delamination.
PVC belts aren’t “easier” or “harder” to splice—they’re just different. Respect both the PVC cover and the fabric carcass, adapt to the bottom finish, and your splice will last as long as the belt itself. Ignore the fabric, and you’re simply hiding a failure under a shiny layer of melted plastic.

3.2 Overview of PVC Splicing Methods
When I’m called in to splice conveyor belt systems made of PVC, I know I’ve got three main tricks in my toolbox: the finger splice, the overlap weld, and mechanical fasteners. Each has its own strengths, weaknesses, and very specific situations where it shines. Choosing the right one isn’t just about knowing the types of conveyor belt splices—it’s about matching the method to the belt’s construction, bottom finish, and operating conditions.
1. Finger Splice with Heat Press
This is my go-to for permanent, high-performance joints. The conveyor belt splicing procedure starts by CNC-cutting both ends into matching “fingers” that interlock like puzzle pieces. With heat and pressure, the PVC cover fuses into a seamless surface that glides over pulleys without a bump.
Step Highlights:
- Cut fingers precisely to prevent tracking issues.
- Heat press at 150–180°C, maintain even pressure.
- Cool under compression to avoid warping.
Bottom-Layer Note:
- PVC-coated bottom:Both covers fuse in one pass.
- Bare fabric bottom:I bond the carcass first before heat-fusing the top layer—this prevents early layer separation.
2. Overlap Weld
The overlap weld is the quick, budget-friendly way to splice conveyor belt sections for lighter loads and slower speeds. The ends are skived at an angle, overlapped, and heat-welded. It’s not as strong as a finger splice, but it’s fast and clean.
Step Highlights:
- Skive ends at ~45° to increase bonding area.
- Apply hot air or heated platen until PVC softens.
- Press firmly, then cool before loading.
Bottom-Layer Note:
- PVC-coated bottom:Standard weld is enough.
- Bare fabric bottom:Adhesive reinforcement is essential for the carcass layer.
3. Mechanical Fasteners
When downtime is more expensive than looks, mechanical fasteners save the day. This conveyor belt splice type is installed with simple tools and works well for temporary or easily replaceable belts.
Step Highlights:
- Square ends and punch holes according to the fastener type.
- Align and secure, checking tension before operation.
Bottom-Layer Note:
Bare fabric bottoms should have edges sealed to prevent fraying and moisture ingress.
My Field Advice
Whenever you splice conveyor belt joints, think beyond the visible PVC cover. The conveyor belt splicing methods that last are the ones that join both the cover and the carcass as a single, unified structure. A flawless-looking weld that ignores the fabric will fail faster than you think.
By knowing the conveyor belt splice types available, following the right conveyor belt splicing procedure, and respecting the belt’s construction, you’ll create a joint that runs smooth, lasts long, and keeps you out of the repair bay.

3.3 Finger Splicing
If you ever see me roll up with my heat press, CNC cutter, and a very serious coffee in hand, it’s probably because I’m about to splice conveyor belt sections using the finger method. This is the gold standard for PVC belts—strong, smooth, and perfect for high-speed applications. Unlike some types of conveyor belt splices that rely purely on adhesives or clamps, a finger splice actually melts the PVC cover into one continuous piece. When done right, it feels like the belt was never cut at all.
1.Step-by-Step Conveyor Belt Splicing Procedure
1.Preparation and Safety
- Shut down the system, lock out the power. Trust me, you don’t want a live conveyor moving while your fingers (the human kind) are near the belt.
- Clean the work area so no dust or debris ends up in the joint.
2.Cutting the Fingers
- Use a CNC or precision template to cut the interlocking “fingers” into each belt end. The accuracy here makes or breaks the splice conveyor belt quality. Misaligned cuts cause tracking nightmares.
3.Surface Cleaning
- Wipe down the fingered ends with solvent to remove oils and dust. A clean surface ensures proper bonding during this hot splicing conveyor belt
4.Layer Considerations
- PVC-coated bottom:Both top and bottom will fuse simultaneously.
- Bare fabric bottom:Apply a thin adhesive layer to the carcass before fusing the PVC top layer. This step ensures the conveyor belt splicing procedure binds the entire belt, not just the surface.
5.Heating and Pressing
- Set the press temperature between 150–180°C. Too low, and you get a weak bond; too high, and you risk scorching the PVC.
- Maintain even pressure across the joint—no gaps, no hot spots.
6.Cooling Under Compression
- Let the joint cool while still under pressure. This prevents warping and gives you that perfectly flat finish every splice conveyor belt operator loves to see.
7.Final Trimming and Testing
- Trim any excess material from the joint.
- Run the belt at slow speed, watching how the splice moves over the pulleys. If it’s quiet and smooth, you nailed it.
2.Field Tips for Finger Splicing
- Never rush the cooling phase. Impatiently releasing pressure is the fastest way to ruin a perfect splice.
- Keep your blades sharp for cleaner cuts—ragged PVC edges are harder to fuse.
- Remember: A finger splice is a form of hot splicing conveyor belt technique, so your temperature and timing are everything.

3.4 Overlap Weld for PVC
Sometimes the customer wants a strong, permanent joint. Other times, they want the job done fast, with minimal downtime and a smaller invoice. That’s when I bring out the overlap weld method to splice conveyor belt sections. It’s one of the simplest types of conveyor belt splices for PVC belts, and while it’s not as sleek as a finger splice, it can be surprisingly effective when matched to the right application.
1.Why Overlap Weld Works
The principle is simple: increase the bonding area by skiving both ends of the belt at an angle, then fusing them together under heat and pressure. By overlapping instead of butting the ends together, you spread the tension over a wider surface. This makes the conveyor belt splicing procedure faster and less equipment-intensive than hot finger splicing.
That said, this isn’t the method I’d use to splice conveyor belt systems running at 200 meters per minute in a parcel sorting hub. But for light-duty packaging lines, short conveyors, or temporary installations, it’s quick, cheap, and easy to train staff on.
2.Step-by-Step Conveyor Belt Splicing Procedure
1.Square and Skive the Ends
- Cut the belt ends square. Then, skive them to about a 45° bevel. The smoother and cleaner your skive, the stronger your overlap weld will be.
2.Surface Prep
- Clean the PVC with a suitable solvent. Dust, oil, or moisture will compromise the bond.
3.Bottom Layer Check
- PVC-coated bottom:Heat-fuse both covers in one step.
- Bare fabric bottom:Apply adhesive to bond the carcass before fusing the PVC top layer. This is a critical step for preventing premature separation.
4.Heating and Pressing
- Use a hot-air gun or heated platen. Keep the temperature consistent—usually between 150–170°C—to melt the PVC without scorching.
- Press the overlapped area firmly, making sure the pressure is even across the width.
5.Cooling and Finishing
- Hold pressure until the joint has fully cooled. Release too early, and the overlap will warp or lift.
- Trim any excess PVC along the seam to ensure smooth travel over pulleys.
3.Field Notes from Experience
- The overlap weld is one of those conveyor belt splicing methodsthat benefits from patience. Rushing the heat cycle is the fastest way to ruin a splice.
- For food-grade applications, I still recommend finger splicing. The overlap weld leaves a visible seam that can catch debris.
- If you’re teaching new techs how to splice a conveyor belt, start with overlap welding—it’s forgiving and helps build confidence before moving on to precision cuts.
Whenever I splice conveyor belt joints using this method, I think of it as the “no-frills” option: not the flashiest, but reliable when used in the right place. As long as you follow the conveyor belt splicing procedure and respect the belt’s construction, this splice will give you months—sometimes years—of trouble-free service.

3.5 Mechanical Fasteners for PVC Belts
When you’re in the middle of a shift, the phone rings, and the operator says, “The belt’s split!”—you don’t always have the luxury of a heat press or a full vulcanizing setup. That’s when I grab my mechanical fastener kit. This is the “get-it-done-now” approach to splice conveyor belt sections, perfect for PVC belts that need a quick return to service.
I like to think of mechanical fastening as the emergency tire change of the types of conveyor belt splices: not glamorous, not meant to last forever, but reliable enough to get you moving again.
1.Where Mechanical Fasteners Make Sense
- Downtime is expensive – Every minute counts, and you need a splice in under an hour.
- Remote locations – No access to heavy splicing equipment.
- Frequent belt changes – Systems where belts are swapped often and permanence isn’t required.
If the application is food-grade, high-speed, or under constant washdown, I’d think twice. Fasteners can catch debris, add noise, and sometimes wear pulleys faster.
2.Conveyor Belt Splicing Procedure – Mechanical Method
1.Shut Down and Lock Out
- Always isolate the power first. A moving belt is not the place to test your reflexes.
2.Square the Ends
- A straight, even cut is critical. Crooked ends will twist the splice under load.
3.Pick the Right Fastener
- For PVC belts, I often recommend small hinged plates or polymer-coated hooks. They grip well without chewing through the belt cover.
4.Mark Hole Positions
- Use the template supplied with the fastener kit. Line it up with the belt’s centerline to ensure even pull.
5.Punch Clean Holes
- A sharp punch avoids fraying the fabric layers.
6.Install and Secure
- Position the fastener flush with the belt surface. Tighten hardware gradually from the center outward to avoid bending the plates.
7.Insert Connecting Pin
- For hinged styles, slide the pin in and check that it rotates freely. A nylon-coated pin reduces both noise and wear.
8.Test Run
- Start slow, watch the joint pass over the pulleys, and listen for unusual sounds. Adjust before ramping up to full speed.
3.Field Experience Tips
- If you’re learning how to splice a conveyor belt, start here—mechanical methods teach alignment and tension basics without the complexity of heat and curing times.
- Keep a spare pin and a few fasteners in your toolbox. They’ll save you from extended downtime.
- Even though it’s quick, inspect mechanical joints regularly. Tighten hardware before vibration loosens it.
In my years of work, I’ve seen mechanical fastening rescue entire shifts. It’s not the longest-lasting among the types of conveyor belt splices, but when speed matters more than aesthetics, it’s the one that gets the system back in motion—before anyone upstairs notices the line was down.

3.6 PVC Splice Selection Guide
If there’s one thing I’ve learned in my years on the shop floor, it’s that a PVC belt can make or break an entire system—sometimes literally. Picking the right way to splice conveyor belt sections isn’t just about joining two ends; it’s about ensuring that joint survives your exact working conditions. I’ve seen flawless splices run for years, and I’ve seen bad choices fail before lunch break.
When I help a client choose between types of conveyor belt splices for PVC, I think in terms of speed, cleanliness, and durability. Every method has its personality—some are elegant and long-lasting, others are quick and temporary.
1.Finger Splice – The Seamless Performer
I use this when perfection matters. The belt ends are cut into a series of interlocking fingers, lined up with millimeter precision, and fused with heat and pressure. Once cooled, the joint looks and feels like the original belt.
- When I choose it:Food-grade processing, parcel sorting, quiet-running systems.
- Advantages:Smooth, strong, hygienic.
- Trade-offs:Needs skilled operators and a press, not great for field repairs.
2.Overlap Weld – The Practical Fix
This is the middle ground. I skive both ends to a bevel, overlap them, and apply controlled heat until the PVC layers bond. It’s not invisible, but it’s reliable for moderate use.
- When I choose it:Low-to-mid speed lines, seasonal operations, budget limits.
- Advantages:Quicker than finger splicing, no special cutting templates.
- Trade-offs:Slight step at the joint, not as flexible under repeated bending.
3.Mechanical Fasteners – The Emergency Hero
Sometimes the line stops and the clock starts ticking. That’s when I pull out the mechanical fasteners. They clamp the ends together in minutes—no curing, no waiting.
- When I choose it:Remote sites, urgent restarts, belts replaced often.
- Advantages:Fast install, minimal equipment.
- Trade-offs:Visible, noisier, not ideal for hygiene-sensitive areas.
4.My Rule of Thumb on How to Splice a Conveyor Belt
- Hygiene first – Finger splicing wins in clean environments.
- Speed matters – Overlap weld if you have hours, fasteners if you have minutes.
- Longevity vs cost – Permanent methods cost more upfront but save in downtime.
Choosing the right way to splice conveyor belt is about matching the splice to the work, not forcing the work to fit the splice. Get it right, and your PVC belt will run smoothly, your maintenance log will stay short, and you’ll have more time to enjoy the quiet hum of a system doing its job.