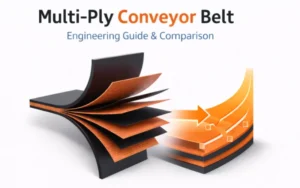
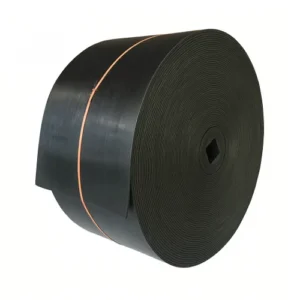
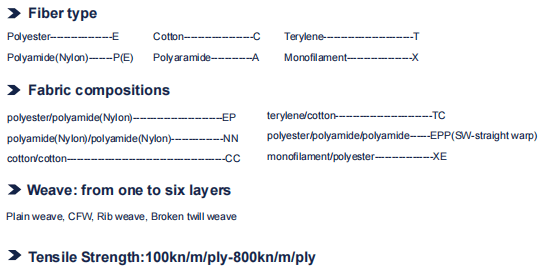
1. From Leather to Logic: The Colorful Evolution of Conveyor Belt Manufacturing
When you think of cutting-edge conveyor belt manufacturing, your mind probably doesn’t jump straight to horse-drawn factories and cowhide. But that’s exactly where it all began. In the early days, conveyor belts were more “belt” than “conveyor”—simple strips of leather, stitched together, looping around steam-powered rollers. These belts were loud, slippery, and one misstep away from disaster, but they were a revolution for their time.
Back then, material handling solutions were more about muscle than mechanics. Early belts didn’t have performance data—they had personality. Engineers (or let’s be honest, blacksmiths with spare leather) relied on trial, error, and a bit of animal fat to keep things moving. If it didn’t snap in a week, it was a success. There were no such things as conveyor belt specifications—the only spec was “hold it together and pray.”
Then came vulcanized rubber, and the game changed. Suddenly, belts didn’t just move—they performed. The introduction of rubber compounds made belts stronger, more flexible, and a lot less… organic-smelling. This material innovation marked the start of a smarter, more sustainable conveyor belt production process. No more guessing. No more stretching leather until it squeaked. Now we had tension control, reinforcement layers, and the ability to handle everything from rocks to croissants.
Today’s conveyor belt manufacturing world looks like a sci-fi factory tour. Robots assist with layering, AI systems monitor thickness tolerances, and belts are customized to handle extreme heat, oil, chemicals, and even food-grade conditions. Want something flame-retardant and FDA-compliant? No problem. Modern conveyor belt specifications cover tensile strength, elongation, abrasion resistance, and more—each driven by decades of innovation and global standards.
Understanding how far we’ve come matters. Because when you’re selecting a belt for your own operation, you’re not just picking a strip of material. You’re choosing from 150 years of industrial evolution. Every crack in a leather belt, every snapped pulley, every late-night redesign in a dusty workshop has led us here—to belts that are smarter, stronger, and far more reliable.
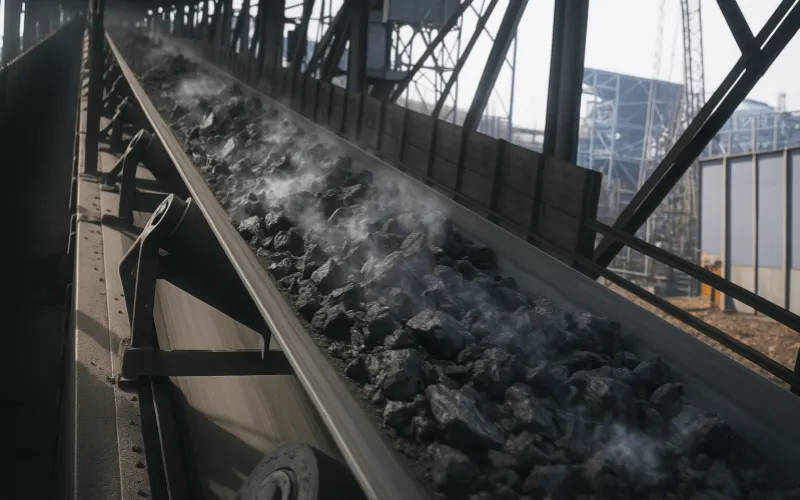
So the next time a belt quietly moves 100 tons of aggregate without complaint, remember—it didn’t get there by accident. It got there through generations of ingenuity, a little rubber science, and a lot fewer cows.
2. Building a Better Belt: The Role of Raw Materials in Conveyor Belt Manufacturing
You wouldn’t build a house with sandpaper and chewing gum, and the same goes for conveyor belts. At the core of conveyor belt manufacturing, raw materials aren’t just the ingredients—they’re the DNA. The right mix defines everything from durability and flexibility to whether your belt can survive a Sahara-like furnace or a deep-freezer in Antarctica. Spoiler alert: chewing gum doesn’t cut it.
2.1 Rubber Compounds: The Secret Sauce of Industrial Performance
Let’s start with the unsung hero—rubber compounds. This isn’t your car tire’s distant cousin; it’s a scientifically engineered blend of natural and synthetic rubber, antioxidants, plasticizers, and fillers, designed for specific industrial nightmares… ahem, I mean applications.
Want high tensile strength for mining? There’s a compound for that. Need flexibility for snaking around a dozen pulleys in a packaging plant? We’ve got that too. And if you’re dealing with oils, heat, or chemicals, specialty rubber compounds can be tailored to shrug it all off like a belt-shaped superhero.
The magic happens during mixing, where ratios are fine-tuned to balance elasticity with resistance. Get it wrong, and you’ll have belts cracking in winter or melting in summer—neither of which are good for your operation or your budget.

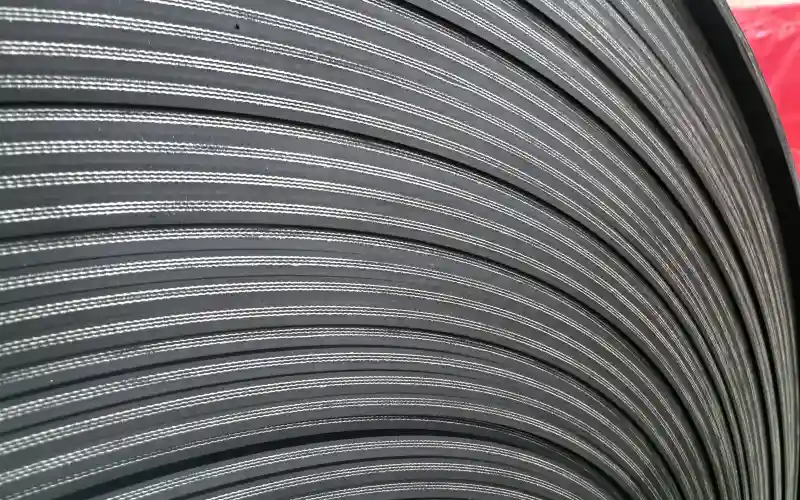
2.2 Reinforcing Materials: Because Even Rubber Needs a Backbone
Rubber alone is brave, but not bulletproof. Enter the reinforcements: fabric and steel cords. These materials act like the skeleton inside the muscle, giving belts their shape, stability, and strength under pressure. Literally.
For flexible, lightweight needs—think logistics and light manufacturing—polyester/nylon fabrics (yes, the famous EP fabric) are the go-to. They’re cost-effective, strong, and help maintain tension without warping.
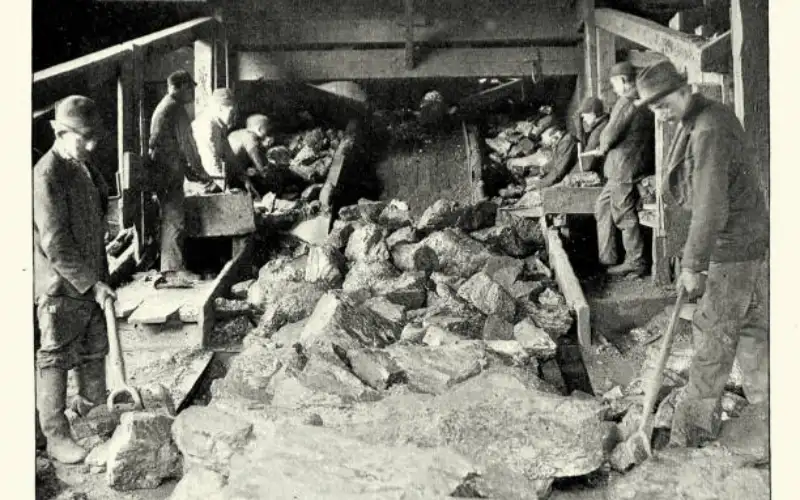
But if your conveyor moves things like iron ore, cement, or quarried stone, you’re going to need steel. Lots of it. Steel cord belts offer unmatched load capacity, reduced elongation, and next-level reliability for the heaviest material handling solutions.
The choice of reinforcement is a defining moment in the conveyor belt production process, and making the wrong call is like wearing flip-flops to a construction site—technically footwear, but totally inappropriate.
2.3 Chemical Additives: The Unsung Microscopic Heroes
Let’s talk about the invisible muscle behind every belt—chemical additives. These compounds may not get much attention, but without them, your belt would degrade faster than a banana on a dashboard.
We’re talking anti-aging agents to fend off oxygen and UV, anti-ozonants to prevent surface cracking, plasticizers to improve flexibility, and bonding agents to keep all the layers glued together like a happy industrial sandwich.
These additives directly impact how well a belt meets modern conveyor belt specifications: elongation limits, abrasion resistance, fire retardance, oil tolerance, and more. They ensure your belt stays in shape, holds its strength, and passes every safety check you throw at it.
2.4 It’s Not Just Chemistry—It’s Strategy
There’s no cookie-cutter recipe when it comes to picking raw materials for a conveyor belt. It’s a strategic decision driven by application type, environment, load, speed, and even regulatory compliance. From food-grade belts requiring non-toxic rubbers to mining belts designed to survive sparks and shale, raw materials define both capability and longevity.
So, the next time someone asks, “Why is this belt more expensive?” you can say, “Because it’s engineered, not guessed.” Each choice—from rubber compounds to the tiniest chemical agent—plays a part in making your conveyor belt manufacturing investment smarter, safer, and longer-lasting.
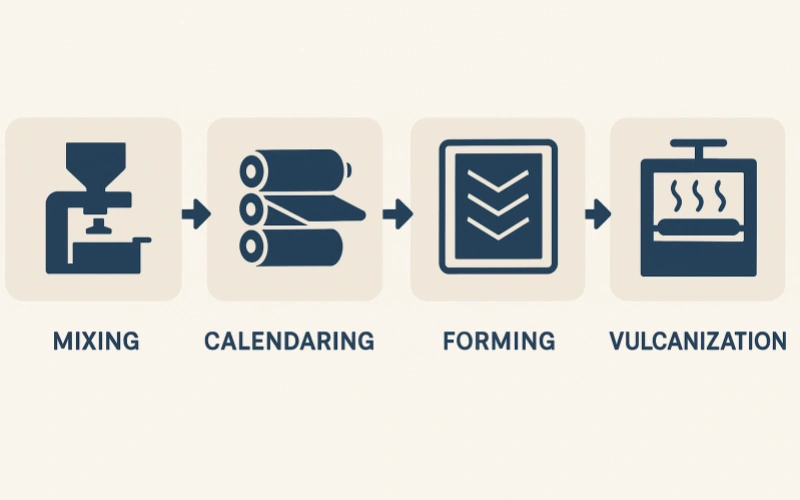
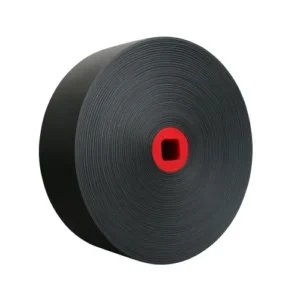
3. Conveyor Belt Manufacturing Process :Mixing
Before a conveyor belt moves any material, it must go through a transformation that defines how it will perform under pressure—literally. At Tiantie, this transformation happens not during vulcanization or cutting, but right here, in our proprietary mixing phase. In our conveyor belt manufacturing process, this is where performance isn’t just influenced — it’s locked in before the belt even takes shape.
Unlike many factories that rely on standard recipes or third-party mixing, we fully control the entire formulation process in-house. Every component—powders, oils, rubbers, and additives—gets measured, blended, and integrated through our automated, precision-controlled mixers. This allows us to fine-tune each compound specifically for the real-world demands our clients face — whether it’s extreme heat, heavy loads, or highly abrasive materials.
Here’s how that happens, in four precise steps.
Step 1: Starting with Structure—Fillers First
The mix begins dry, with powdered materials like carbon black, calcium carbonate, and occasionally other fillers. These aren’t just bulk—they laminate the base that determines how tough or stable the compound will be.
Carbon black strengthens the rubber’s internal frame, making it more durable under repeated stress and less prone to degradation when exposed to friction and UV. Calcium carbonate doesn’t add muscle, but it does shape how rigid or forgiving the compound behaves during use and processing. You can think of fillers as the architecture—load-bearing but not flashy.
Each material is weighed precisely to align with the belt’s final conveyor belt specifications. It’s not a matter of tossing things in—it’s calibration, down to decimal points.
Step 2: Bringing in the Flow—Liquid Additives
Next, the mix gains fluidity. Once oils enter the blend, they adjust the rubber’s flexibility—making sure it flows smoothly during processing and doesn’t turn brittle too soon.
This step is critical for controlling how the compound performs during both production and final use. The type and volume of liquid determine whether the belt becomes pliable enough for sharp bends or stable enough for steady, heavy-duty material handling solutions.
Getting the oil balance right isn’t cosmetic—it determines whether the compound can be shaped cleanly and stay usable for the long haul.
Step 3: Customizing the Core—Rubbers and Additives
This is where the compound gains personality. Based on the job the belt is meant to do, a suitable rubber type is chosen: natural rubber for flexibility, SBR for cost-efficiency, or nitrile for chemical resistance.
Then come the functional agents. Curing agents like sulfur determine how the material sets under heat. Antioxidants delay wear and weathering. Accelerators control how quickly the belt can be vulcanized without overreacting.
Not all rubbers are cut from the same cloth—some bend without breaking, others stand their ground in harsh chemical spills or grinding friction. The combination of rubber and chemistry at this stage is what defines the belt’s future: whether it will last, flex, resist, or fail.
Step 4: Mixing Under Pressure
With every ingredient in place, the batch is sent into an internal mixer. There, it undergoes controlled heat and pressure that push, fold, and shear the blend into a unified, consistent material.
Inside, everything is worked until the entire mass becomes one reliable structure. The result isn’t just a black lump—it’s a precisely blended rubber compound with properties you can count on. Uniform tensile strength. Predictable elongation. Excellent bonding potential.
Once it’s cooled and formed into sheets, the compound is either stored or passed directly to calendaring. At this point, its identity is locked in. No tweaks. No second chances.

Why Mixing Matters More Than You Think
Tiny variations—5 seconds too long in the mixer, or a drop too much oil—can ruin a batch. Cracking, bubbling, and uneven tension are all ghosts of a bad mix.
That’s why any reliable conveyor belt manufacturing operation treats mixing like controlled science. Whether the belt is heading to a food processing line or a copper mine, it all starts with how these materials were blended.
Every successful material handling solution depends on rubber that performs. And that performance isn’t guessed—it’s mixed into existence.
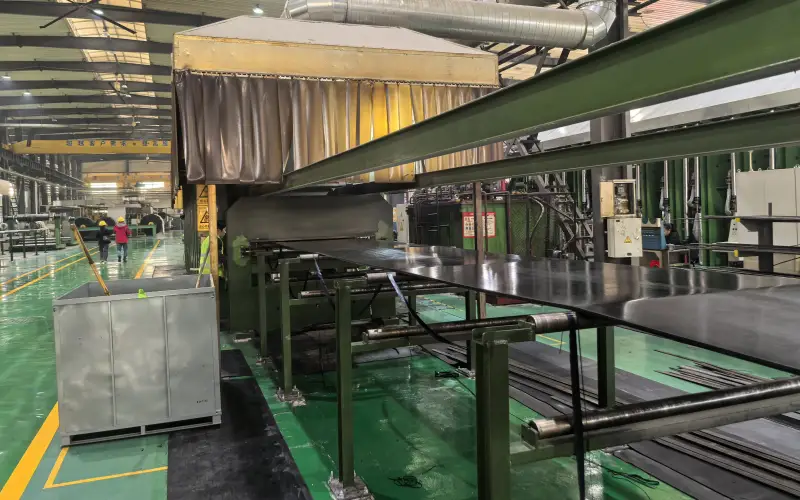
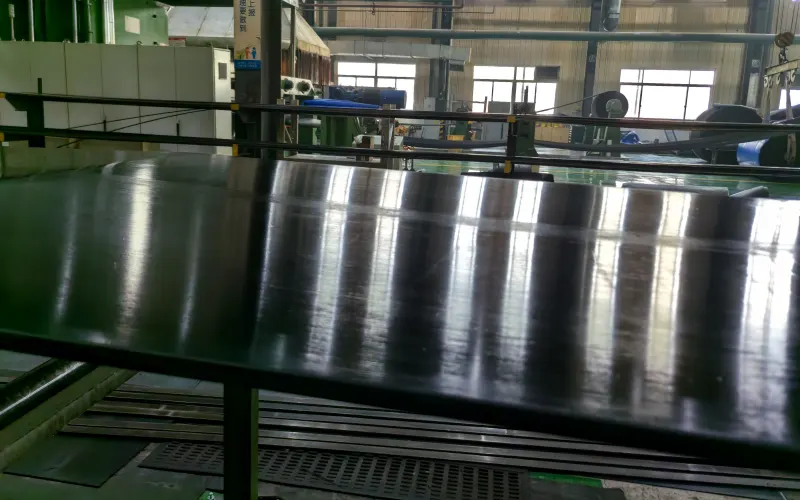
4. Conveyor Belt Manufacturing Process:Calendering
In the world of conveyor belt manufacturing, precision is everything. While mixing defines what a compound can do, calendering is where that potential begins to take physical form. But before a single sheet rolls into the calendering line, it must first pass through a critical intermediate step—extrusion.
This is where most misunderstand the process: the output from the internal mixer isn’t fed straight into the calender. It’s far too wide, too irregular, and too uneven in heat distribution. To prepare the rubber compounds for precise shaping, extrusion plays the role of gatekeeper—and heat manager.
4.1 The Role of Extrusion Before Calendering
After the compound is mixed, cooled, and batch-rolled, it enters our advanced screw extruder—a machine that reheats the rubber and uses controlled compression to ensure stable, uniform output. This design offers several critical advantages:
Reheating the rubber to ideal laminating temperature with even thermal distribution
Using the screw mechanism to control width, forming narrower, perfectly uniform strips
Stabilizing material flow for smooth, consistent feeding into the calender
The extruded rubber, now precisely formed, is placed onto a conveyor system that transports it directly to the calendering line. This seamless transfer guarantees the material enters the rollers at the exact temperature, speed, and alignment.
Skipping this step, or using less advanced extrusion methods, increases risks of uneven thickness, surface flaws, and bonding failures during calendering. In high-precision conveyor belt production, screw extrusion isn’t optional—it’s essential.
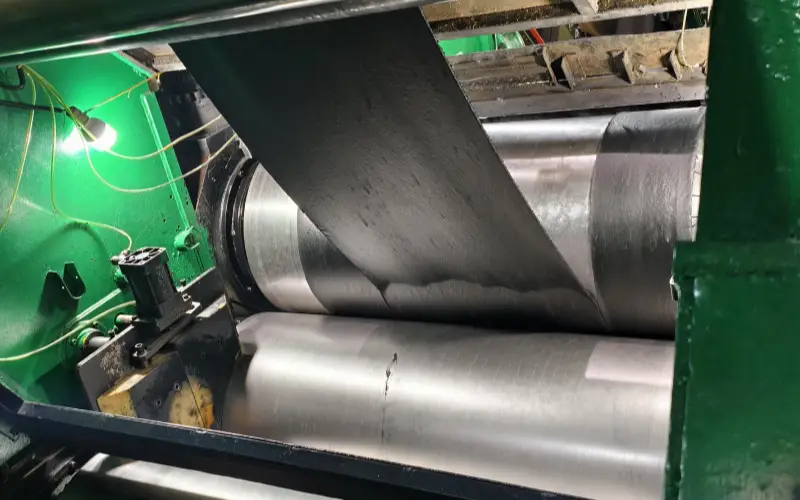
4.2 Into the Rollers: The Calendering Line
Once on the calendering line, the rubber strip is fed between heated steel rollers—usually arranged in a three-roll or four-roll configuration. These rollers compress the strip into flat, precisely measured sheets.
The goal here is to create rubber layers of uniform thickness, consistent density, and surface smoothness. Whether the application calls for 3.0 mm or 6.0 mm cover stock, the machine must deliver exact dimensions across the entire sheet.
Computerized thickness gauges and edge sensors continuously monitor the output, adjusting roller pressure in real time. This isn’t just about flat rubber—it’s about consistency down to the decimal.
4.3 Coating Fabric and Prepping for Structure
Once rubber sheets are calendered, they may be used to coat reinforcement fabrics—such as EP (polyester-nylon) or aramid. These fabrics are pulled into the calender in sync with the rubber sheet, sandwiching the material on both sides.
This creates a bonded ply: the foundation of the multi-layered conveyor belt.
Adhesion is critical. Any flaw—air pockets, improper tension, off-center layering—can later lead to delamination or failure under stress. That’s why alignment, temperature, and roller pressure are closely managed throughout the coating phase.
4.4 Fine-Tuning the Output: Parameters That Matter
Precision calendering demands strict control over:
- Roller temperature – for flow and bonding
- Line tension – to avoid stretching or warping
- Feed rate – for even coverage
- Thickness calibration – monitored constantly to meet exact conveyor belt specifications
Even minor fluctuations here can cascade into major defects during vulcanization or service use.
4.5 Staging, Storage, and Anti-Adhesion Measures
After calendering, the rubber sheets or fabric-coated plies are carefully rolled and moved into storage areas. But because these are semi-finished goods, the rubber surface still carries inherent tackiness.
To prevent the layers from sticking together during storage or transport, a release liner or protective fabric layer is inserted between the windings. This thin interlayer ensures the sheet won’t fuse onto itself—especially since calendered rubber is relatively thin and fragile. If sticking occurs, it often leads to tearing or irreversible surface damage.
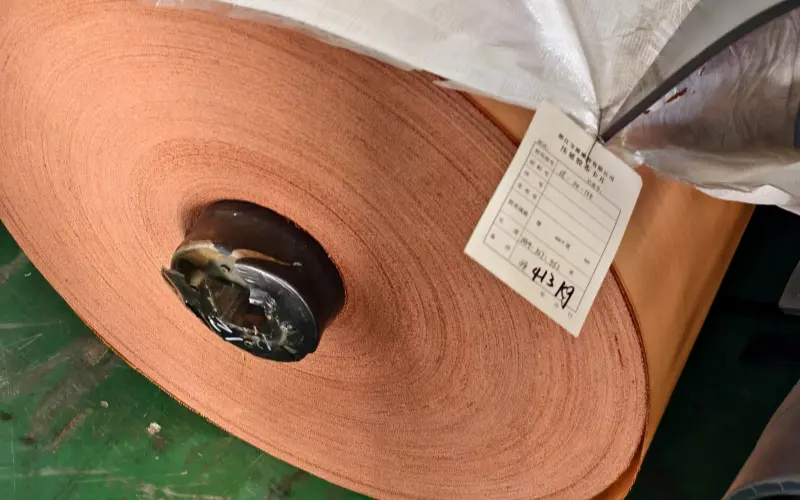
Each roll is labeled for traceability, including batch number, thickness, and application purpose. The rolls are then staged for laminating or temporarily stored under controlled conditions.
4.6 Why Calendering Can’t Be an Afterthought
It’s easy to assume calendering is just about flattening rubber. But in truth, it’s where a belt’s reliability is shaped—both literally and structurally.
A poorly calendered sheet could cause belt misalignment, premature wear, or catastrophic failure under load. On the other hand, a well-calendered sheet holds its edge, stays bonded, and provides the physical integrity needed for demanding material handling solutions.
That’s why in modern conveyor belt manufacturing, calendering isn’t just a line in the process—it’s a discipline in its own right.
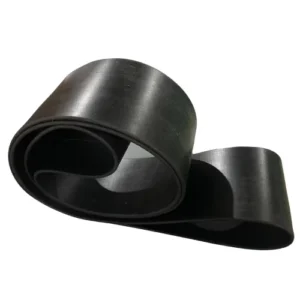
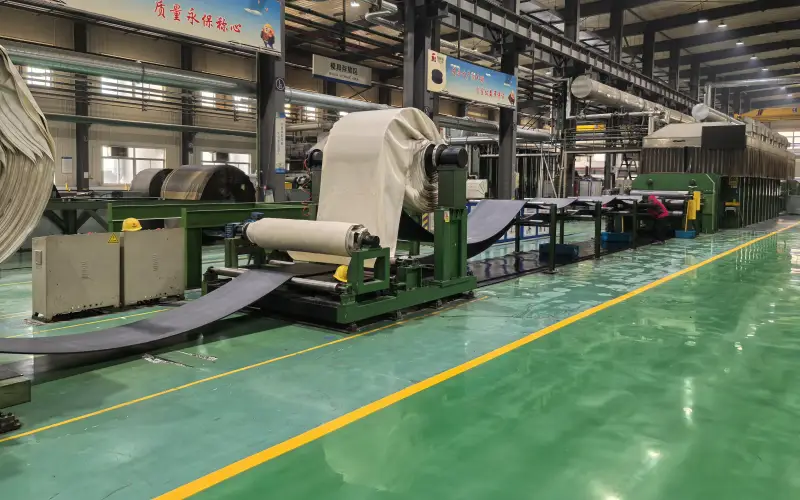
5. Conveyor Belt Manufacturing Process:Laminating
In the journey of conveyor belt manufacturing, Laminating is the stage where all the earlier effort—compounding, calendering, quality control—comes together in one structured build. This isn’t just a physical stacking of materials. It’s where every ply, every layer, and every cover must meet both technical specs and the practical demands of real-world use.
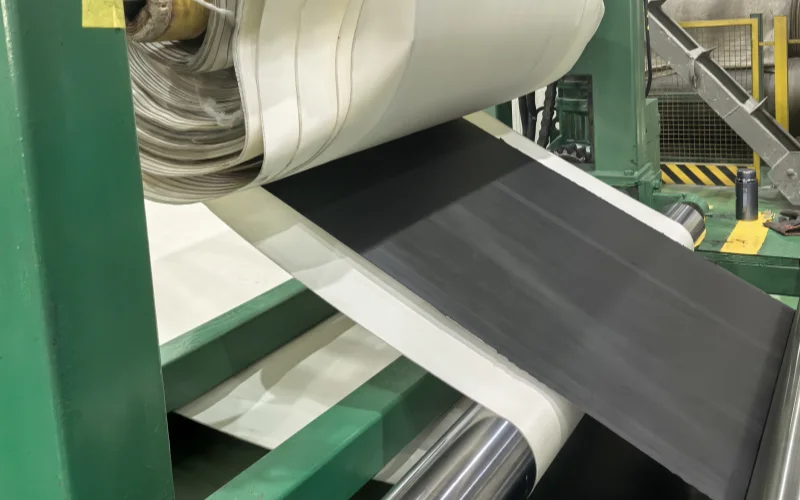
After calendering, rubber sheets and fabric-reinforced plies are transported to the laminating zone. At this point, everything is semi-finished, soft, and tacky—meaning it’s ready for assembly but still flexible enough to fail if mishandled.
5.1 Getting the Right Layers in Place
Each belt design calls for a specific set of components:
- Calendered rubber covers for top and bottom protection
- Rubber-coated EP or nylon fabric sheets to provide structural integrity
- Optional reinforcement plies—such as anti-tear or breaker layers—for added impact protection and internal stability
Rather than just deciding “how many layers,” engineers look at the working environment. A belt used in package sorting won’t be built the same as one used in a copper mine. Some require extra flexibility, while others must resist gouging, ripping, or high compressive loads. The assembly plan reflects these unique mechanical needs, not just a standard count of plies.
5.2 From Lay-Down to Lamination
The assembly process begins on a flat table or automated lay-up bed. The operator places the bottom rubber cover first, then adds each subsequent layer based on the design plan. In high-precision lines, laser guides or camera-based systems track placement. Manual setups rely on alignment templates, trained eyes, and tactile feel.
Every ply is flattened using rollers or pressing devices to eliminate air bubbles and to ensure intimate contact. Since the uncured rubber compounds retain natural tack, no adhesive is used—just heat and pressure during vulcanization later.
Correct alignment isn’t just aesthetic. A 2 mm offset might cause belt wander during operation, creating uneven wear or worse—system failure.
5.3 One-Shot Assembly
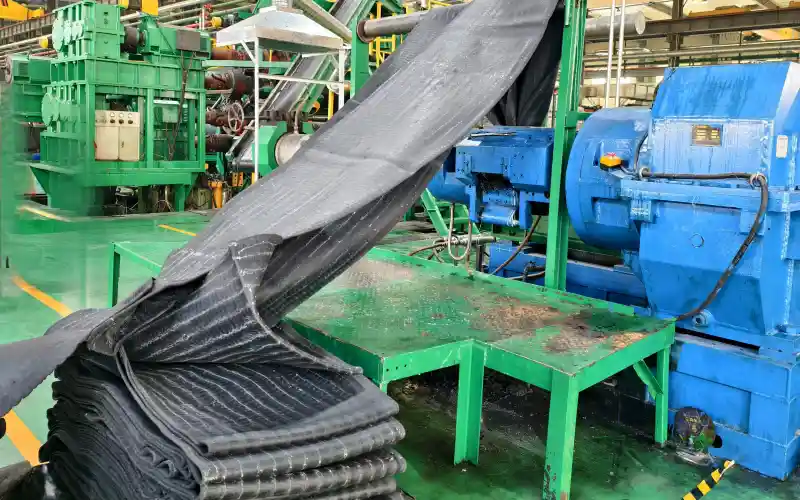
In advanced conveyor belt production processes, our factory uses a one-time, all-in assembly method. We stack all the layers in a single setup and send them directly to vulcanization. This reduces production time, avoids repeated heat exposure, and significantly improves layer bonding.
Anti-tear plies and reinforcement sheets are inserted strategically, depending on whether the belt must resist edge fray, handle impact, or flex in multiple directions. This single-pass strategy minimizes handling and lowers the risk of internal misalignment.
5.4 Trim, Label, and Prepare for the Vulcanization
After laminating, the belt body is trimmed to final width and length. At this point, any edge features—tapers, step joints, or finger-cut ends—are applied for future splicing or mechanical assembly.
Because these are still uncured assemblies, care must be taken during handling. To prevent surface sticking or damage, we insert protective liner cloth between coiled layers, especially when dealing with thinner cover stocks prone to tearing.
At our facility, each belt is affixed with a production tag that includes job ID, cover and ply specifications, and curing instructions. For us, the laminating area also acts as the final quality checkpoint before vulcanization—a stage where errors can no longer be corrected.
5.5 Why Laminating Isn’t Just Stacking Rubber
Precision laminating is what makes a belt strong on day one—and stable for years. Misalignment, poor layering, or forgotten reinforcement will show up not in the factory, but in the field, when it’s far too late.
In our view of conveyor belt manufacturing, laminating is a step of quiet complexity. It’s the last moment of flexibility—literally and figuratively—before the belt enters vulcanization and becomes permanent.
When done right, the laminating process locks in every design intention. And that’s how performance is built.
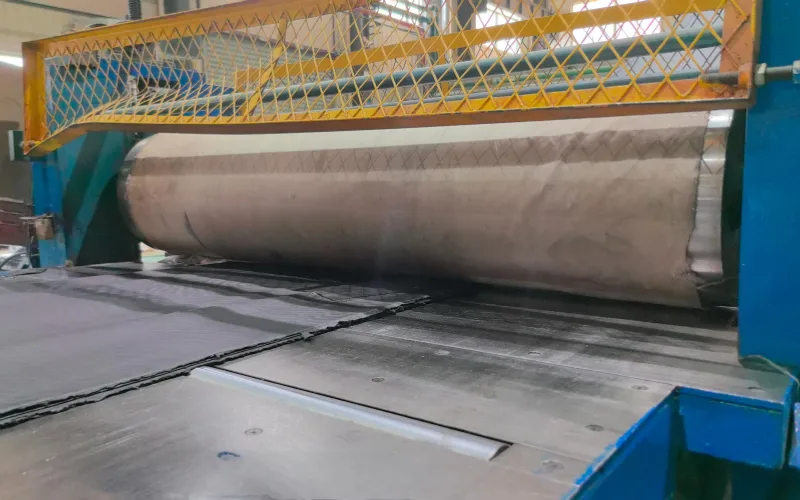
6. Conveyor Belt Manufacturing Process:Vulcanization
Up to this point, a conveyor belt is still just a fragile stack of layered materials—pliable, sticky, and entirely dependent on what happens next. Vulcanization is the moment where structure becomes substance. In conveyor belt manufacturing, this is where the belt earns its resilience, elasticity, and mechanical stability.
6.1 The Science Behind Vulcanization
Technically speaking, vulcanization is a controlled chemical process. Under the right temperature and pressure, sulfur and other curatives form crosslinks between the long molecular chains in rubber compounds. These crosslinks act like anchor points, giving the material its shape memory, toughness, and long-term wear resistance.
Without vulcanization, the belt would deform, crack, or tear under basic stress. With it, the belt can handle years of heavy-duty material handling solutions—from cement plants to ports.
6.2 Pressing Matters: Two Curing Methods
There are two common ways to vulcanize a conveyor belt:
6.2.1 Batch Vulcanization
Used for custom or thicker belts, this involves placing the belt inside a steel mold and compressing it under heat and pressure. It’s slower, but offers excellent control for specialized conveyor belt specifications.
6.2.2 Continuous Vulcanization
Ideal for standardized production, this method runs the belt through a moving press system or heated drums. It offers speed and efficiency, though it requires very uniform pre-formed materials.
Both methods aim for the same goal: to create one fully bonded structure where all layers—from covers to plies—are unified without weak spots.
6.3 Critical Parameters: What We Control
Successful vulcanization isn’t guesswork. In our production line, we carefully monitor:
- Temperature – typically between 140°C–160°C, adjusted for compound type
- Time – based on belt thickness and design
- Pressure – to ensure full bonding across every layer
- Heat consistency – uneven heating leads to internal stress or warped profiles
All data is logged and traceable. If a problem arises later, we can track it back to the curing press.
6.4 Post-Cure Reality Check
After vulcanization, the belt isn’t ready to ship just yet. It must cool down gradually to prevent internal tension. Once cooled, it goes through:
- Ply adhesion testing
- Surface inspection
- Dimensional checks
This is where we verify that the conveyor belt production process worked as planned, and the product truly meets customer requirements.
6.5 Why Vulcanization Is Non-Negotiable
There’s no going back after this step. Unlike earlier stages where errors can be corrected or reprocessed, vulcanization locks everything in. A mistake here means scrapping the entire belt.
That’s why we treat it with the seriousness it deserves. In conveyor belt manufacturing, curing isn’t just about finishing—it’s about finalizing the belt’s identity. Once it comes out of the press, it’s not just layers of rubber. It’s a performance-ready product.
7. After Conveyor Belt Manufacturing Process:Quality Check
In conveyor belt manufacturing, quality isn’t something you check at the end—it’s something you embed into every step. From raw materials to final delivery, every phase is accountable. One bad roll doesn’t just waste material—it can cost someone a production shutdown. That’s why our approach to quality control is deliberate, thorough, and yes, sometimes a little obsessive.
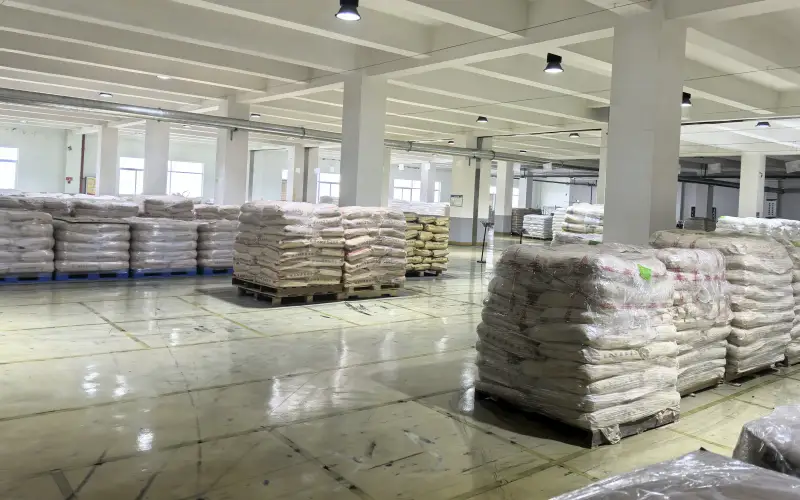
7.1 It Starts Early: Raw Material Checks
Before rubber ever hits the mixer, we conduct a full audit of incoming materials. Base polymers, fabric plies, carbon black, processing oils—all are tested for consistency, purity, and conformity to our internal conveyor belt specifications. Our lab checks include:
- Melt flow index (for polymers)
- Moisture content (for fabric plies)
- Oil composition analysis
We’re not afraid to reject a batch. Starting with bad material is like trying to cook with spoiled ingredients—no seasoning can fix it later.
7.2 In-Process Monitoring: Real-Time Assurance
As mixing begins, we extract samples of the rubber compounds for:
- Mooney viscosity – to verify flow behavior
- Specific gravity – for batch consistency
- Scorch time – to ensure safe processing window
Calendering lines are equipped with laser thickness gauges, auto-width scanners, and edge alignment controls. Even tiny inconsistencies in thickness or coating can affect downstream ply bonding. That’s why we inspect in motion, not just post-production.
During ply lamination, visual checks ensure no trapped air, skewed layers, or cover gaps. Everything must align before the belt hits the press.

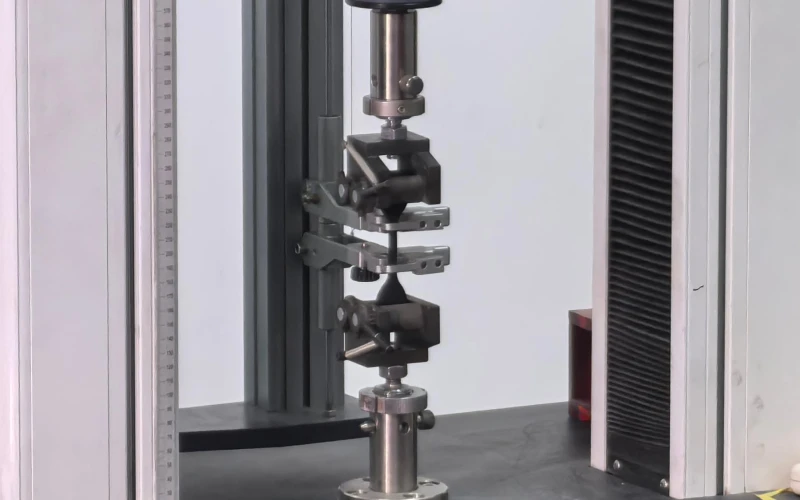
7.3 Post-Cure Testing: The Real Stress Test
After vulcanization and cooling, the belt undergoes mechanical testing in our in-house lab:
- Adhesion strength: using a tensile tester to pull apart cover and ply—measured in N/mm
- Tensile and elongation: to confirm that stretch and recovery match performance targets
- Hardness and rebound elasticity: Shore A durometer readings and bounce tests
- Visual QC: edge integrity, surface gloss, and absence of cracks, pores, or warping
We also simulate stress cycles using belt fatigue machines for select lots—especially for material handling solutions expected to face severe operating conditions.
7.4 Hands-On Inspection: The Human Backstop
Machines can measure, but they don’t always see. That’s why our dedicated inspection team performs manual quality checks after every belt is cured. They look for issues machines may miss—tiny bubbles, delamination, inconsistent texture, edge warping, or embedded particles.
If a belt shows surface-level flaws, it’s logged and isolated. But if a deeper issue is suspected—like poor ply bonding or uneven curing—it’s flagged as a critical defect and sent back for rework or full reprocessing. We don’t debate about borderline quality: if it’s not structurally sound, it doesn’t leave our floor.
This layer of manual scrutiny gives us the final confidence that every belt has been seen—not just scanned.
7.5 Tracking Everything That Matters
Remember those production IDs we mentioned earlier? Here’s where they prove their worth. Each finished roll is tagged with a digital label containing the full history: mixing time, batch formula, calender settings, press pressure, curing temperature, operator ID.
These aren’t just stickers. They’re a digital fingerprint that lets us trace every belt—from raw compound to final tension test.
For projects requiring third-party certifications, we share this data directly with client inspectors or external auditors. In high-risk environments, transparency isn’t optional—it’s expected.
7.6 Beyond Testing: How We Actually Improve
We don’t stop at passing tests. Every data point gets logged and analyzed weekly by both our lab and production team. If we see a trend—say, adhesion strength drops 3% across batches—we dive in: Was it roller temperature? Mixer shear rate? Moisture in the fabric?
That feedback loop is where good factories become great. Quality control doesn’t just catch failure. It teaches you how to prevent it.
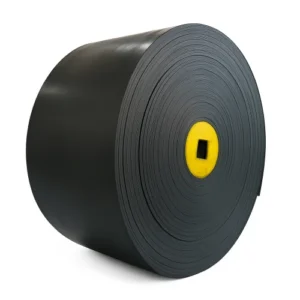
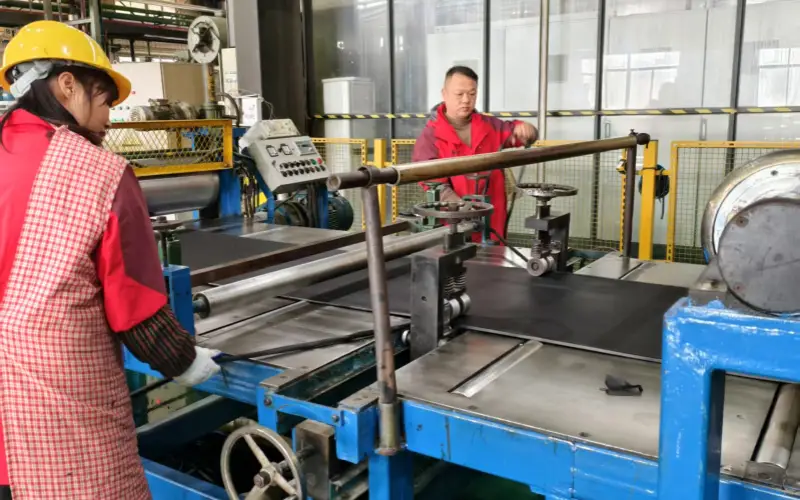
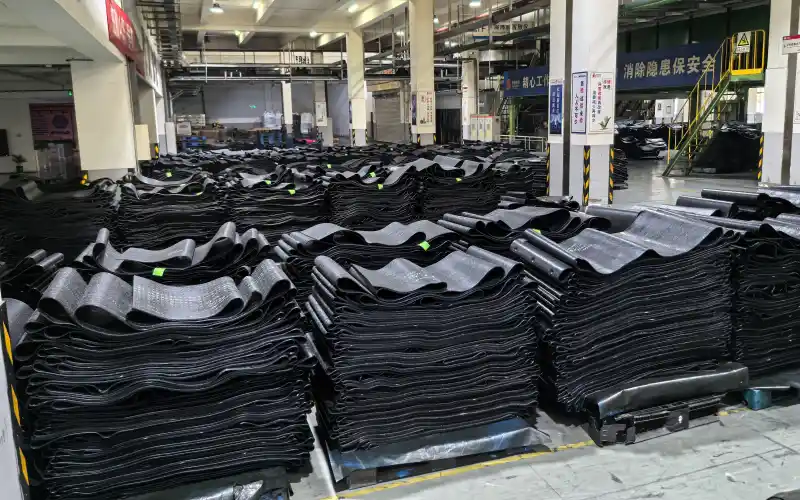
8. Cutting, Packaging, and Shipping in Conveyor Belt Manufacturing
Once a belt has passed all quality checks—tensile tests, adhesion evaluation, surface inspection—it finally enters the home stretch: cutting, packaging, and shipping. In conveyor belt manufacturing, this isn’t just logistics—it’s the last gate where precision and professionalism ensure the product’s safe arrival and proper installation.
8.1 Cutting with Precision: Choosing the Right Machine for the Right Task
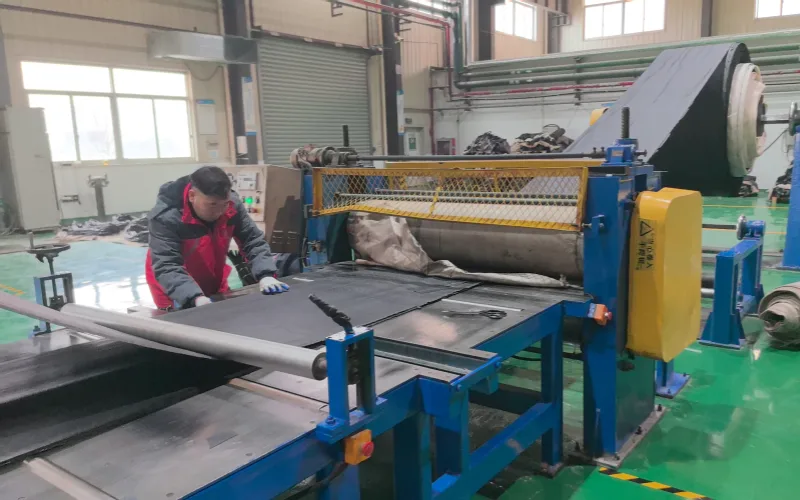
After vulcanization and visual approval, belts are routed to the cutting section. We use two specialized machines, but never interchangeably:
- Slitting machines are used for longitudinal cutting—perfect when splitting wide master rolls into multiple narrower belts for batch orders.
- Guillotine (shear-type) cutters are employed when belts need to be trimmed into accurate lengths. Their clean cut is ideal for preparing belts that require finger joints, step splices, or mechanical fasteners.
For example, a 200-meter EP500/4 belt may be slit into four 500 mm belts, then guillotined into 25-meter segments, per customer layout.
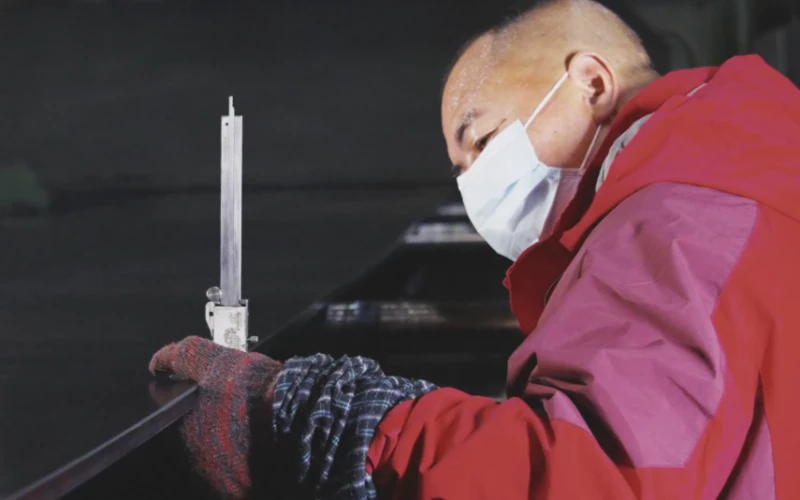
8.2 Secondary Verification: Getting Dimensions Right Before It Leaves
Precision doesn’t end with pressing a button. After cutting, our team re-measures:
- Width across several points using steel rulers
- Length is measured using a distance wheel and laser rangefinder—standard tools in our post-cut inspection process
- Edge alignment with L-squares to ensure squareness and neat edges
These measurements are logged and checked against the conveyor belt specifications. If any outlier is found, the belt goes back for re-trimming—not straight into packaging.
8.3 Edge Quality and Surface Finishing
Even without printed labels or QR codes, each belt undergoes a final hands-on inspection. We wipe down the belt to remove dust, and check the edge finish for cuts, burrs, or inconsistencies. For customers with specific installation setups, we can perform:
- Edge beveling for pulley wrap assistance
- Groove slotting for alignment or lateral guidance
- Protective cloth lining for temporary storage under high humidity
8.4 Packaging That Protects, Not Just Presents
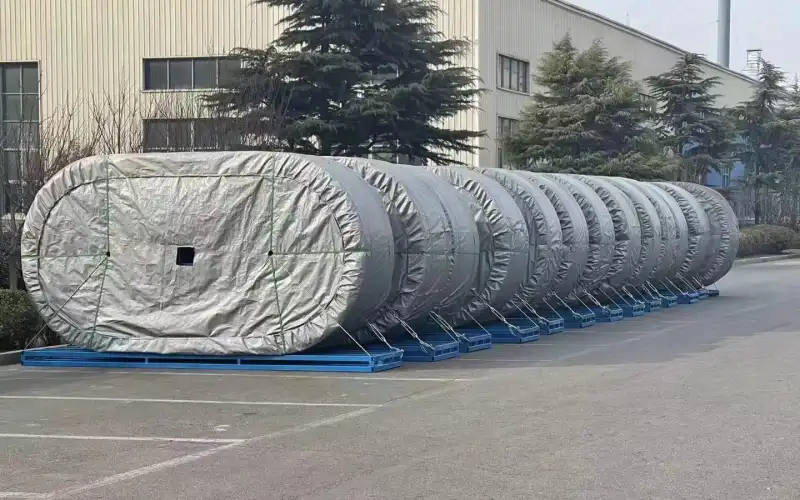
A great belt means little if it arrives dented, soaked, or misaligned. Our standard packaging setup is designed to be both rugged and flexible:
- Belts are tightly wound into central coils with correct tension to prevent edge sag
- PP woven bags protect from dust and general moisture
- Iron-frame pallets, wooden bases, or steel plate bases are applied depending on customer requirement or port regulation
- Plastic film wrapping secures the product for both warehouse storage and shipping
- Core selection is based on belt thickness and stiffness to ensure structural stability
We avoid gimmicks—no foam edge fill, no decorative shrink-wrap—only what’s proven to last from workshop to worksite.
8.5 Preparing for Export: Organized, On Schedule
Each coil is tagged with physical shipment documents: order ID, destination, and belt specs. We coordinate with logistics teams to ensure:
- Container plans match load weight and coil dimensions
- Palletized loads include space for forklift entry
- Split deliveries arrive in phases per construction schedule
- Shipping photos/videos are provided when customers request cargo condition reports
If a shipment is going to the Middle East in the summer or a tropical mine site, we may recommend sealed pallets with additional moisture barriers or metal cases.
8.6 Why the Last Step Still Matters
The cutting and packaging process might look simple—but when belts are shipped 10,000 kilometers to reach a jungle site or underground mine, these choices decide whether installation goes smoothly or turns into a costly delay.
In conveyor belt manufacturing, the final meter is just as important as the first. Because no matter how good the rubber compounds are, a poorly protected belt helps no one.
9. Customization in Conveyor Belt Manufacturing
Rubber conveyor belts rarely get the easy gigs. They’re not rolling sushi or handling holiday packages. They’re in the heat, the mud, the grease, the grime—moving materials that would make most belts cry for help.
And yet, our belts don’t just survive. They thrive.
In conveyor belt manufacturing, building for special applications means understanding one thing: the job site doesn’t care how good your belt looks. It only cares how long it lasts.
9.1 Hot, Wet, Sharp, or Slippery—We’ve Seen It All
Your conveyor system doesn’t live in a climate-controlled lab. So we don’t build like it does.
- Heat-resistant? Ours laugh in the face of 200°C. Cement clinker, sintered ores, hot slag—bring it on. Our custom rubber compounds don’t crack, shrink, or lose their grip.
- Oil-resistant? Perfect for metal sorting lines, oily recycled waste, or anything that would leave fingerprints on a Teflon pan.
- Chemical zones? We’ve built belts that handle acids, alkalis, and the weird stuff that doesn’t even have a proper name.
- Waterlogged conditions? Our bonding tech keeps layers together, even when humidity hits 95%.
These are not marketing labels—they’re working conditions. If your belt fails in the middle of a shift, nobody cares about “general-purpose grade.” You want “this-won’t-break” grade.
9.2 Not Just Rubber—It’s Engineering Inside and Out
Customization is more than a surface-level decision.
- Anti-tear plies go in when the material is sharp, heavy, and generally unforgiving.
- Carcass types—from standard EP to heavy-duty NN or steel cords—are selected based on real-world tension loads and pulley systems.
- Reinforced edges? Cleats? Tracking ribs? If your machine eats belts, we’ll build ones it can’t digest.
We don’t pull belts off the shelf—we build them from the ground up based on your site data, not factory leftovers.
9.3 We Build for Industry, Not Imagery
If you’re looking for sleek, white belts for cleanrooms or packaging lines… sorry, we’re not your people.
But if you need a belt that:
- Lasts through 80,000 tons of aggregate
- Doesn’t turn into rubber soup at 200°C
- Resists tearing when dumped with 2-ton boulders
Then pull up a chair.
When you’re hauling 200 tons an hour, “pretty” won’t help—but a belt that doesn’t quit? That’s gorgeous.
9.4 Customization That Actually Solves Problems
Here’s what we don’t do: hand you a product sheet with five models and say “Pick one.”
Here’s what we do: ask you what’s broken in your current setup, why it fails, how often it fails, and what it costs you when it does.
Then we design:
- The right rubber compound for your temperature, oil, or chemical exposure
- The correct carcass for your tension and load
- We adjust the entire build—compound, carcass, and curing time—to suit your schedule and the beast of a system you run
We’ve done this for nickel mines in the Philippines, quarries in Turkey, and cement plants in the UAE. Not one had the same requirements. And that’s the point—your belt should be built for your job, not someone else’s average.
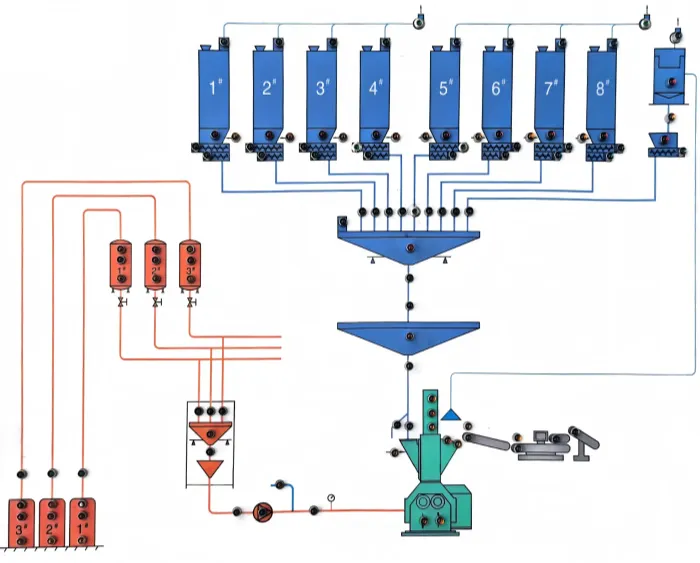
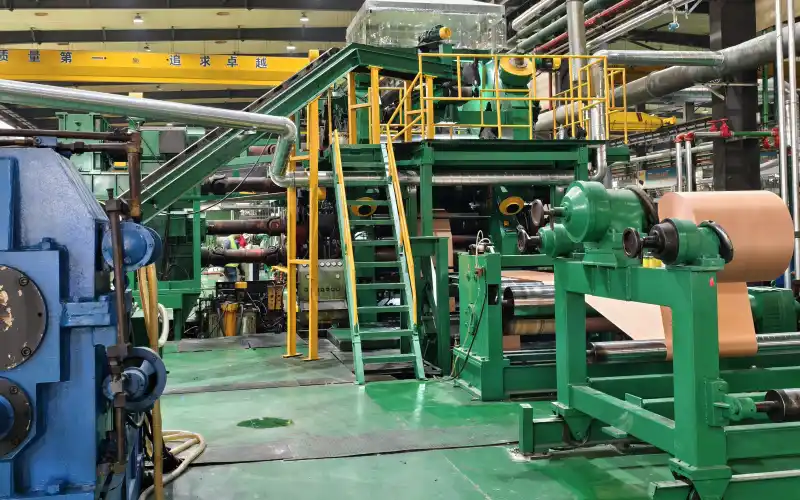
10. Production Line Visualization in Conveyor Belt Manufacturing
The best way to understand how a conveyor belt is made? Walk the floor. Whether you’re a factory veteran or a curious buyer, seeing the line—from raw rubber to finished roll—reveals just how precise conveyor belt manufacturing really is.
Let’s break it down into three parts.
10.1 Core Equipment Overview: The Machines That Make It Happen
Our production line isn’t just long—it’s smart. Each station plays a critical role, and here are the stars of the show:
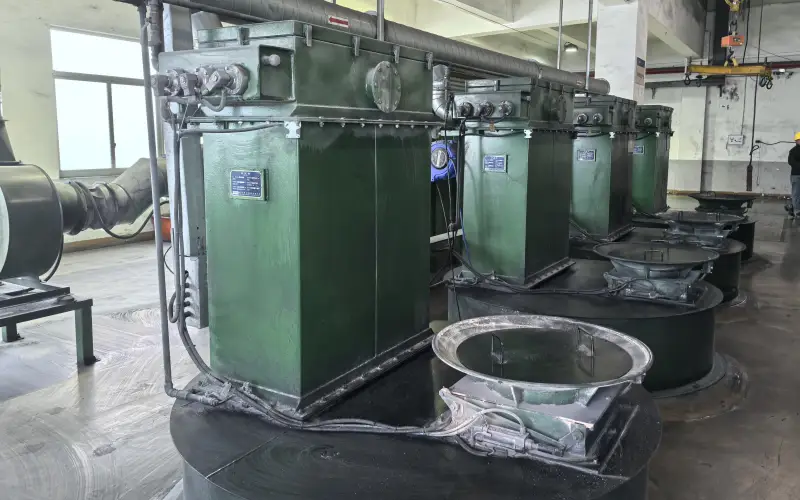
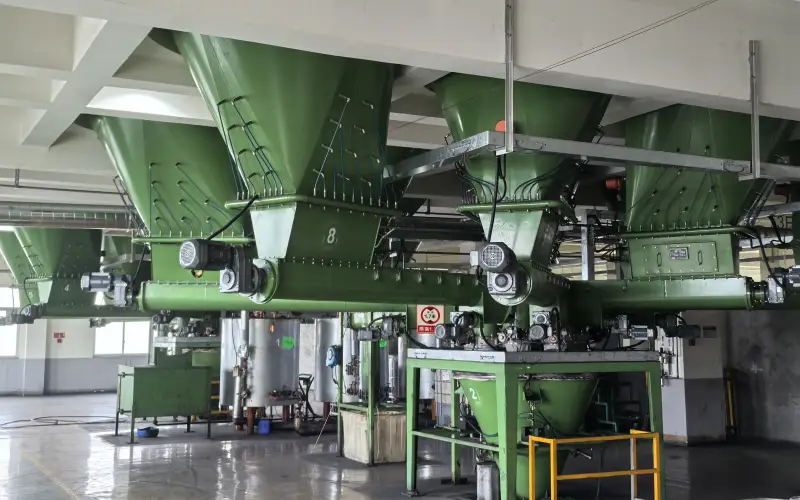
10.1.1 Internal Mixer
This is where it all begins. Large volumes of rubber mix are blended at high temperatures and torque, turning loose ingredients into a dense, uniform compound.Ingredients like carbon black, oil, sulfur, and accelerants are precisely dosed, mixed, and melted into uniform compound batches. Modern mixers are fully automated and traceable.
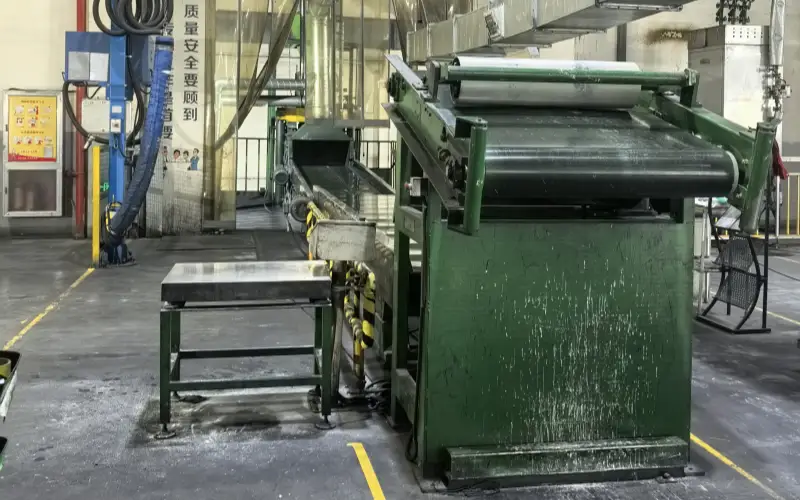
10.1.2 Calendering Machine
After extrusion or striping, rubber sheets are sent through this four-roll press. It laminates rubber onto fabric with pinpoint accuracy. Think of it as a rubber rolling pin—but one that’s monitored by lasers and doesn’t tolerate mistakes. We can control thickness to within ±0.1mm.
10.1.3 Vulcanizing Press
The final transformation happens here. Our 10-meter-long, dual-station presses cure the layered belt at exact temperatures and pressures. This is where cross-linking turns soft rubber layers into a single, reinforced belt—ready to handle 200°C loads or 20-ton impact zones.
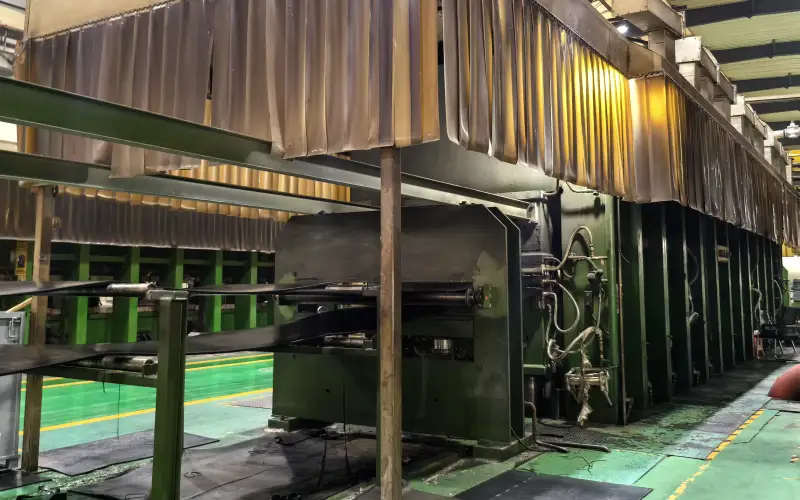
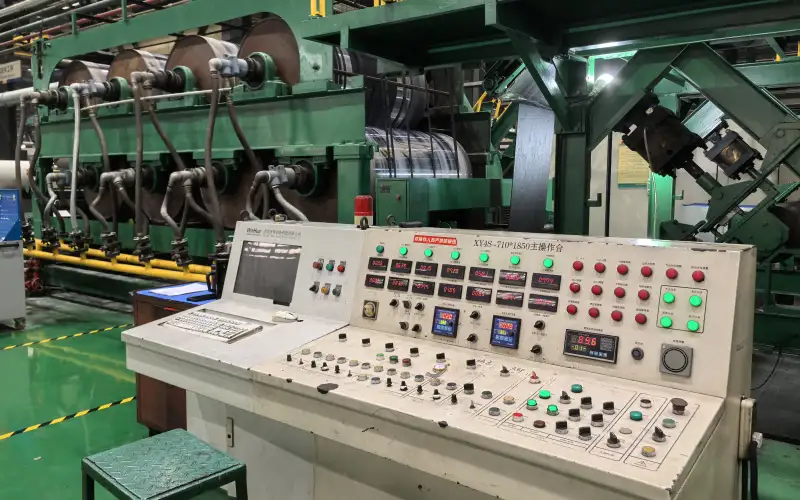
Every piece of equipment is digitally linked to our MES system, logging data for every batch, operator, and cycle.
11. Innovation and Future Trends in Conveyor Belt Manufacturing
You might think conveyor belts are all black rubber and brute force—but step into a modern factory, and you’ll find something very different: smart materials, precise processes, and real environmental awareness.
At least, that’s how we do it.
11.1 Sustainability Initiatives and Eco-Friendly Materials
Being sustainable doesn’t mean being soft. In conveyor belt manufacturing, it means designing belts that last longer, pollute less, and still take a beating.
Here’s how we’re doing that:
11.1.1 Reclaiming, responsibly
Some of our rubber compounds now include reclaimed rubber from trimmed edges, start-up scrap, or offcuts. But let’s be clear—this isn’t about throwing waste into belts. These reclaimed materials are carefully tested and only used in non-structural base layers, ensuring zero impact on product performance. Sustainability doesn’t mean sacrificing quality.
11.1.2 Cleaner chemistry
We’ve switched to low-VOC processing oils and halogen-free flame retardants, minimizing harmful emissions during mixing and curing. The result? A safer environment for workers and a cleaner belt for the planet.
11.1.3 Smart exhaust management during vulcanization
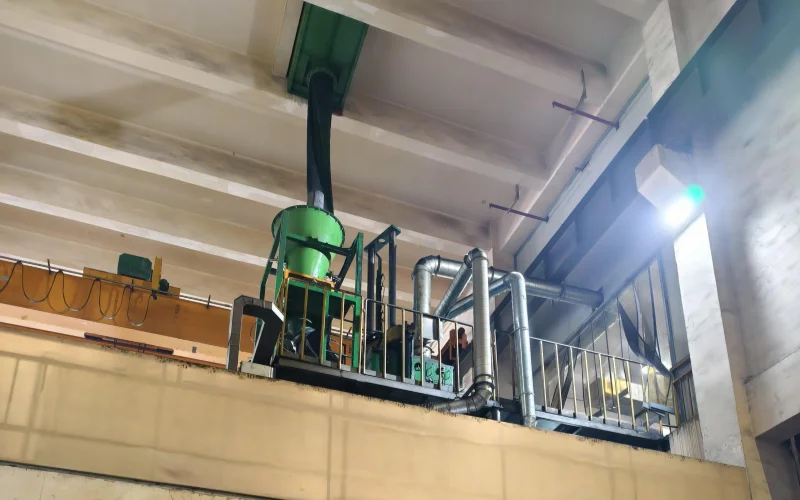
Vulcanization isn’t just heat—it’s chemistry, and yes, sometimes chemistry smells. During this process, we install a custom air purification dome over the presses—a giant extractor we jokingly call “the hotpot lid.” Inside are activated carbon filters that absorb sulfur-based gases like SO₂ and SO₃. At the end of the system, gas treatment equipment ensures zero emission of harmful pollutants. No shortcuts, just clean air.
11.1.4 Durability is sustainability
A belt that lasts twice as long is twice as green. That’s why we focus not just on making belts fast—but on making them tough enough to reduce replacement frequency, downtime, and shipping waste.
11.2 Advanced Technologies and Smart Manufacturing
We believe good belts come from good processes. And good processes? They’re built on real control—not guesswork.
11.2.1 Full MES integration across the line
Each stage of the conveyor belt production process—from mixing to calendering, laminating, and vulcanization—is connected to our centralized system. Batch data, operator logs, recipe parameters, and temperature curves are all tracked and recorded in real-time.
11.2.2 Laser-driven measurement and trimming
We don’t use tape measures on 200-meter belts. We use laser rangefinders and distance wheels, ensuring precision even when scaling up to bulk production.
11.2.3 Servo-controlled laminating lines
Our assembly tables adjust positioning dynamically, keeping belt alignment on spec with minimal manual tweaking.
11.2.4 Lab testing before mass production
No guesswork here. Before full-scale production begins, our R&D lab conducts customized vulcanization tests based on your technical requirements—curing time, tensile strength, elongation at break, etc. Once the formulation hits peak performance, only then do we push the start button on mass production.
11.2.5 Visual QA you can count on
Our quality control team still trusts their eyes—and their experience. Each belt is visually inspected for defects like bubbles, voids, or ply shifting. We don’t let software replace craftsmanship. We let them work together.